2180miles
  • Home
  • Adventure Blog
  • Overland
    • Meet The Jeep
    • Mods & Installs
    • Overland Gear
    • Trip Reports & Videos >
      • Allagash Winter 2019
      • Greece Adventures 2019
      • Overland Expo East 2018
      • Allagash Wilderness 2018
      • Trans-Canada Overland 2017
      • QB-5 Adventure 2017
  • Long Trail
    • Trip Summary
    • Photojournal
    • Hike Statistics
  • Appalachian Trail
    • Trip Summary
    • Photojournal
    • Gear Talk
    • Hike Statistics
    • Financial Planning
  • Bicycling America
    • Trip Summary
    • Photojournal

Custom Rear Deck & Dometic CFX-35 Installation

9/20/2017

8 Comments

 
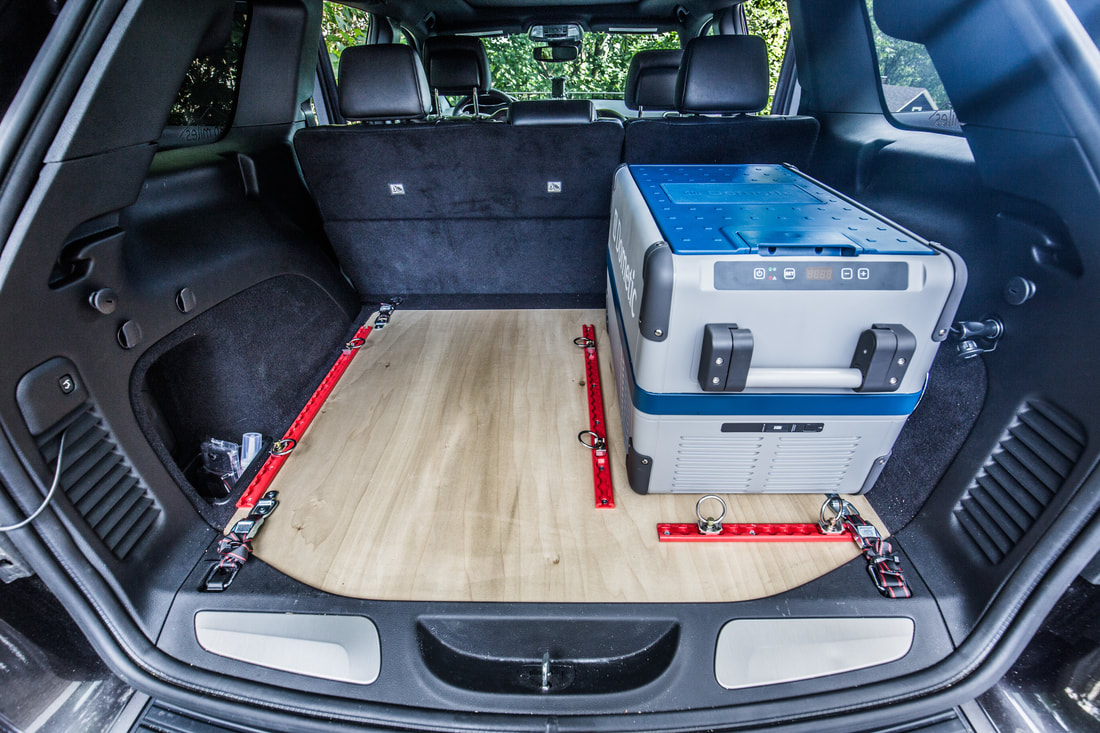
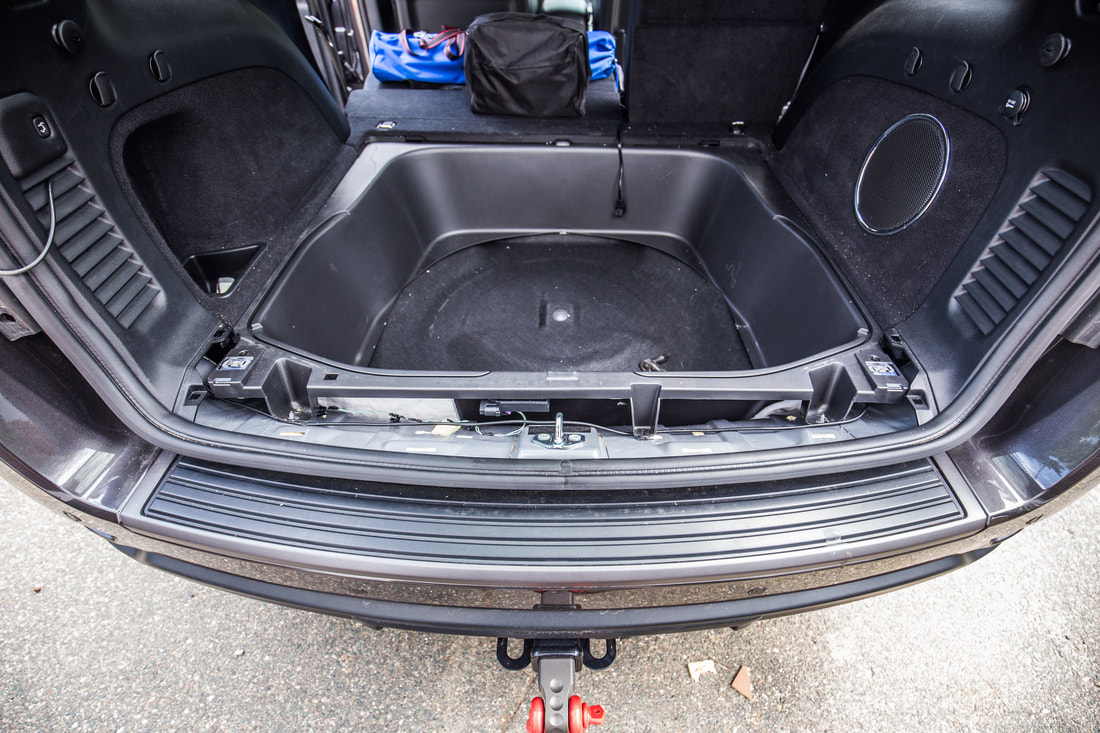
Before departing on our month-long Trans-Canada Overland Expedition, one of the most integral additions of gear to the Trailhawk was the Dometic CFX-35 fridge/freezer… I had hesitated at the cost initially but the value this thing brought to our trip as a whole cannot be conveyed. Once I had decided to purchase one (ended up just getting it on Amazon, paid something in the range of $550.00) it became a task of designing a way to have it held down. While I had initially wanted to put it on a slider, spending the extra $200 to buy the kit from Dometic just wasn’t in the budget that close to our departure, so I decided to flat mount it directly to the deck. This is where the need for some kind of secure deck came from.

Picture

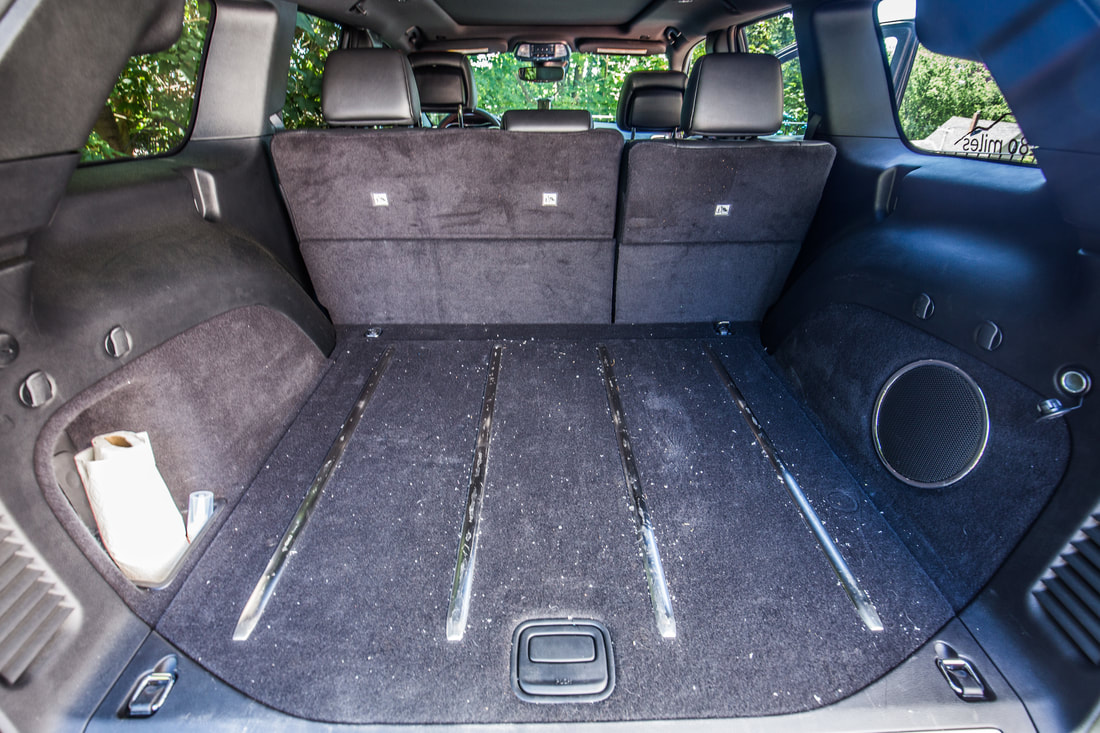
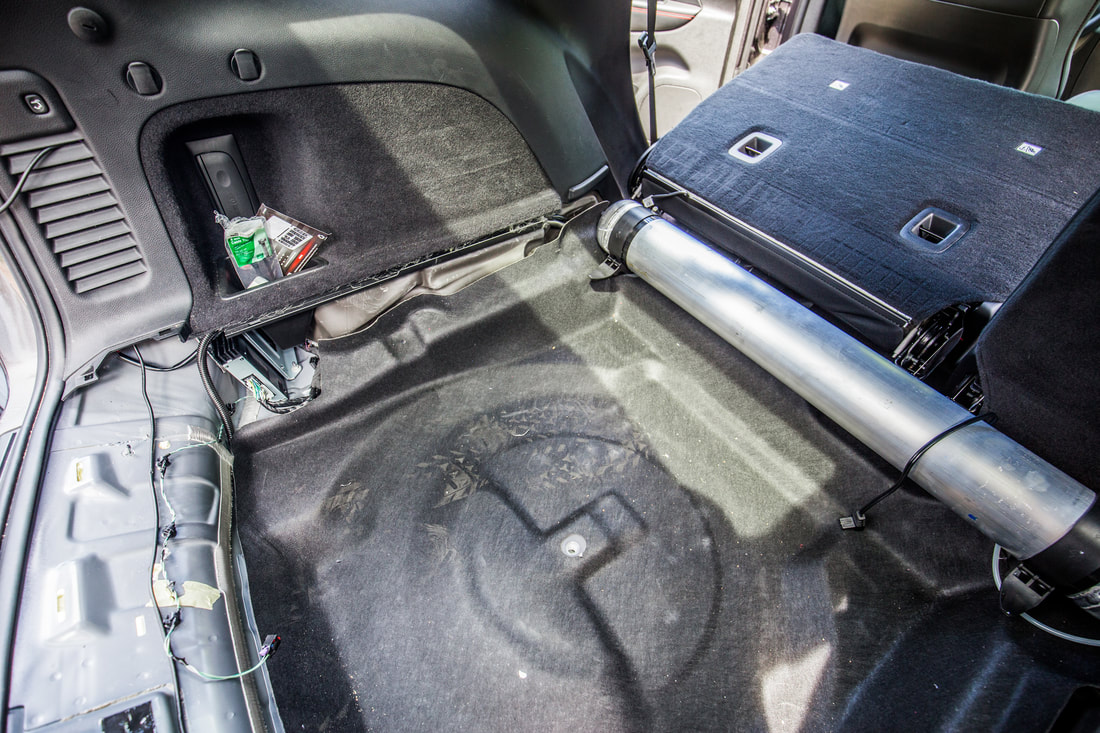
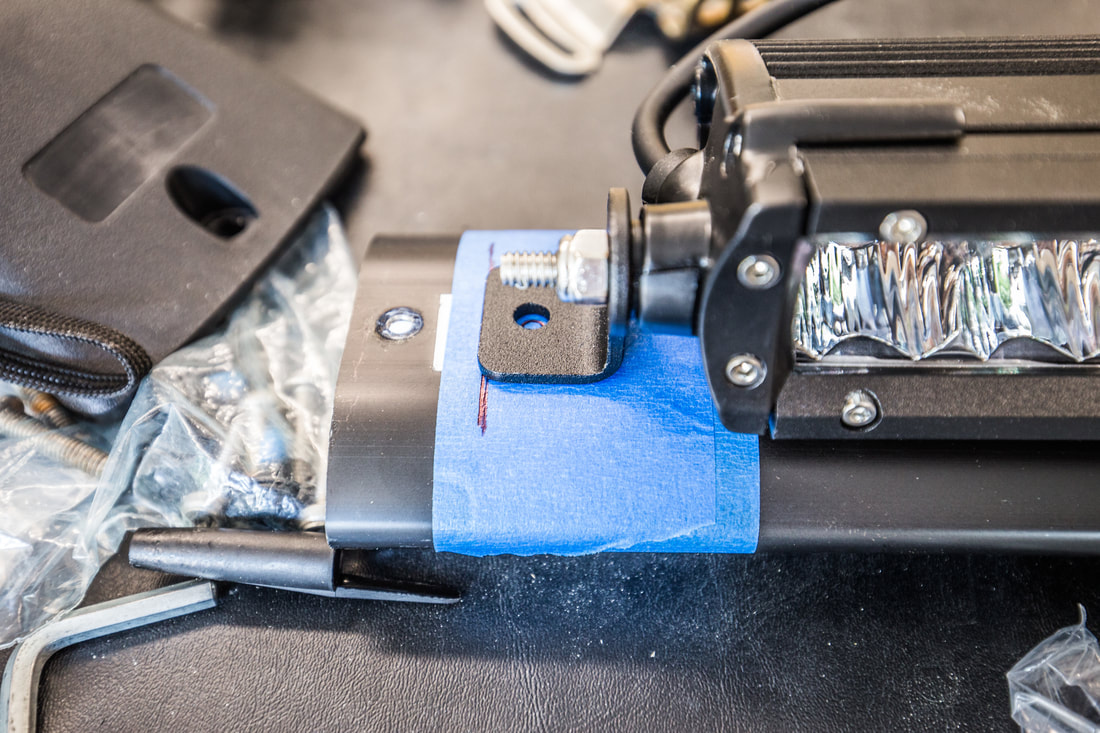
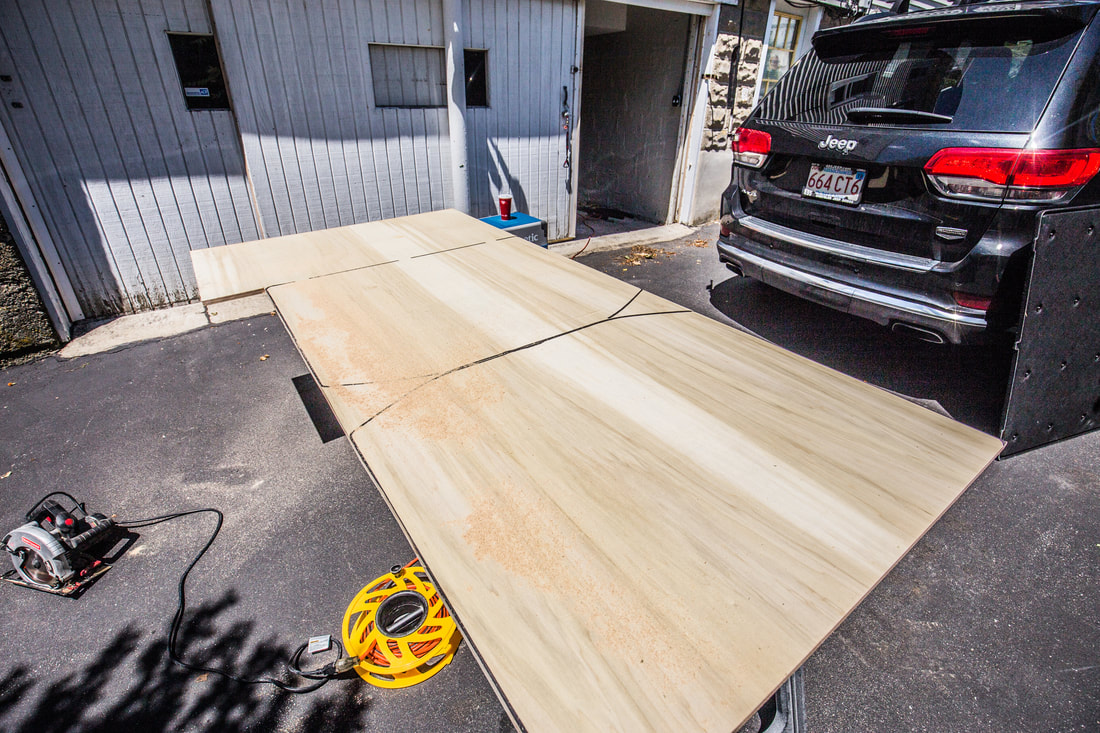
*please excuse the mess... it's the plastic wrap from the OEM deck that started falling apart

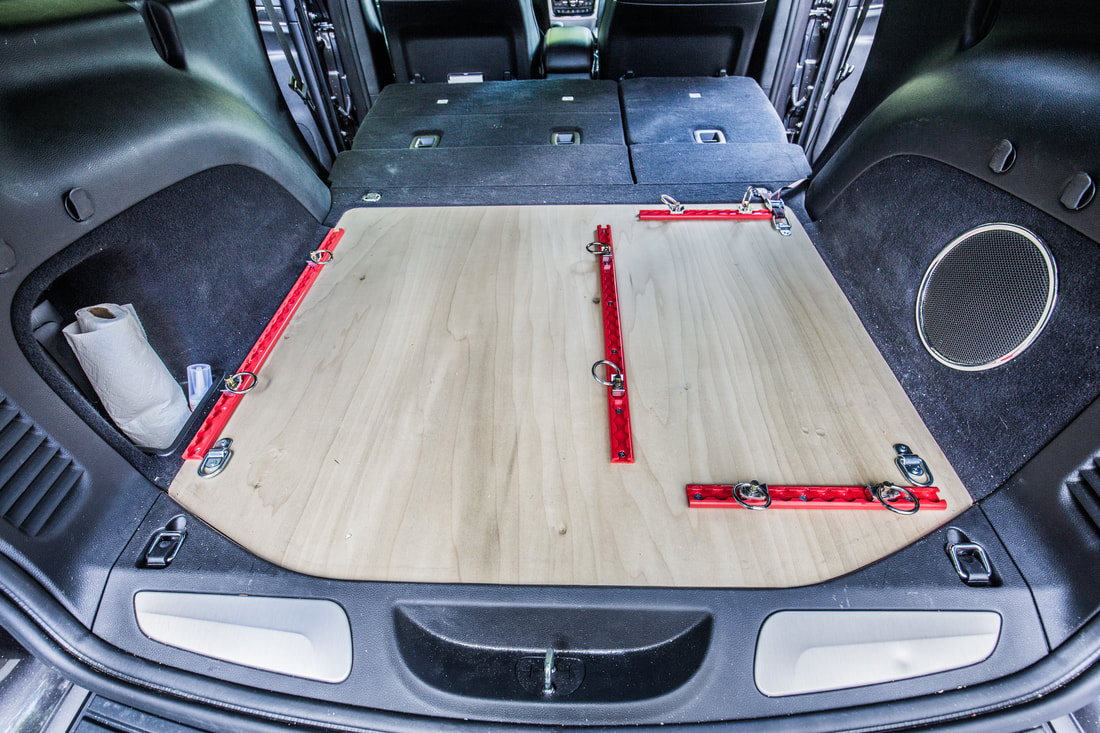
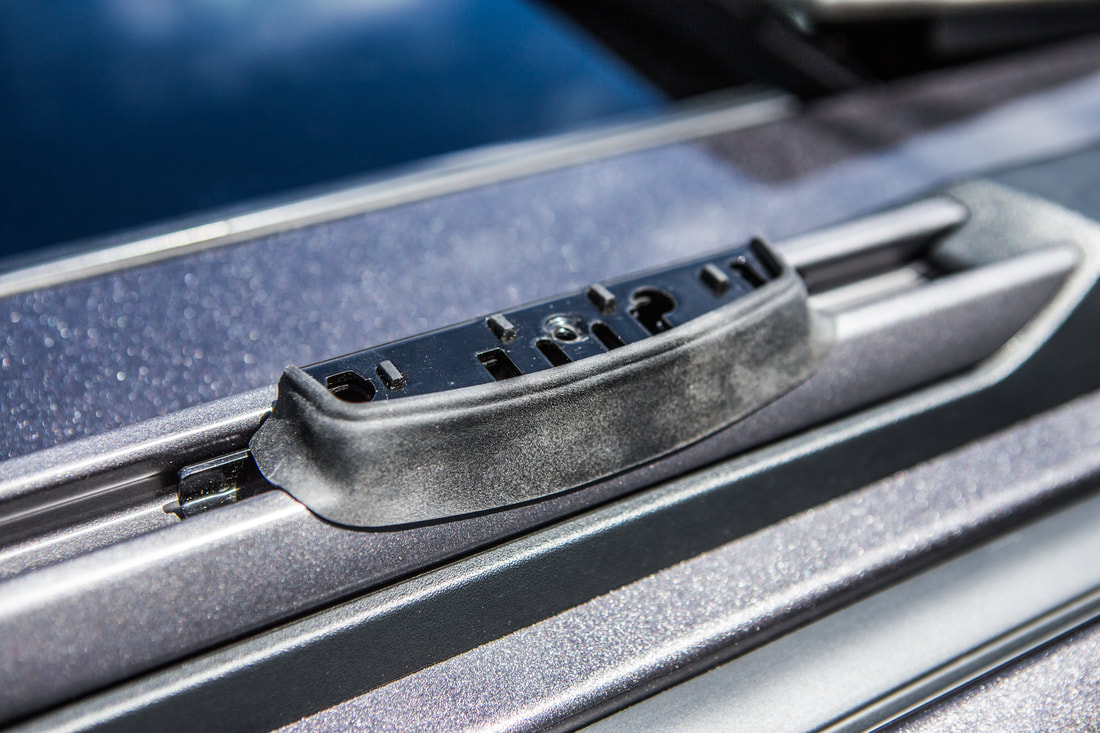
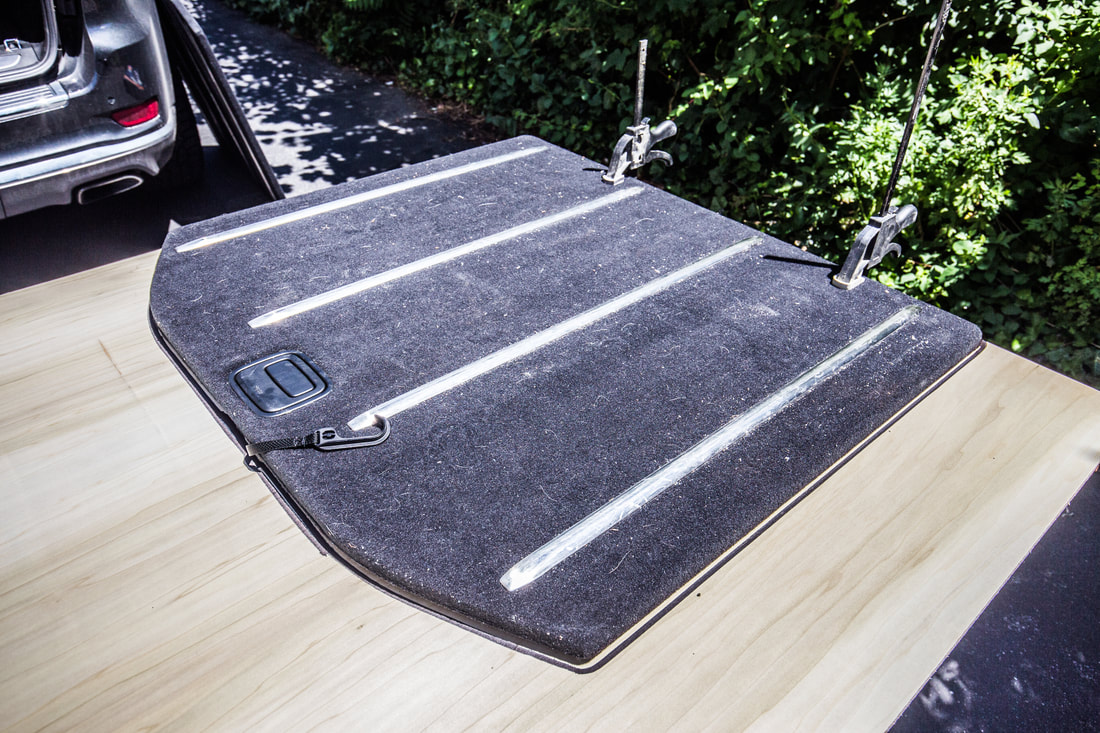
A while back I had seen a thread where a guy used his OEM deck cover and attached mounting hardware to it to tie things down. While the idea was great, I didn’t necessarily want to attach all that weight to the plastic deck that simply “clipped” into place in the back of the Jeep. Measuring the OEM deck to roughly 7/8” tall, I decided that ¾” cabinet plywood would come close enough to be nearly flush. Thinking out the layout I wanted to achieve, I ordered some aircraft L-Track tie-down hardware from US Cargo Control with round tie-down points. These are great because they can slide anywhere on the track and fasten in every 2” as you move down. Total cost from USCargo was $89 delivered.

Parts List:
​

- 4x8’ sheet of ¾” plywood cut to size
- 2x 24” Airline Track
- 2x 12” Airline Track
- 8x 2” Round Stud Fittings
- 6x Home Depot Fastener Straps


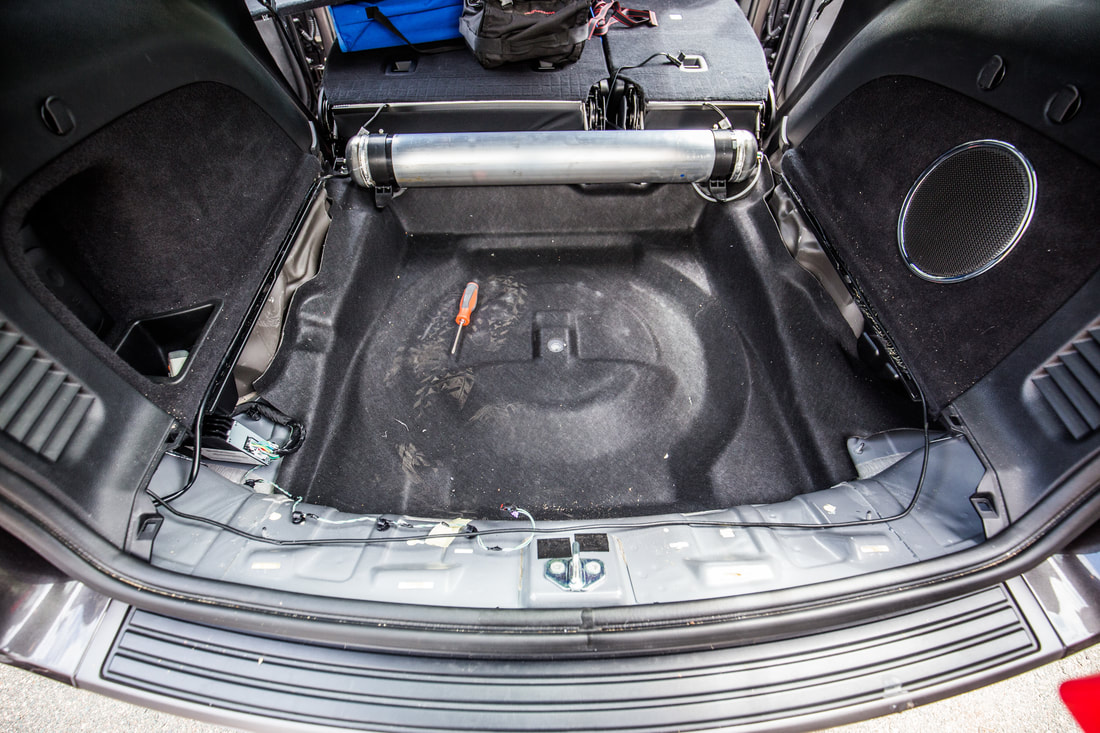
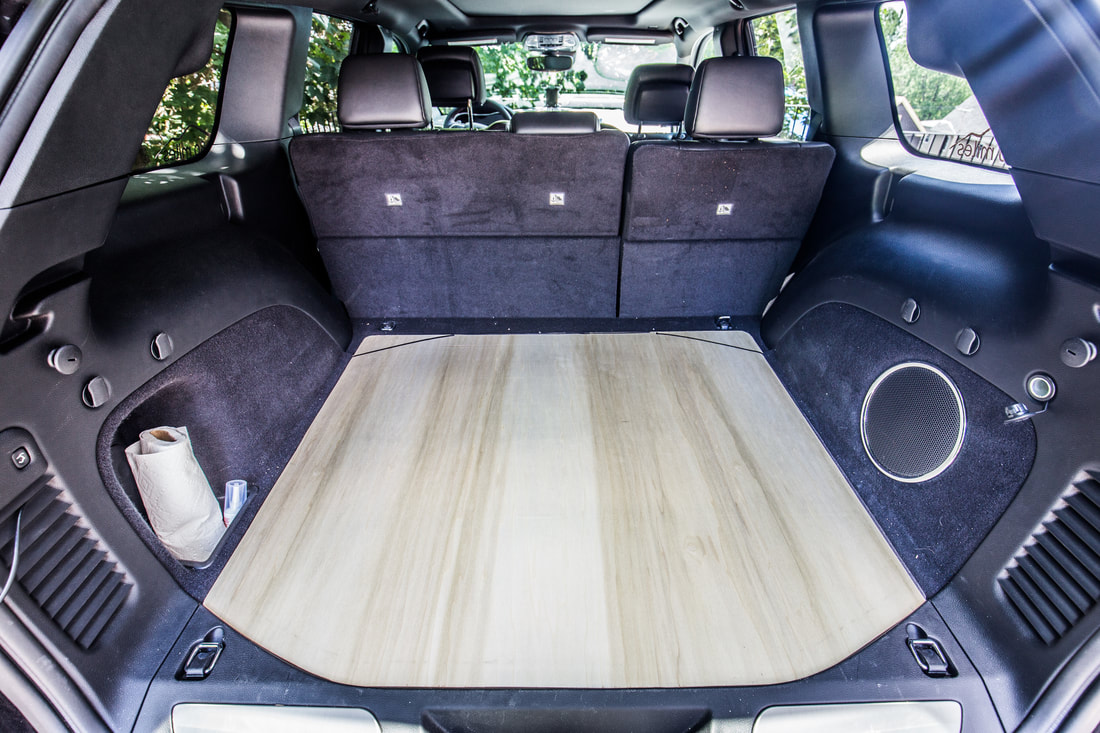
First up in this process was to remove the OEM deck and trace it against the plywood. Discussing this design with my buddy Shaun who is also a WK2 guy, I offered to make him one as well while we were at it. I used my jigsaw to follow the curvature of the deck, and an orbital sander to clean it up and take down extra material where necessary. It took two or three test fittings before things were great, then we repeated the process on the second deck.
​
Picture
Picture

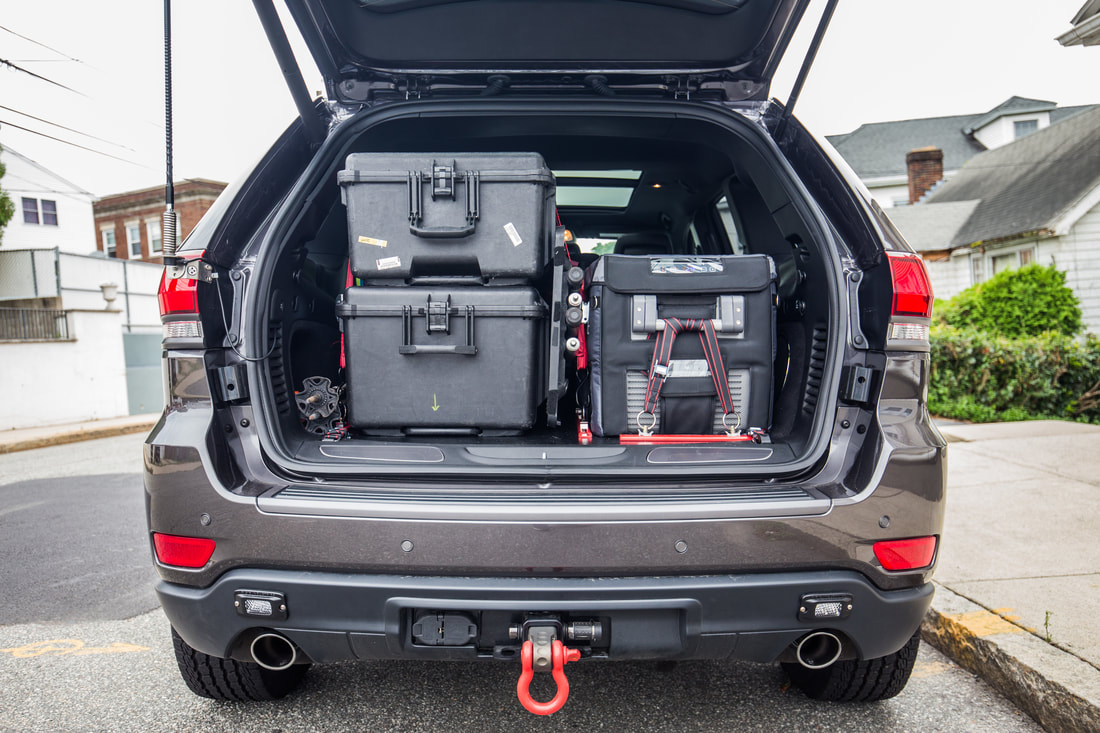
Shaun’s Dometic was living on the sliding deck, so we built a riser out of 1x3s to get it up enough to clear the rear trunk lip. While he went to work bolting the fridge into the tray - a heck of a process, it seemed - I began laying out my L-tracks. My initial thoughts were to have the fridge be on the 40% fold side of the rear bench, as it’s exactly the same width of the fridge itself. This would obviously allow me to utilize the 60% side if (when) I need to sleep in the back, add some lumber, or store whatever needs to be stored. On the left side of the rear deck I spaced the L-Track far enough apart to fit in stacked Pelican 1610 and 1620 cases that store our camp and cook gear during overland trips. *This may eventually change, as Dani and I have discussed a move towards a drawer system for wherever we go next.

I took some time in the week after to add a bed-liner paint job to the new deck, using a rough, sandpaper like base to it to help things not slide as much. The paint held up pretty well over the course of the summer trip, but wore down a little bit from the Pelicans sliding here and there underneath their ratchet straps.
​

Picture
Picture

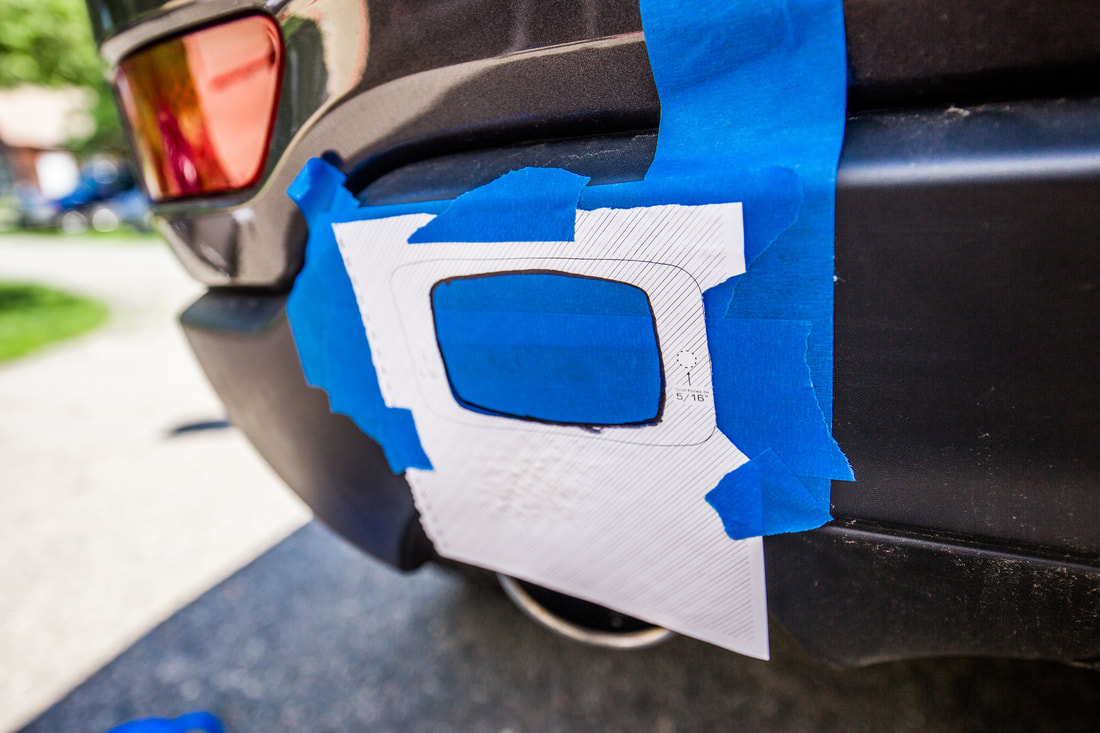
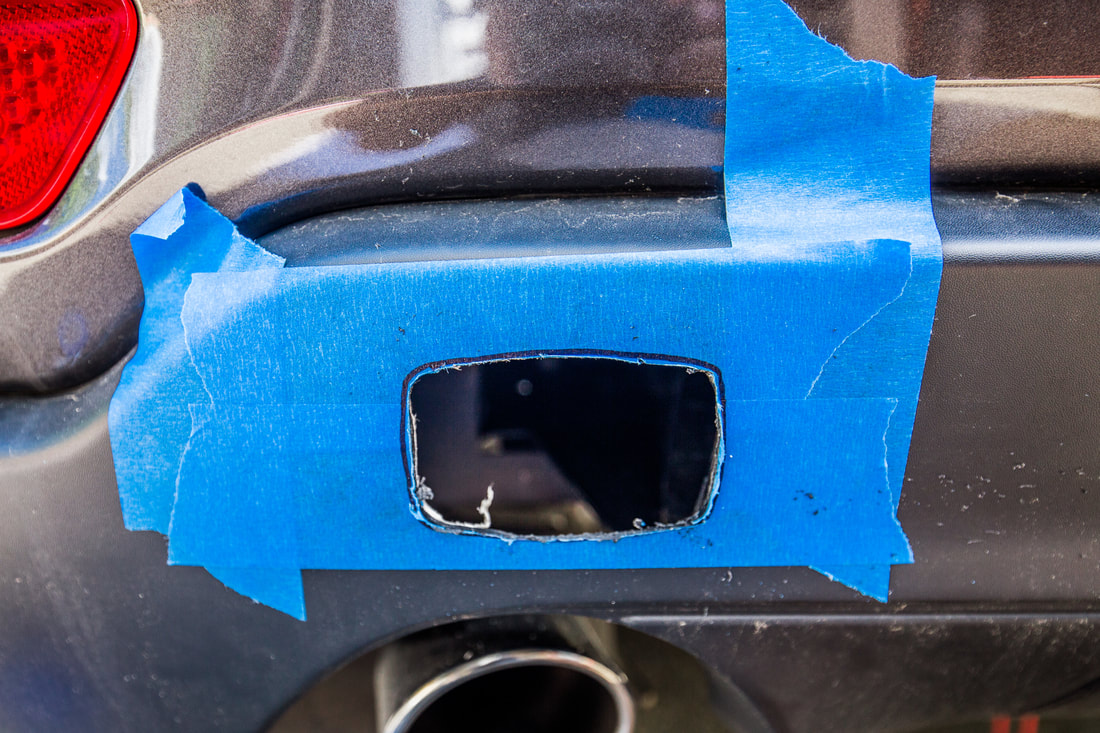
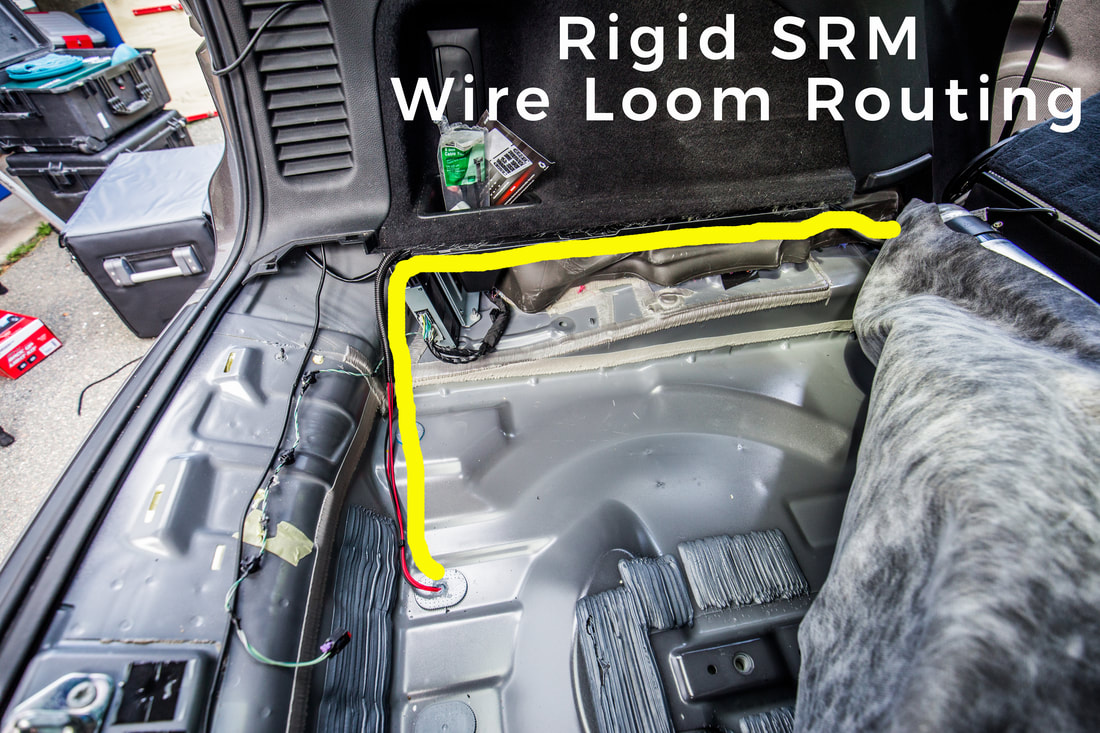
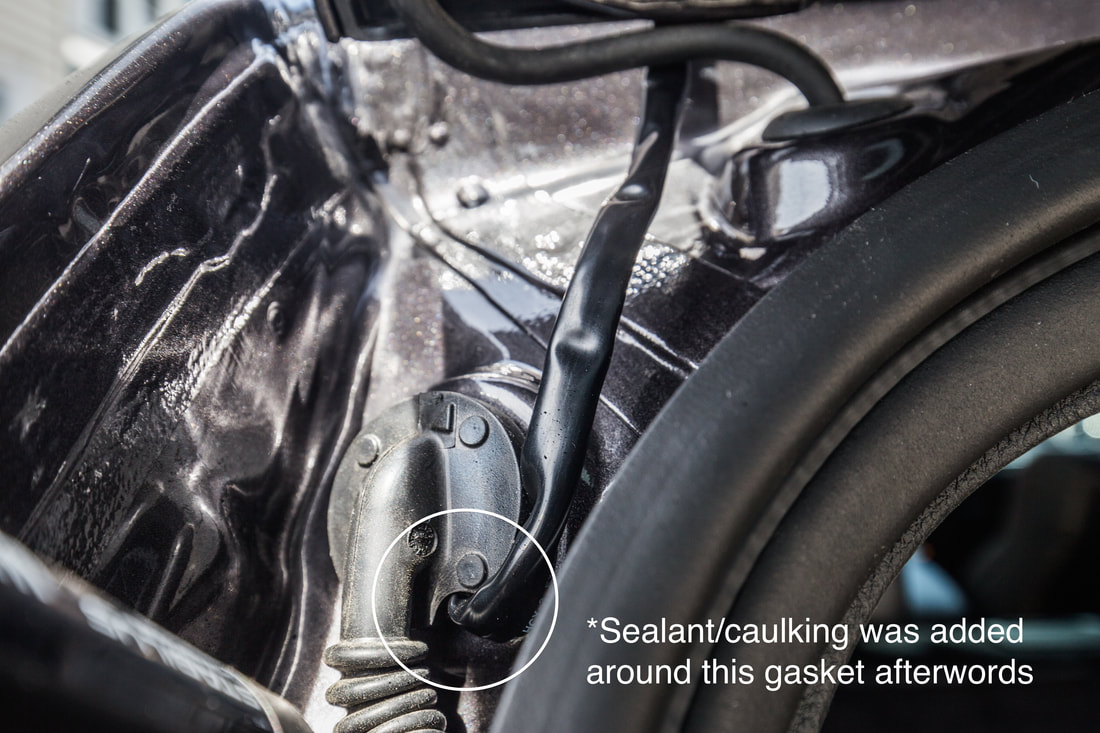
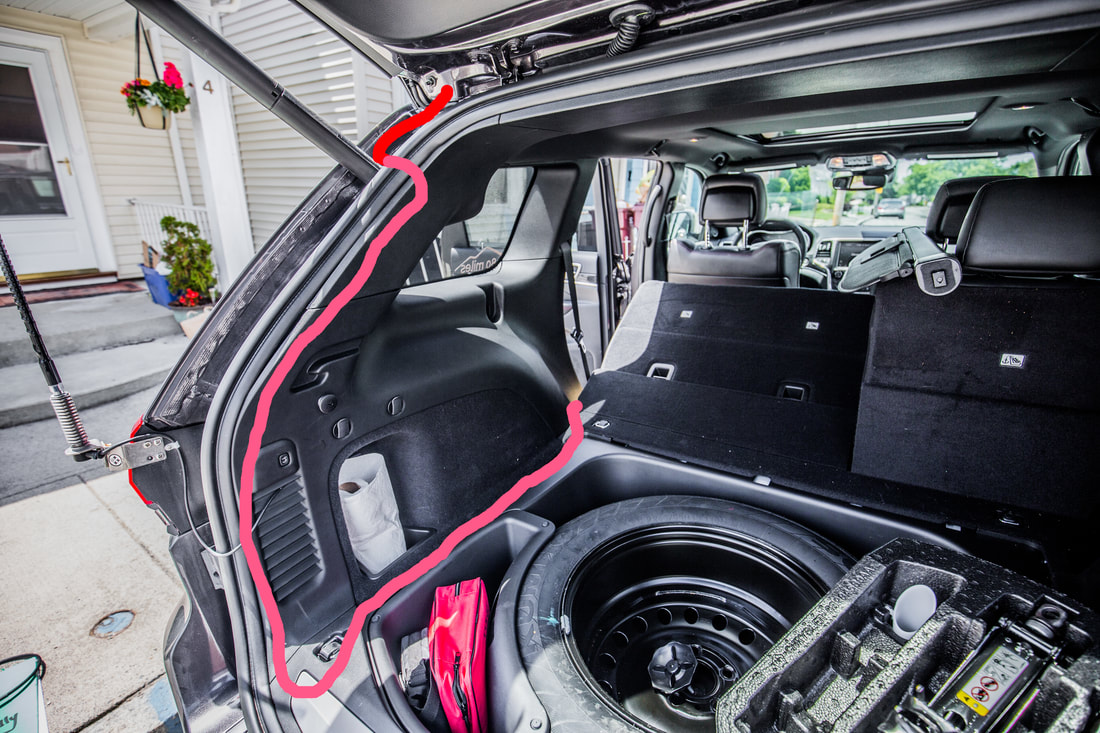
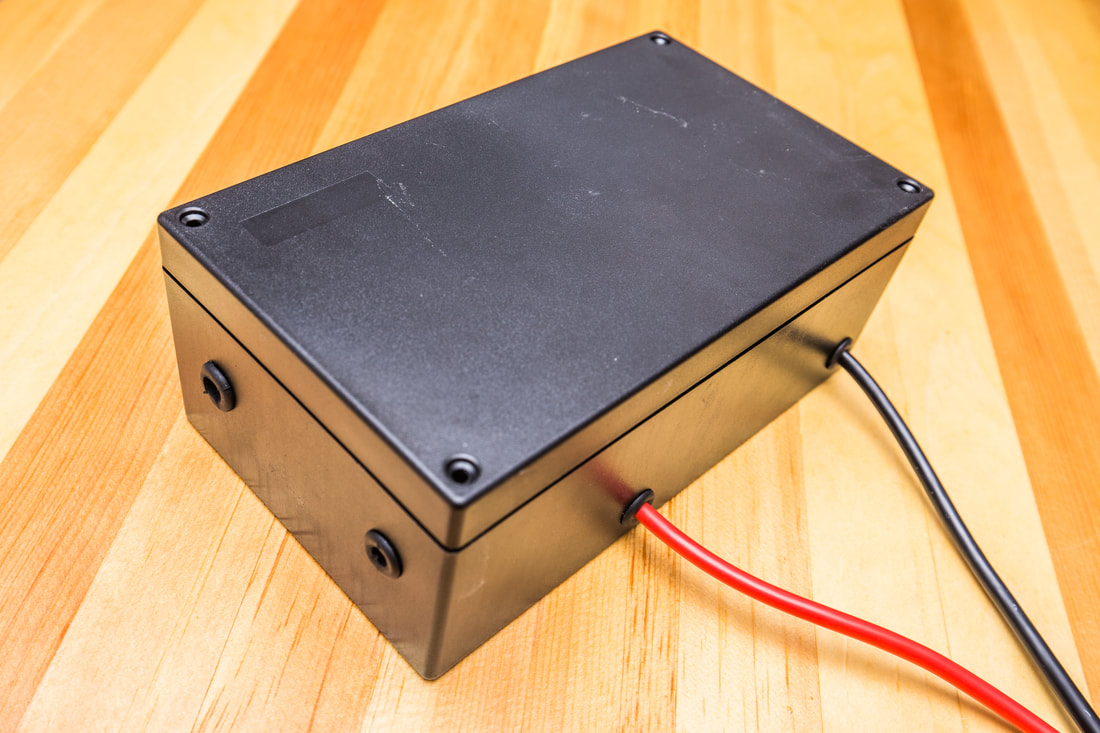
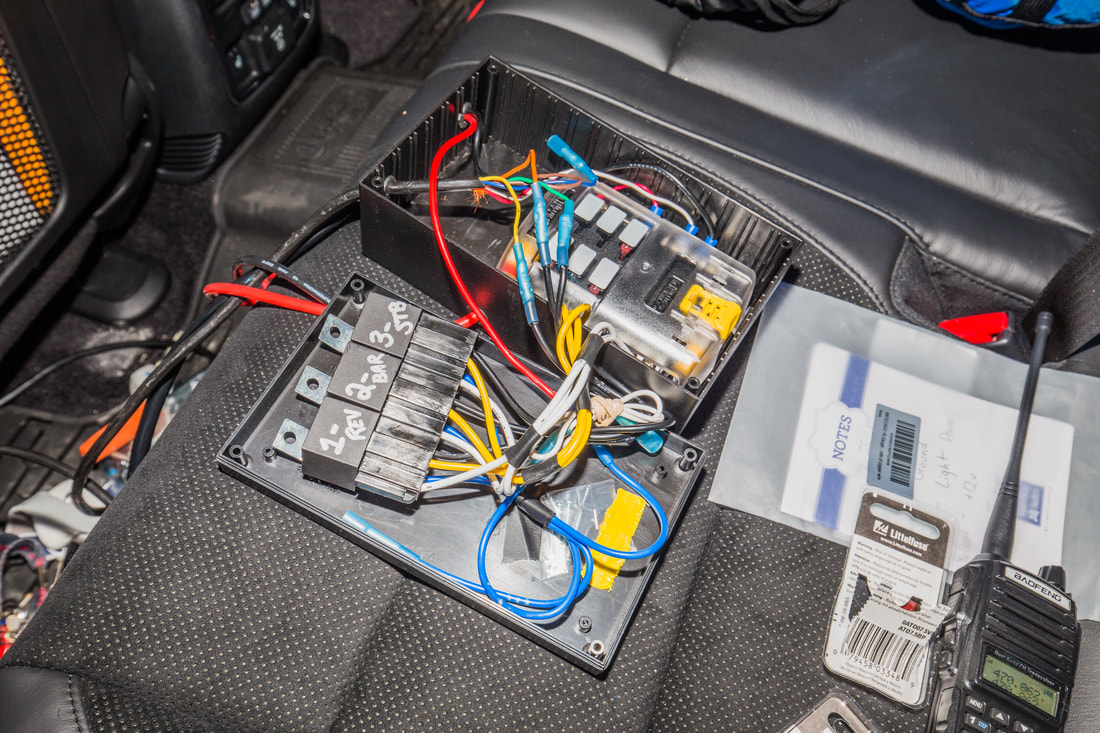
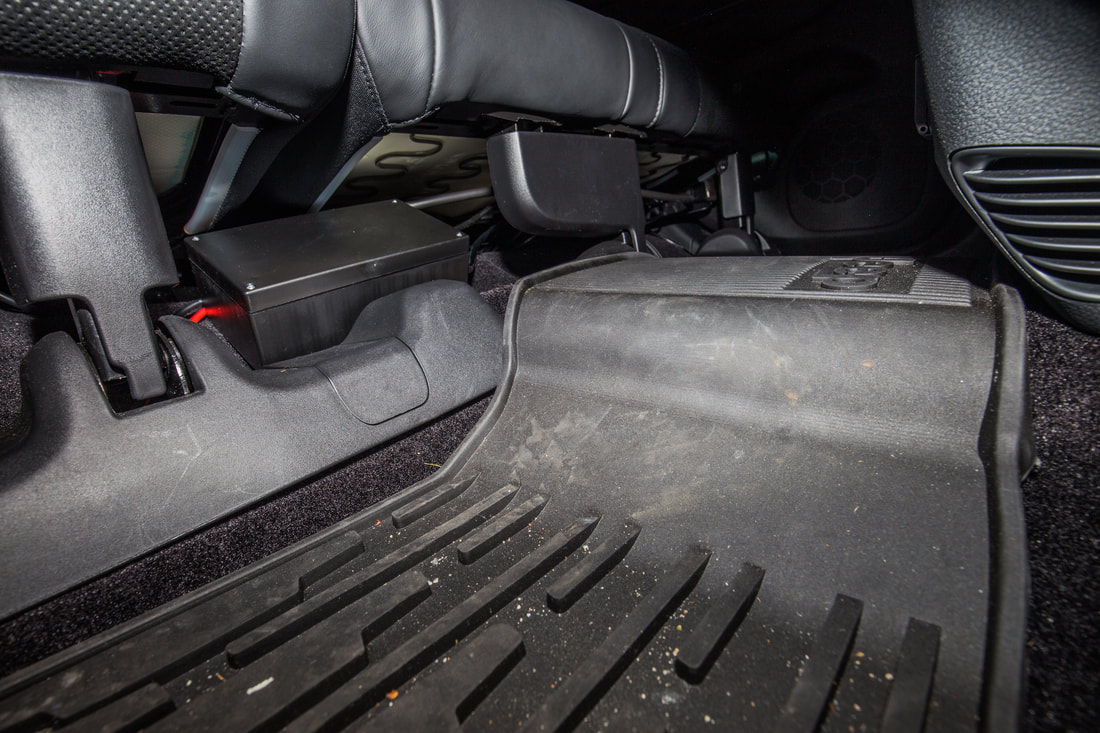
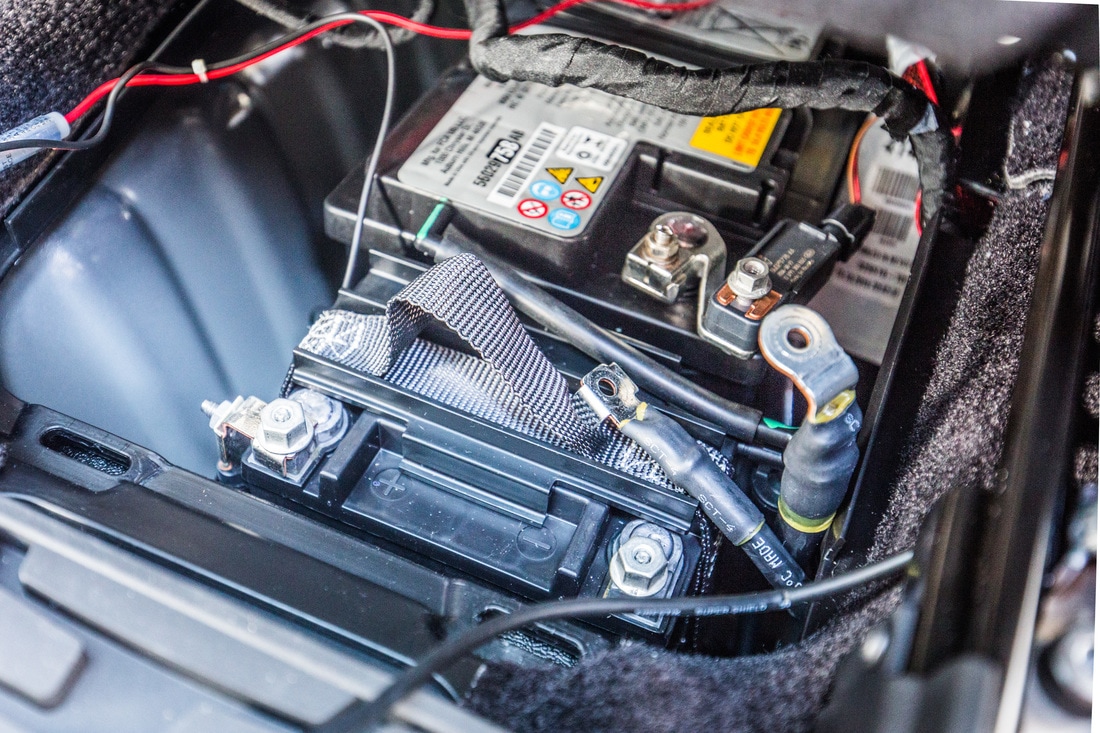
I ran power for the fridge through the trunk trim and down to my auxiliary control box under the rear bench, and it functioned absolutely flawlessly during our trip. I had hesitated initially to drop the cash on it, but cannot imagine doing what we did without having the Dometic for fruit, veggies, meats, cheeses, and the occasional cold hard cider. The Pelican cases would move an inch or two over the course of an overlanding day, but the occasional yank on their straps would fix that for a few hours. The fridge never moved an inch, and ran 24/7 from a few days before our departure until I thawed it out upon arriving back in Boston. For the $110 investment into a solid way to secure things down, this plan worked perfectly for both my Trailhawk and Shaun’s Summit.

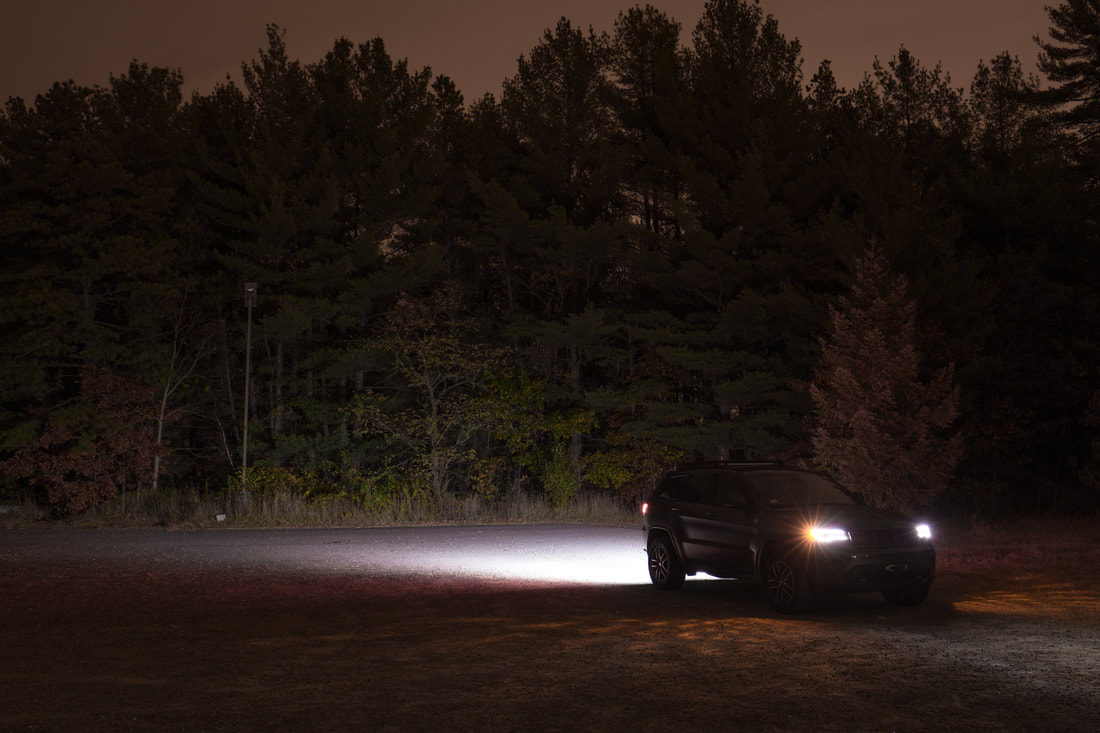
The final photo below is how the Jeep looked fully loaded, the morning we departed for the QB-5 Overland Adventure in Ontario/Quebec back in July.
​

Picture
Picture
Picture
8 Comments

Rigid SRM Reverse Lights

7/18/2017

1 Comment

 
I’ve always liked having an auxiliary set of reverse lights on the Wrangler, and though the factory ones on the WK2 are as impressive as the headlamps, I wanted something I could switch on at any time, and looked sleek. While I wish that I could have used more Black Oak LED products for this, they unfortunately don’t offer a single-row unit for flush mount, instead as of this point only a 2x2 which wouldn’t work for my space. Because of this, I turned to Rigid for their flush-mount version of the SRM reverse light kit that I run on the TJ. Easily purchased on Amazon Prime, they cost about $150 for the kit. Picking a day that my friend Topher from our overland group could help me install them, I drove up to his newly built barn on the North Shore of Mass and we got to work. 

First up was to remove the interior trim from the back of the trunk. I started by taking out the rear deck piece, and then removed the spare tire and its accessories. After unbolting the two tie-down mounts (8mm nut) from the rear-most trim piece, I popped that out to gain access to two bolts that hold the spare tire surround to the body of the Jeep. Those are a 10mm nut in the rear, then by folding the middle bench down I removed the snapped-in floor level piece to gain access to two Phillips head screws that hold the front of the tire surround in place. At that point I had free access to fold back the sound-deadening floor mat that lives under the spare tire, and got my first great view of the space I had to work with for wire routing.
Picture
Picture
Picture

I’ll point out the suspension’s air tank up behind the rear bench there… kind of neat to see.

Comparing the trunk space with the vast amount of space underneath the body, I looked at three plugs that were towards the back of the vehicle. Utilizing a step-bit, I drilled the left-most one out to the width to accommodate the 4-wire harness that the reverse lights utilize. Once it was drilled out and cleaned up, I placed a grommet around the immense wire harness (seriously, props to Rigid for including what must have been +20’ of wire loom on this kit for those huge pick-up truck installations) and installed the grommet to the new hole in the Jeep’s floor, leaving enough slack underneath to allow the pre-made harness connections to reach the left and right sides of the rear bumper.

Next up was figuring out where the lights were going to go, though unfortunately with the WK2 there aren’t many options. The steel bumper/crossmember runs almost the entire width of the tailgate, leaving only 6” on either side of it (above the tail pipes) before running into heat shield. That settled that pretty quickly, the lights would live wide on the outside… probably better anyway, and where I had originally intended, but just so any future people know, there isn’t much room for options.

Covering each area with painter’s tape, Topher cut out the stencils and I applied them to the bumper, checking for center and level as I went to try and get it as close to perfect as possible the first time. I used my Dremel cut-off wheel (obviously a favorite tool in this build) to cut out the rough rectangular shape, then a sanding bit to shape it to the light itself. A couple test-fits and some additional sanding allowed the lights to slide in effortlessly and wiggle around a bit, leaving me with the final task of drilling the mounting holes in the lights final position.
​

Topher had to meet with the new barn’s General Contractor, so I took some time to clean up my wire looms both inside and out of the vehicle. After finalizing the lengths needed for the water-tight connectors to reach the light fixtures on each side, I used some of the plastic wire-wrap Rigid included to get from the hole in the floor to the rear bumper where I zip-tied it to the existing trailer-wire harness. I cleaned up the runs on both sides to the lights, then worked on the inside of the vehicle to route them. 

I followed along the lines of the Black Oak LEDs 30” bar on the roof, using the wire wrap once I was out from underneath the flooring carpet (not wanting it to bulge unnecessarily) then ran the loom to under the rear bench where I could again tie it into the electrical control panel.

At about that point, Topher came back and we were able to, albeit with some frustration, mount the hardware. I wish I’d triple checked my cut region when making the holes, as even a half-inch further outside on both ends would have allowed me to get the hardware in without issue. As it was I had to tape a loc-nut to a stubby wrench to hold the nut in place on each inside fastener. Lesson learned for next time, I guess…. Save yourself the struggle and triple check your measurements even after you’ve double-checked them.

Tightening them down securely, we checked to make sure the included grommet around the light had seated well, which it had. No issues with fitment or flushness with the plastic bumper, and the lights are nicely faced down a bit to illuminate the landscape behind the vehicle. I tied the wire into the control box, and tested the dash-mounted reverse light switch, finding that they worked brilliantly. 

Total time on the install, including hanging out with his new puppy for a while and grilling burgers: about 3 hours.
​


​They’ll serve well for auxiliary reverse lights and diffused pattern floodlights in working situations or while setting up camp. As an additional feature, I’ve tied them into a solid-state strobe controller that’s also in the fuse panel box. I’ve run strobes on the back of the Wrangler for years and have used them in many, many, many situations, so I figured where this Grand Cherokee will see lots of time out and about across the country and in remote areas, it should have at least some set of strobes in the back.

For those wondering why, it’s situations like flat tires or breakdowns on the side of the highway for my own safety, but I’ve also stopped a dozen or more times over the years in all kinds of New England conditions to bring attention to other broken down motorists until the police arrive… they’re just good to have. The control wiring was done with two independent switches on the dash powering the same lights without having any kind of voltage feedback upstream to the switches. Pretty neat, but a standard use of a diode in a 12v system. 

The brightness of these units are fantastic, they draw low power, and they're a clean install with the flush-mount bracket. They've helped us set up countless campsites, helped me as strobes on the road, and have made a lot of things easier at night when we're out with the Trailhawk.

​

​
Picture
Picture
Picture
1 Comment

Black Oak LED Bar Installation

7/1/2017

11 Comments

 
Picture

AFFILIATE INFO: PLease help support 2180miles.com - if you’re interested in Black Oak LED products for yourself, you can take an additional 10% off their prices by applying code “2180miles” at checkout.

With the switch panel installed in the dashboard, Rhino roof rack in place, and electrical control box wired and mounted under the back seats, the time finally came to order and install the LED bar that I planned for the roof. 

While I’ve always been a Rigid Industries guy (full disclosure, technically this vehicle has one pair of their lights), a friend turned me on to a company called Black Oak LEDs out of Florida while he was working on his Tacoma build. I’d never heard of them before. I saw the quality of the product first, as Rob had 2x 4-LED pods on his front bumper, and learned of the incredible price point second. While the market for LED fixtures has quickly become flooded with cheap knock-offs and poorly assembled units at “affordable” prices on Amazon and other web portals, Black Oak manufacturers one impressively solid and powerful product. I reached out to their products team back in March and began speaking to them about my Trailhawk build, my interest in modifying the WK2 Grand Cherokee line in a way that not many others had done yet, and my intrigue into their larger scale LED product offerings. I was put in touch with a guy named Chris who was equally as interested in getting me on their list of sponsored vehicles, and after a month or so of talking, we got the ball rolling.

Despite quite a bit of research into previous WK2 owner mounts/installations, it didn’t seem that anyone else had ever put a light bar on the roof. Plenty of other owners have done small light bars and pod fog lights in the lower fascia on either side of the ACC camera, though save for one minimally documented roof bracket, it seemed that I was again in uncharted territory for my installation. My plan/hope was to get as wide a light bar as possible, packing in as many lumens as possible, into a very sleek and minimally invasive housing. This without question limited me to a single-row kind of fixture at whatever width the roof rack crossbars would allow. My plan was to tap and drill the cross bar piece to the mounting pattern of the light bar brackets, and cross my fingers it would fit between the cross bar and the glass of the roof. In measuring out the Rhino Rack cross bar to 36” wide after installing it, I then went to work checking out Black Oak’s single-row series of lights, finding their 30” to measure in at 34” with the mounting brackets attached… perfect!

Placed the order on a Tuesday, the light bar shipped on Wednesday and was delivered on Friday with a hand written “Thank you” on the invoice. So far, Black Oak was winning my vote a hundred times over. I eagerly unboxed everything upon returning from a work trip and discovered that despite my attempt to pre-measure everything, there simply wasn’t enough height under the cross bar to allow for the light to fit. Ugh… dead in the water. So after some thought I took it to the local fabrication shop and had them shorten the height of the Black Oak stainless bracket by 3/8”, but that didn’t work either. So I called Black Oak and asked if they could custom make me a bracket, and after speaking with John on the other end he suggested I try their super-short-low-profile-fits-anywhere-awesome-bracket… for an easy to reason $15. It was delivered in 2 days and worked perfectly.

After all these pieces were in order, it took all of 20 minutes to get the cross bar tapped out and finagle my trimmed mounting hardware into the exceptionally narrow tolerance height of the cross bar.
Picture
Picture
Picture
Picture
Picture
Picture

Once the wire was run through the new exit point from the trim piece, I began removing the rear upper trim pieces from the inside of the Grand Cherokee. I have to come to very much dislike removing trim pieces, but it’s the only way to do things cleanly and have myself feel like I’ve done a professional install job, which has become important to me while modifying this vehicle. I toyed with how to get it into the cabin, and ultimately decided to pull out the gasket that houses the controls for the hydraulic tailgate piston. It’s a gigantic gasket, and upon removal I saw that there was plenty of room to sneak the shrink-wrapped Black Oak harness inside of there.

I took the same dremel sanding bit and carefully trimmed back just enough of the gasket’s outer edge (lower edge, ideally to alleviate excess water from getting near it) and fed the wire harness through to the inside of the d-pillar. It’s important to note as you look at the photo below, that I went back later with clear silicone sealant and liberally applied it around the gasket to seal up whatever tiny openings may have arisen from my adjustment to the OEM seal. From there I ran the wire down the d-pillar to the bottom of the tailgate, unscrewing the factor internal cargo hook and running the wiring under the trim pieces and along the length of the spare tire trunk trim piece towards the middle bench. 

You can see in the photo below that I highlighted the wiring harnesses external stretch in red, then the pink portion shows where it’s being run inside the vehicle.
​

Picture
Picture

The final bit here was tying the Black Oak harness into the control box I had just built and installed a week or so prior. FYI, for anyone trying this, I ordered one of the Black Oak 8’ extensions for the wiring harness, which I was VERY happy to have for this installation. Once the grounds and +12v leads were connected to the appropriate ground bus and relay, I tied the light bar into the waterproof connection point on the roof and tested the dashboard installed switch panel to activate the light.

HOLY BRIGHT.

That’s about all I can say. The specs on this 30” bar using the available 5w CREE LED’s is roughly 16,500 lumens. Let me tell you, even in broad daylight, this thing is blinding. Let me report that this thing is one of the brightest light fixtures I’ve ever seen… and that’s as someone who works in the concert production industry with some serious lighting systems. I’m exceptionally impressed with the build quality, customer service, and actual power of this light bar, and look forward to ordering more products from Black Oak in the future.

Here are the final close-up installation photos... more to come to show off the actual power this thing packs into such a small form factor. In the end, it wasn’t a huge pain to get this installed in what I truly believe is a very clean form, barely noticeable unless you’re really looking for it up there. Thankfully there’s a few millimeters of space under the light above the glass, and also enough room between the light and the cross bar to fit a mounting bracket for a Roof Top Tent in the future if my path goes that way 

That’s all for now – talk soon about some other neat stuff.
Picture
Low + High Beams
Picture
Low + High with Black Oak LED Bar
11 Comments

Electrical Control Box Build

6/20/2017

0 Comments

 
I had some time home last week (and decent weather!) to work more on the auxiliary electrical system for the WK2. As you’ve seen previously, I built and installed a 4-switch panel in the driver dashboard area to control lighting throughout the Jeep. With 18-7 fire alarm wire I made a loom to get back to a control/relay box that I was building for the rear trunk area to house the electrical components of the system. I ran out of time to work on the control box until a recent work trip, so I had products delivered to the hotel and began constructing the main brain of project.

Hardware used:

- PI Manufacturing Project Box (ABS) – 7.6” x 4.51” x 2.95”
- Blue Sea Systems 5025 6 Blade Fuse Block
- Rigid Industries 40312 Strobe Flasher
- 4x 12v Relays (30A)
- 6A Blue Ox Saturn Diode Pack
- Misc. heat-shrink connectors

It was a tossup as to what project box would fit my components, but using Google SketchUp I built a few examples to see what the right option would be; even despite doing this I was still nervous that I got it right. Upon the delivery I breathed a sigh of relief as everything fit. Trimming and labeling the wires of the relay harnesses, I crimped my connectors and installed them to the Blue Sea Systems fuse panel accordingly. Labeling the “trigger” and “+12v” lead of the harness, I got everything ready for the installation of the lights themselves. With the interest of being able to remove the fuse panel, strobe controller, and relays from the box, but have them be secure and organized in the mean time, I used 3M adhesive Velcro to hold them to the project box itself. With everything installed and fitment checked, I removed the components and drilled out the sides of the project box for the 8AWG wire leads from the battery, and left two holes in the side for the 18-6 control loom and aux. lighting wiring.

The Project Box:
Picture

Once it had the grommets installed and the leads were crimped and heat shrunk, I brought the box out to the Jeep and fished the fire alarm wire out from under the rear bench seats where I had stored it in April when the switch panel was installed. Pulling the 18-6 wire through the grommet in the side of the project box, I went to work crimping and heat-shrinking the switch wires to the relay trigger leads and the +12v and ground switch wires to the Blue Sea fuse system, thereby activating the power and LEDs on the switch panel itself.

Once the switch leads were heat shrunk and everything was tucked away, I nestled the box itself under the rear bench and used HD Velcro to hold it in place. It ended up being a little further to the passenger side than the photo shows, but it is in a place and is small enough that the bench portions can fold completely flat without coming into contact with the control box. I ran the +12v lead/ground from the battery under the bench hardware trim piece, then under the OEM floor mat and into the battery compartment. It worked flawlessly and is VERY hard to find if you’re not looking for it. I might someday heat shrink that cable too, but for now they’re simply red and black as they run under the flooring. I ran some wiring out of the control box to my multimeter and then the light bar that’s going on the roof (install write-up to come) and was pleased to see that the switches activate each relay appropriately, and the light functions without issue.

One step closer! Next up will be the aux. lighting installations themselves.
​

Picture
Picture
0 Comments

Roof Rack Installation

5/26/2017

2 Comments

 
With less than two months until we load this Trailhawk up and take it nearly 7,000 miles across Canada, I’m kind of under a time crunch to get the modifications installed (and fine tuned) before we roll out. One of the things that I’ve wanted to do for a while for a multitude of reasons is install roof rack cross bars. While I’m hoping to not need to run a cargo basket or roof rack for this specific trip, I’d like to have these bars in place to potentially get a roof-top tent in the distant future, carry extra gear if need be, and provide a mount for some auxiliary lighting.

I was scanning eBay a few weeks ago and saw that there was an “open box” set of Rhino Rack RSP-27 cross bars for about $50 under the Amazon/E-Trailer website pricing. These were the bars I wanted, as I believe they’re the sexiest of those available… yeah, I just used sexy to describe a roof rack cross bar, but these taper off to the roof rail height whereas other models end in a T shape, sticking off the ends further than I need them to. At $225 delivered, I wasn’t sure what to expect from the whole open box labeling, but despite a few dents in the OEM box and a bag of hardware open and spilled throughout (the seller included a new bag of hardware in addition to the original, so no hard feelings there) it was a pretty simple process to install the bars, just a few T-25 torx bolts to tie it together and into the factory rails… Couldn’t have taken me more than 20 minutes to get it done.

I was able to drive with them on over Memorial Day holiday as we headed up to Vermont for a friend’s weekend-long BBQ party, and was happy to hear minimal whistling from the bars. I make a living as an audio engineer, so I’m sure it was my hypersensitivity to sound that made me pick up on it, as Dani didn’t mention hearing it at all, so we’re good in that regard. The bars look great up top, and it gives it a bit more of an overland-y aggressive appearance in a subtle way. 

I’m looking forward to getting home tomorrow from a week and a half in Northwest Arkansas working on the production of Wal-Mart’s gigantic Shareholder Week events, and spending some time doing electrical work to move forward with furthering the switch panel installation by getting the relay/control box installed, having made some progress with it in the past few nights in my hotel room… the housekeeping service lady probably thinks I’m wiring some kind of bomb detonating device.

​The images are in a gallery, so you can expand them to see more closely.
2 Comments

Chief Products Hidden Winch Mount + Warn Zeon 10S

5/20/2017

5 Comments

 
Picture
At the beginning of the May, over the course of two afternoons and evenings, my buddy Rob and I dove into the installation of the Chief Products Hidden Winch system in the front end of my WK2 Grand Cherokee Trailhawk. I had been speaking with Bill Mackin, the owner of Australia-based Chief Products, since the beginning of March in regards to getting one of their mounts test-fitted in a 2017 Grand Cherokee to see what kind of adjustments, if any, would need to be made for the new generation grills and front-ends. I reached out to Warn to inquire as to sponsorships for a winch, and after speaking with someone from their Sponsorship team, was offered a steep discount on the 10-S Platinum for installation on the Trailhawk.

---


Having never taken the front end off of the Jeep before, and being used to the much more accessible front end of a Wrangler, I did some research as to what went into taking the lower fascia and the upper bumper off. Chief Products had a good write-up for the fascia, and a quick YouTube video showed how simple it was to remove the bumper… we were in business. It’s easy enough, with a few quarter-turn screws under the fascia, two plastic rivets per side in the wheel well, the fascia then pops off from the bumper. The bumper itself requires removing a small hex-head nut in each wheel well, and two small plastic rivets along the top of the radiator brace bar.

We decided to do the installation at Rob’s house, as I’m still in the process of getting my garage at home organized enough and he has a large driveway that easily accommodated our needs. I opened the shipping boxes and laid out our components on an old section of drywall he had in the shop, and we took inventory of what we had to work with.
​
Picture
Picture
Picture


​Chief Products Hidden Winch Parts List:

1. Left & right tow hook mounting bracket
2. Air compressor guard bracket
3. Left & right tow hook spacers
4. ACC camera mount bracket
5. Left & right frame mount brackets
6. Winch cradle
7. Left & Right radiator brace brackets


​
Picture
Picture
Picture

From there we disconnected the ACC camera via the two fasteners that hold it to the bottom of the OEM bumper. There’s a small wiring harness that needs to be unclipped, then it was placed to the side well out of harms way (I don’t want to know how much that camera costs). We then went about removing all of the fasteners that hold the OEM bumper to the Jeep itself, as highlighted by the red circles in the photo below. With the Styrofoam bar and metal backing removed, we took off the plastic protecting pieces from the air suspension system and the windshield washer fluid reservoir. Last to do here was remove the air duct pieces from in front of the radiator, and move the wiring looms as far out of the way as possible for access to the front end.

The majority of the Chief Products Hidden Winch system is comprised of 3 main pieces (comprised of 5 individual parts). The winch cradle spans the mid-section in front of the radiator, and holds the winch in place. There are two frame mount brackets, one for each side, and finally two tow-hook mounting brackets that sandwich between the cradle and frame brackets. By starting with the frame brackets, installing the mounting fasteners without tightening down, we were able to then install the tow hook pieces and the winch cradle without issue, putting the hardware in to hold the entire assembly together while we figured out how the other pieces assembled.

This was getting towards the end of our first day (night, actually… we were working by the light of the flood light in the driveway) and we were both pretty tired. We struggled for a while with the tow hooks before I called Bill at Chief Products and asked him if we were missing something. In hind sight, had we played around a bit more with the pieces we would have realized that the OEM tow hooks need to be swapped to the opposite side of their original installation location, and flipped over to work with the new brackets. Laymen’s terms: move the driver hook to the passenger side, passenger hook to the driver side, flip 180 degrees, and install to Chief Products tow hook spacers.

At that point we called it a night, put the front bumper and ACC camera back on without the lower fascia, and I drove home without incident or any pieces falling off.
​
Picture
Picture
When we picked up on day 2, we were determined to finish the project before it got late again. It was around 16h00 by the time Rob got home from work and we got started, but we made solid progress as the sun made its way across the sky. 

Now that the tow hooks had been figured out, we were able to move forward with tightening the entire Hidden Winch system down, and began the process of test-fitting the OEM Trailhawk bumper. In comparing it with the Limited / Overland / Laredo bumpers it seems that the grills is much more sloped back. I can’t comment specifically because I do not own any of the other models, but I do know that the guy who installed my clear bra on the WK2 made a comment about it being different from any other grille he’d ever seen. As such, Bill and his team were intrigued to know whether or not this system would work on the new model.

As we re-installed the bumper and fascia, we noticed that there were parts of the winch cradle that were pushing out against the both trim pieces, to the point where they would not fit back into place. We looked at our options for trimming the back side of each piece, and “modified” the bumper by bending the mounting tabs for the parking sensor looms upwards, essentially lightly breaking them to alleviate some rubbing on the winch cradle. The cradle is fit with 6 mounting points for the bolts that attach to the frame mount brackets, with each of those 6 points being U shaped, opening towards the front of the Jeep. Due to the space in the U-shapes, Rob and I decided to push the entire cradle backwards ½” or so to fit better behind the bumper and fascia. In talking to Bill at Chief, their 2015 model did not have room in front of the radiator to move back the way that we were able to in the 2017.

Once it was pushed back, we re-installed the bumper without issue, and popped the fascia back in as well. Knowing it would all fit, we turned our sights towards trimming out space for the fairlead to rest against the winch cradle mounting points. Initially, I was under the impression that this would be alike the other Rocky Road winch mount, with the fairlead being in the middle of the bumper by the license plate bracket. To my delight, it barely touched the bumper, and instead the majority of trimming came out of the fascia. I made a small cut, maybe ½” tall into the bottom most portion of the bumper itself, and then went to work tracing the fairlead to the fascia. With their final fairlead design, Chief now includes a template for future installers to use when making their cuts.

Picture
Picture
Picture
Picture

Once we were comfortable with the trimming, we moved on to the installation of the winch. The Zeon 10-S Platinum is described by Warn as being “built for those who push the limits-with double the durability, 20% faster line speed, and extreme IP68-rated waterproofing. The Advanced Wireless Remote controls not only the winch, but also the clutch and other accessories. With a 10,000 lb. pulling capacity, high-performance motor package, and Spydura® Synthetic Rope, you'll be equipped to go places others only dream about.” – for this application, it’s perfect, especially with the electrically controlled clutch. Whereas my other winch sits on the open front of my Wrangler, I don’t have access on the WK2 to engage and disengage the electric vs. free-spool setting. With the remote, this makes the hidden factor of the winch all that more feasible.

We followed Warn’s instructions for mounting the winch and spooling the Spydura line, outfitting the end of the synthetic rope with my new Factor55 Flatlink winch hook. Rated with a breaking point far beyond what I’ll ever be utilizing, the easy D-ring attachment point and red powdercoating make it a sleek addition to the front end of the Grand Cherokee. Once the line was appropriately attached we spooled it in, maintaining tension on the line by hand and wrapping it cleanly. While I don’t currently have any auxiliary lighting planned for the grille of the Trailhawk, the Zeon Platinum offers 2x 12v ports to plug auxiliary lights into, to then be controlled on/off by the wireless remote. I may someday add some lights in there, at which point this will be a phenomenal way to avoid running wiring through the firewall.

I took a couple dozen shots of the front end from every angle I could think of, and then we moved forward with re-installing the ACC camera on a Chief Products supplied bracket to the rear bolts holding the winch into the cradle. We had to wallow out the mounting bracket holes a little bit to fit what I assume is a revised camera mount dimensions, but notes and photographs were taken to show the guys at Chief.

Once the camera was good to go and re-harnessed, we re-installed the front bumper securing it back into the wheel wells and above the radiator by reversing the removal process. Putting the fascia back on we realized we had a little more trimming to do to get the outer edges by the wheels to fit appropriately. We got it to fit that night, but after driving last week with regular use, I realized I have to go back and re-trim some of the area in front of the fairlead mount to get the clips to sit properly back in the bumper above the fascia.
​
Picture
Picture
Picture
Picture
Picture
In the almost year since installing the Chief Products Hidden Winch system, I've had no issues other than craning in my neck every time I turn around in the grocery store parking lot to check out the Jeep as I walk away. The pieces are secure, and the front end looks sexy as all get-out with the Factor55 FlatLink hinting that there’s a lot of pulling power under that front bumper.

I've had opportunities to use the winch and pull WK2 uphill in bad terrain. The system, comprised of the mounting bracket, winch, hook, and remote performed flawlessly. I go forwards into the backcountry feeling more confident in the Jeep’s capabilities with this new self-recovery capacity in place. 

Again a huge thanks to both Chief Products, Factor55, and Warn for their amazing support and incredible products that made this installation and self-recovery abilities possible.
​
​
Picture
Picture
Picture
Picture
Picture
5 Comments

Switch Panel Installation

5/1/2017

4 Comments

 
Continuing with the switch panel install… 

I apologize in advance for some of the photos seeming blurry, I was shooting this outside, handheld, with a very narrow depth of field to avoid a high/grainy ISO, and had nowhere to really bounce the flash off of in these tight spaces. I know most of you won’t care, but for the photographers in us, I wanted to preface by saying I know there’s a lot of unintentional bohek/obvious DoF.

Next up came the actual dash install of the switches. This part was a bit unnerving, as removing the knee air bag panel from under the steering column required the removal of a fair bit of parts, and the FSM’s Interior Panel Removal section wasn’t really great at depicting exactly what I needed.  I took a ton of photos for you to see, but I’ll detail this a bit more.
Click gallery images to enlarge.

You can see the panel in the photos above that I’ll be working with, and the approximate area the switches will go into, below and to the right of the headlight selector switch and fuel tank door switch.

*** DISCONNECT THE BATTERY TERMINALS BEFORE DOING THIS AS THERE IS AN AIR BAG UNDER THE STEERING COLUMN IN SOME MODELS! ***


The required tools here are a ¼” socket set, a Phillips head screwdriver, and a small interior trim pry tool.

  1. Pry off the plastic cover to the left of the dash, between the door and dashboard2. Pry off the steering column surround bezel till it’s loose at the top of the wheel
  2. Remove the Phillips head screw to the top left of the steering column
  3. Pry back the upper left and right of the large trim piece that covers the lower steering column from where it meets the upper dashboard (there are a few retaining clips, the tool will help)
  4. Remove the plastic pop rivets holding the rug piece over the gas/brake pedal
  5. Underneath the dashboard, remove 4 Phillips head screws (they’re roughly highlighted in the photo below)
  6. At this point you should be able to pull the upper piece of the trim far enough off the dash to remove the airbag trim piece from around the airbag itself. ​
Picture
Picture

​At this point you should be able to pull the upper piece of the trim far enough off the dash to remove the airbag trim piece from around the airbag itself.  If you do have the airbag, you might struggle here. I decided against removing the airbag itself, and instead just removed that trim, but only after I made the mistake of trying to remove the air bag panel with the pry tool (you’ll see tape in the last photos, I have to re-glue it back together……)

Once I got that done I was able to pull the panel forward and down enough to access the left side, removing the wiring harnesses from the fuel door button and headlight selector.  I removed the headlight panel completely in order to better get the Dremel tool in there for trimming.

After measuring the switch panel and comparing it to the rear support plastic behind the dash panel, I cut out an appropriate section to fit the depth of the switch into the dashboard. After that came making the template for the switch assembly itself, and then taping off the region in the panel in which I’d cut the hole. This was the most nerve-wracking part of the project, as I wanted to make sure that if anything, I undercut the hole so that I wasn’t trying to fill any extra space in if I cut it too large. With the painter’s tape in place, I used the honeycomb print in the dash plastic to make sure the Dremel cut was level and even.

Picture

After the 2”x4” hole was cut I used a file to get the edges even and less rough, then did a few test fittings to make sure the switch panel itself would fit exceptionally snugly, which it did after a couple adjustments to the plastic of the dash. At this point I ran the 7-strand sprinkler wire harness through the Jeep and began plugging the crimp connections onto the switch panel to create the final product, leaving the +12v lead for the ignition lights coiled above the dash panel for me to work with at a later date. 

Picture
Picture
Picture
Picture
Picture

After the 2”x4” hole was cut I used a file to get the edges even and less rough, then did a few test fittings to make sure the switch panel itself would fit exceptionally snugly, which it did after a couple adjustments to the plastic of the dash. At this point I ran the 7-strand sprinkler wire harness through the Jeep and began plugging the crimp connections onto the switch panel to create the final product, leaving the +12v lead for the ignition lights coiled above the dash panel for me to work with at a later date.
​

I reassembled the harnesses for the headlights and fuel tank, then began piecing the dashboard back together by reversing the above disassembly procedures. Once everything was back together (note the green tape on the air bag panel that I’ll glue back together), I ran the 18-7 wire harness through the trim pieces along the driver’s doorsill, back behind the B-Pillar, and up to the rear bench. I’ve yet to decide where the actual control box for this will live, so at the moment the remaining 10-feet of loom is spooled under the rear bench until I get around to the final assembly of the control box and relays.

So that’s that… the incredibly nervous process of putting a gigantic hole in the dashboard of a brand new vehicle. I don’t know how the XOverland guys do this all the time, but here I am one step closer to getting this Trailhawk to where I want it to be!

Final install picture once everything was re-assembled, which I'll replace once the air bag panel has been fixed.
​
Picture
Picture
4 Comments

Custom Aux. Electrical Upgrades

4/18/2017

0 Comments

 
I was home this weekend between work trips, the last two weeks in Orlando and Vegas, the next two in Northwest Arkansas and then Orlando again… This left a very narrow window to get any work done on the Jeep, but Rob and I had anticipated the winch mount and winch having arrived by then… Unfortunately, they hadn’t, so we decided to move forward with another project I had been working on.
 
One of the most important things for me in vehicles is visibility. The TJ has a LOT of LED lighting, strobes, etc. - so the plan for the WK2  was bound to be pretty intricate as well. First step for any additional lighting is figuring out how it’s going to be controlled, and from where it’s going to be controlled. After Googling a fair amount of options, seeing if anyone had built vehicle-specific panels, I went ahead with my initial plan to install a switch panel to the lower left side of the steering column. There was a great write-up by a guy on JeepForum a few years ago that followed along the same lines as my idea.
 
I wanted/needed to keep the switches refined and purposeful, so I had to decide which each of the four Contura switch spaces would control. For me, reverse light is hugely important… second to that is forward facing light, so recessed driving lights or some kind of LED bar will get a spot. Third up in my mind is a strobe light system, as I’ve spent many years with one in the TJ and often find myself pulling over to help people on the side of the road, or utilizing them for other situations in bad weather and the like. Spot 4 then became a catch-all, or an expansion slot.
 
So:
 
Switch 1: Reverse LED Lights
Switch 2: LED Bar (likely roof mounted)
Switch 3: LED Strobe System
Switch 4: For the mean time, VHF radio power.
 
With a quick Amazon order for switches, wiring, heat-shrink crimp connectors, and the 4-space mount, I got to work. The VHF switch cover was from eBay for an extra seven bucks.
Picture
Picture
Picture
​The Contura switches I bought were 5-pin versions… Inputs: +12v for the status light and power source, +12v for the locator light (to find the switch when it’s off), and a ground. Outputs: ground loop, +12v for the light itself. It took some research to find out the exact way to wire this, but once I knew I got to work on an 18awg wire loom for them all. The night I put it together I was sitting in my girlfriend’s office as she worked late and finally had to reassure her coworkers that I wasn’t building a bomb in their workplace. Final results were clean, I was happy.
 
From there I had to figure out what kind of wire loom I would use to get from the eventually-will-be-built control box (relays, fuses, flux capacitors, etc) to the switches. I knew each of the 4 switches would need an individual wire strand to trigger each respective relay, then all would need a +12v lead which they could share, and a ground which they could also share… this brings us to 6-strands of wire for those who can’t count fast.
 
I work in the live events industry; so 5 and 7 pin cable is a common thing in my life. The issue that I had was the fact that most of those wires, as well as DB9 data cable, are mainly 22-26 AWG, which although it’s okay to push ~0.33A down through, I didn’t want to mess with having to crimp 24 gauge cable to the switch pins. A quick run to Home Depot for 7-strand thermostat cable yielded me a more substantial 7-strand (solid core vs stranded) wire for sprinkler system installations. The other benefit of sprinkler versus thermostat is that the latter was brown, while sprinkler wire housing is black… cleaner to install and easier to hide.
 
Once I had the wire in hand, I cut each strand to the appropriate length. Red and White would be my hot and ground lines for easy decoding, and the color-coding of the rest would be easy enough to remember for when it’s time to install the control box. In order of (ROYGBIV) I continued past red with Orange on switch 1, Yellow on 2, Green on 3, and Blue on 4. I cut each of the wires to specific lengths to make the sprinkler loom sit cleanly against the switch panel, and then went ahead and crimped/heat shrunk the wires to mate with their female crimp-on ends. I added a separate +12v line made of a miscellaneous five foot section of 14awg wire to tie into an ignition-based +12v line to turn on the locator/indicator LEDs in the bottom of the Contura switches, separate of the ignition.
 
In laymen’s terms, I wanted the indicator lights to come on with the ignition of the vehicle, but the lights themselves (strobes/rev/LED) to be able to remain on even when the vehicle is turned off. The latter will get their +12v lead from a fuse panel directly tied to the battery.
 
The result was a rather clean switch panel, parallel grounds and +12v for the leads and switch LEDs, and a 15-foot wire-loom for the relays to be triggered by. 
Picture
Picture
0 Comments

New Sponsorships & Upcoming Changes

4/13/2017

0 Comments

 
​About two months ago I reached out to an Austrailian company called Chief Products who makes skid plates, push bars, etc. for the Grand Cherokee platform. Reading about their recessed winch mount, and noting their comments about looking for a 2017 M.Y. & Trailhawk platform test vehicle, I emailed them volunteering myself to assist with the test-fitting of their new WK2 Hidden Winch Mount. In a few long e-mails back and forth between myself and Bill, the owner of Chief Products, we decided that he'd ship me one of their winch mount systems at a reduced rate in exchange for install and final-product photos, and measurements of the fitment within the 2017's new sloped grill style. This was an immense first step in making the Grand more capable on its own.

Knowing that this winch mount would need a winch to go in it, I reached out to Warn and asked about their corporate sponsorship opportunities for the Trailhawk build. In doing a fair amount of research and speaking with Bill at Chief about what winches he already knew fit the mount, it became pretty clear that the Warn Zeon Platinum was going to be the most ideal option for the WK2. Yeah, okay, it's insanely expensive - $1750 - (this especially emphasized due to me being a guy who has rocked a Smittybilt XRC-8 for 6 trouble free years on the front of my TJ), but the Platinum is the best winch on the market in Warn's 4WD product line, and has one key quality that will prove immensely useful in the Grand Cherokee: an electronic clutch. Once this puppy is recessed into the front end, accessibility of the free spool/engage clutch would become rather difficult as far as I can tell. It's waterproof, wifi-based remote operable, has an accessory 12v port for driving lights (bypassing the need to run wiring through the firewall) and is wound with the Spydura Synthetic line. After a few e-mails with a woman in the sponsorship department at Warn, she informed me that while they couldn't give me a Zeon Platinum for free, she could send me one at a deeply discounted rate. So for about a thousand dollars under retail, I'll have the most highly regarded unit they're currently manufacturing in the front end of the WK2 on the Chief Products mount.

These, combined with a discounted FrontLink winch hook courtesy of Factor55 which I'm equally excited to install, will transform the front end and my self-recovery abilities immeasurably. For now I've got some stock imagery, but should have some great photos coming when I tackle the install with my buddy Rob in a few weeks. In the mean time, I'm pretty excited for these upcoming modifications to the rig.

You can click the images below to enlarge them.

Chief Products Hidden Winch Mount
Warn Zeon Platinum 10S
Factor55 Flatlink Winch Hook
0 Comments

Subtle Vehicle Branding

4/1/2017

0 Comments

 
With the intention of being out and about photographing/hiking in the WK2, I went ahead and had some vinyl lettering done for the rear side windows to hopefully drive some traffic to the blog and social media accounts. The lettering/logo measure 22" wide and 4" tall. I found a place called Sticker Genius on the web who printed me 3 copies of the sticker (1 as a backup) for $35 delivered. I haven't yet decided if something will go on the rear window of the tailgate, but I wanted to get this done first so that I could see what would look best on the back.

Looks pretty clean, in my opinion.
​

Picture
Picture
0 Comments
<<Previous
Forward>>

ADVENTURES

Trans-Canada Overland Expedition
The Long Trail
Appalachian Trail
Bicycling Across America

Overland Build

Meet The Jeep
Backcountry Gear
​Modifications & Installations

Everything Else

Read The Blog
Photography
Guest Book
Contact

Picture
© COPYRIGHT 2019
​All Rights Reserved