Continuing with the switch panel install…
I apologize in advance for some of the photos seeming blurry, I was shooting this outside, handheld, with a very narrow depth of field to avoid a high/grainy ISO, and had nowhere to really bounce the flash off of in these tight spaces. I know most of you won’t care, but for the photographers in us, I wanted to preface by saying I know there’s a lot of unintentional bohek/obvious DoF.
Next up came the actual dash install of the switches. This part was a bit unnerving, as removing the knee air bag panel from under the steering column required the removal of a fair bit of parts, and the FSM’s Interior Panel Removal section wasn’t really great at depicting exactly what I needed. I took a ton of photos for you to see, but I’ll detail this a bit more.
Click gallery images to enlarge.
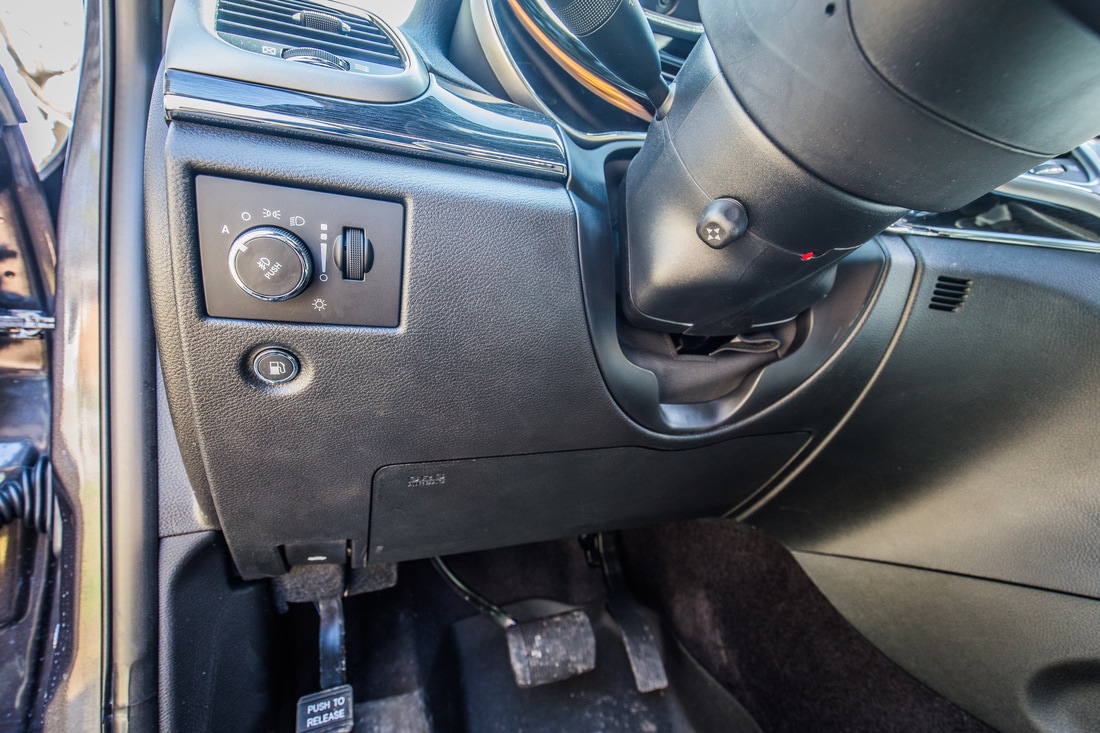
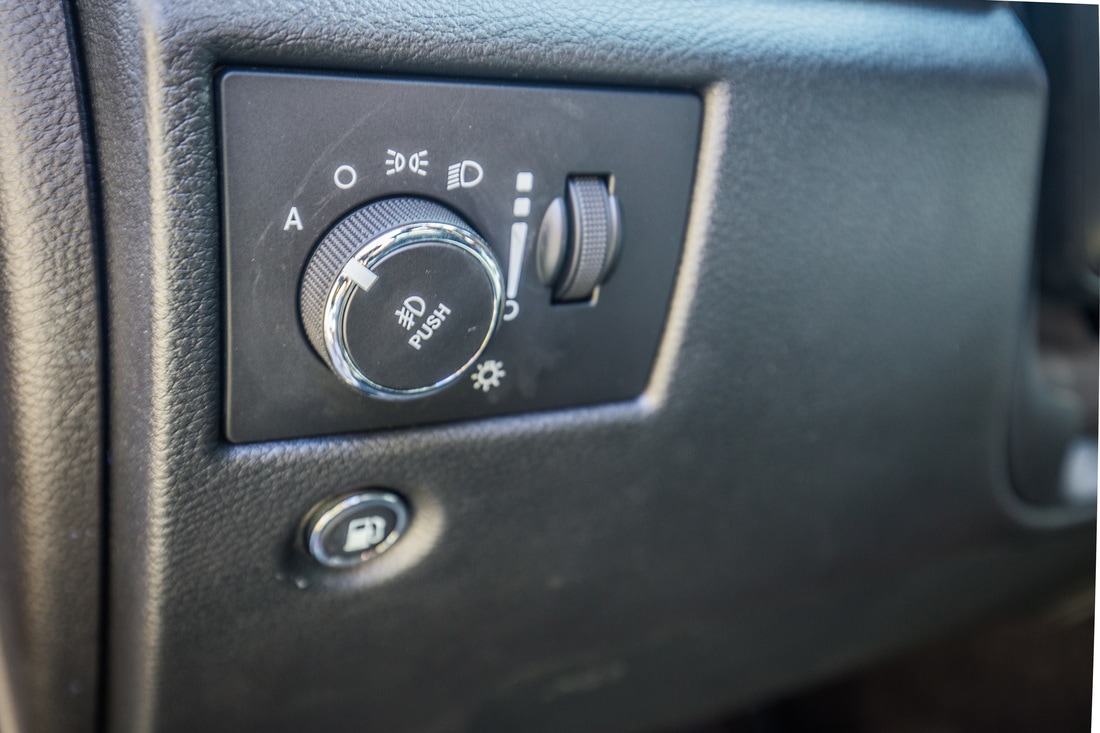
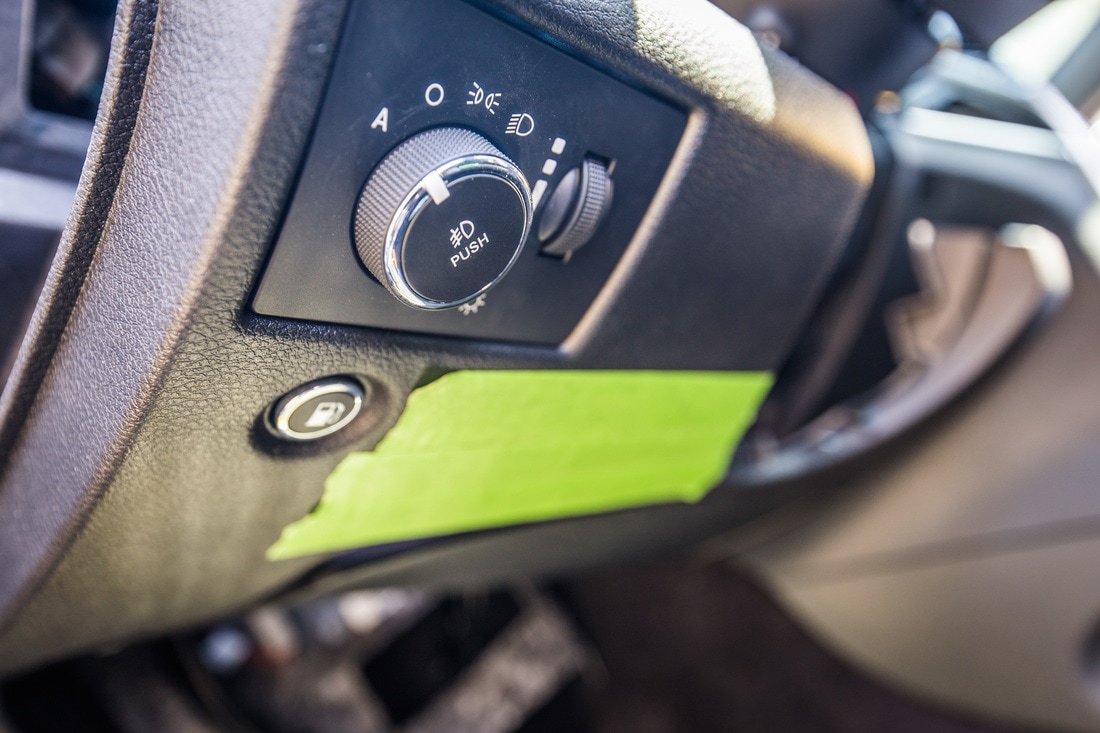
You can see the panel in the photos above that I’ll be working with, and the approximate area the switches will go into, below and to the right of the headlight selector switch and fuel tank door switch.
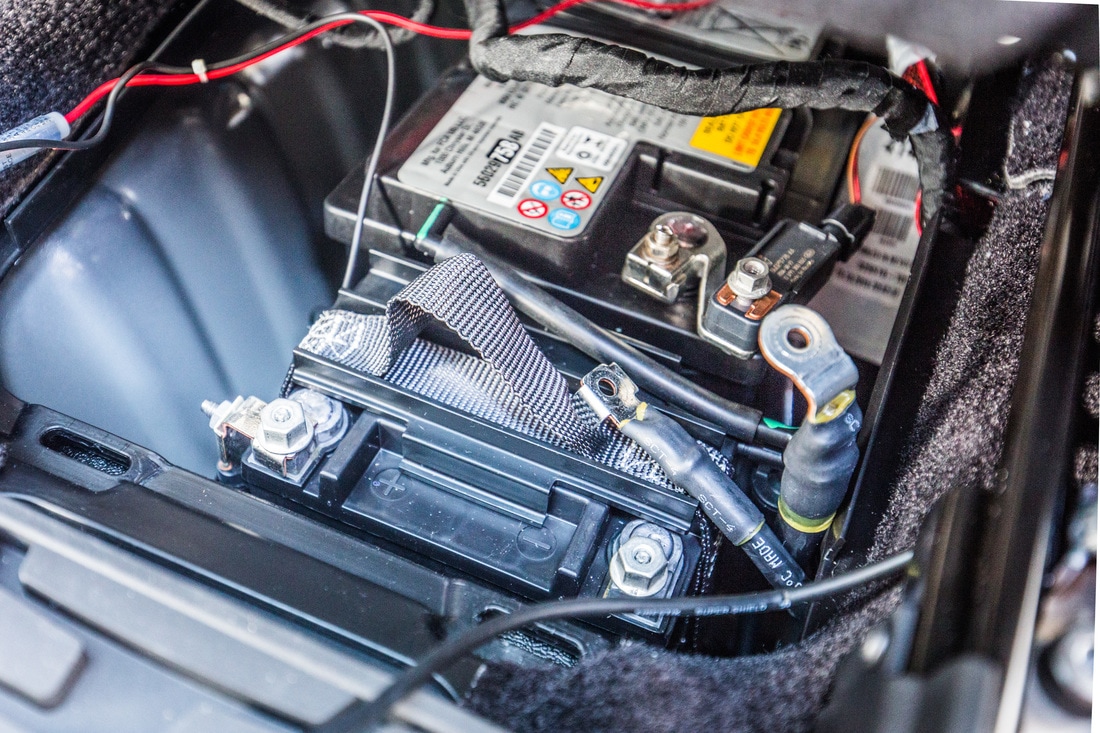
*** DISCONNECT THE BATTERY TERMINALS BEFORE DOING THIS AS THERE IS AN AIR BAG UNDER THE STEERING COLUMN IN SOME MODELS! ***
The required tools here are a ¼” socket set, a Phillips head screwdriver, and a small interior trim pry tool.
- Pry off the plastic cover to the left of the dash, between the door and dashboard2. Pry off the steering column surround bezel till it’s loose at the top of the wheel
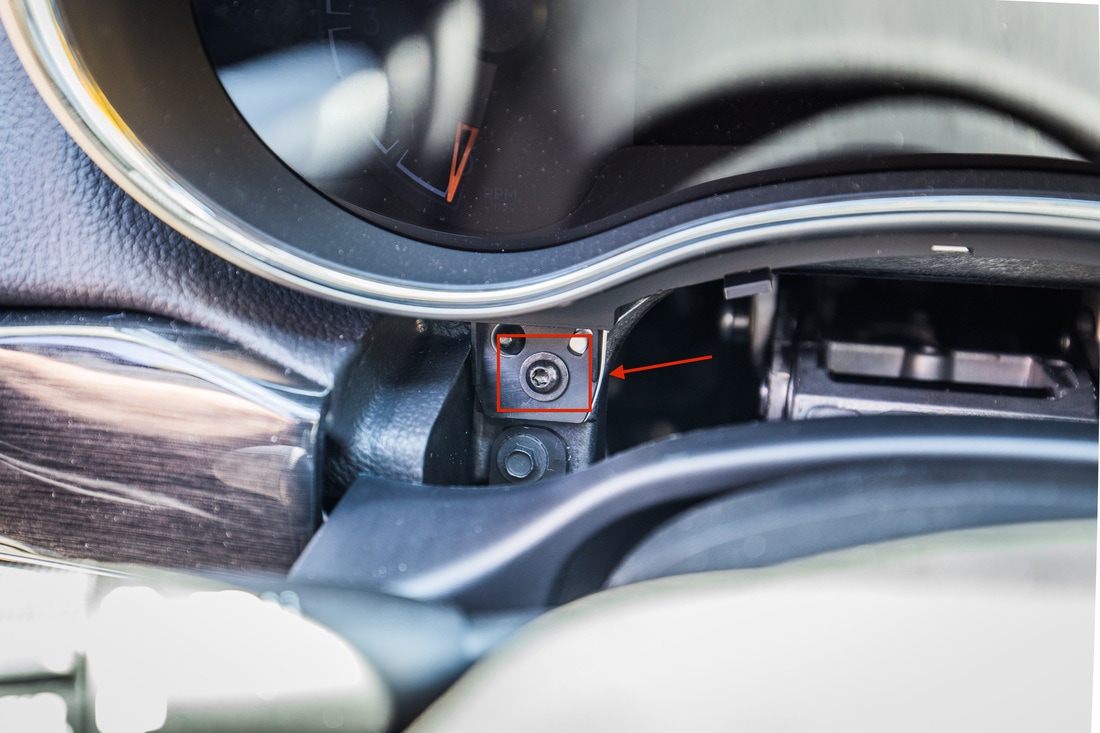
- Remove the Phillips head screw to the top left of the steering column
- Pry back the upper left and right of the large trim piece that covers the lower steering column from where it meets the upper dashboard (there are a few retaining clips, the tool will help)
- Remove the plastic pop rivets holding the rug piece over the gas/brake pedal
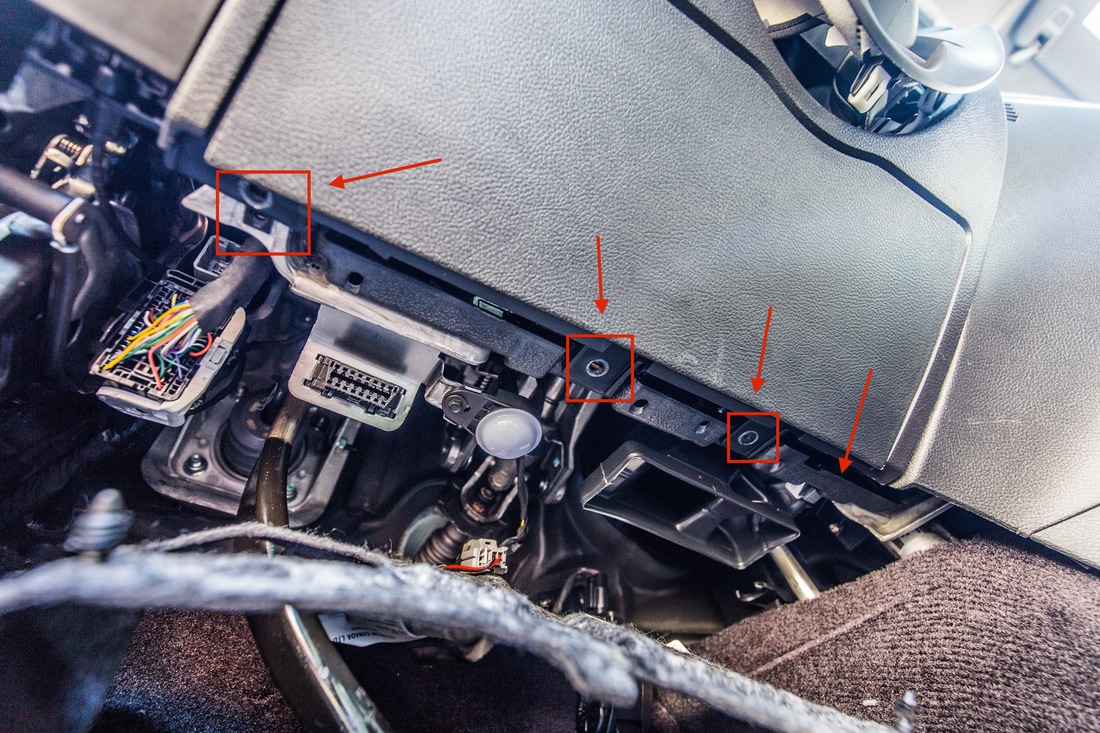
- Underneath the dashboard, remove 4 Phillips head screws (they’re roughly highlighted in the photo below)
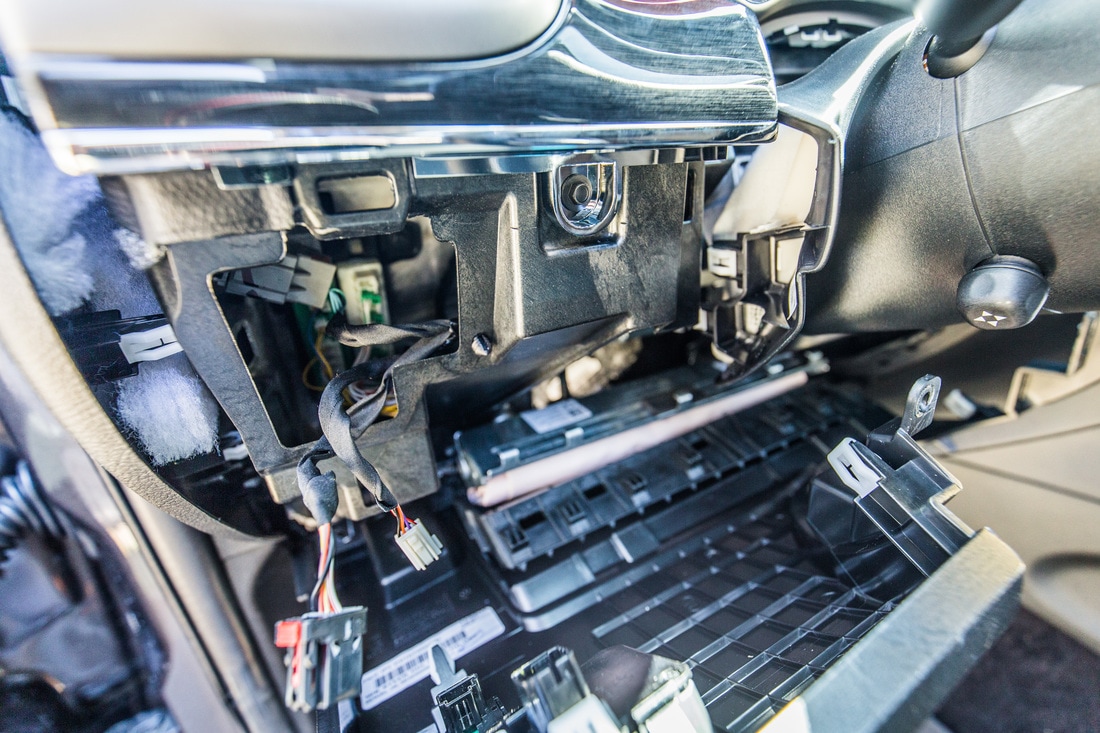
- At this point you should be able to pull the upper piece of the trim far enough off the dash to remove the airbag trim piece from around the airbag itself.
At this point you should be able to pull the upper piece of the trim far enough off the dash to remove the airbag trim piece from around the airbag itself. If you do have the airbag, you might struggle here. I decided against removing the airbag itself, and instead just removed that trim, but only after I made the mistake of trying to remove the air bag panel with the pry tool (you’ll see tape in the last photos, I have to re-glue it back together……)
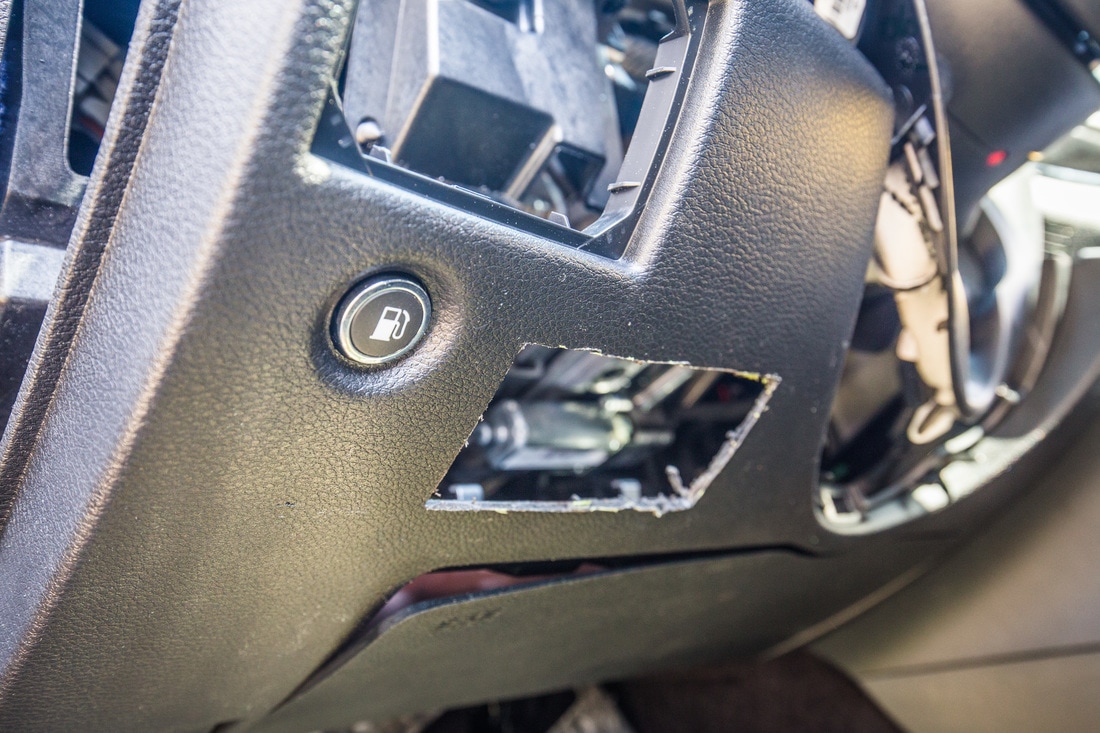
Once I got that done I was able to pull the panel forward and down enough to access the left side, removing the wiring harnesses from the fuel door button and headlight selector. I removed the headlight panel completely in order to better get the Dremel tool in there for trimming.
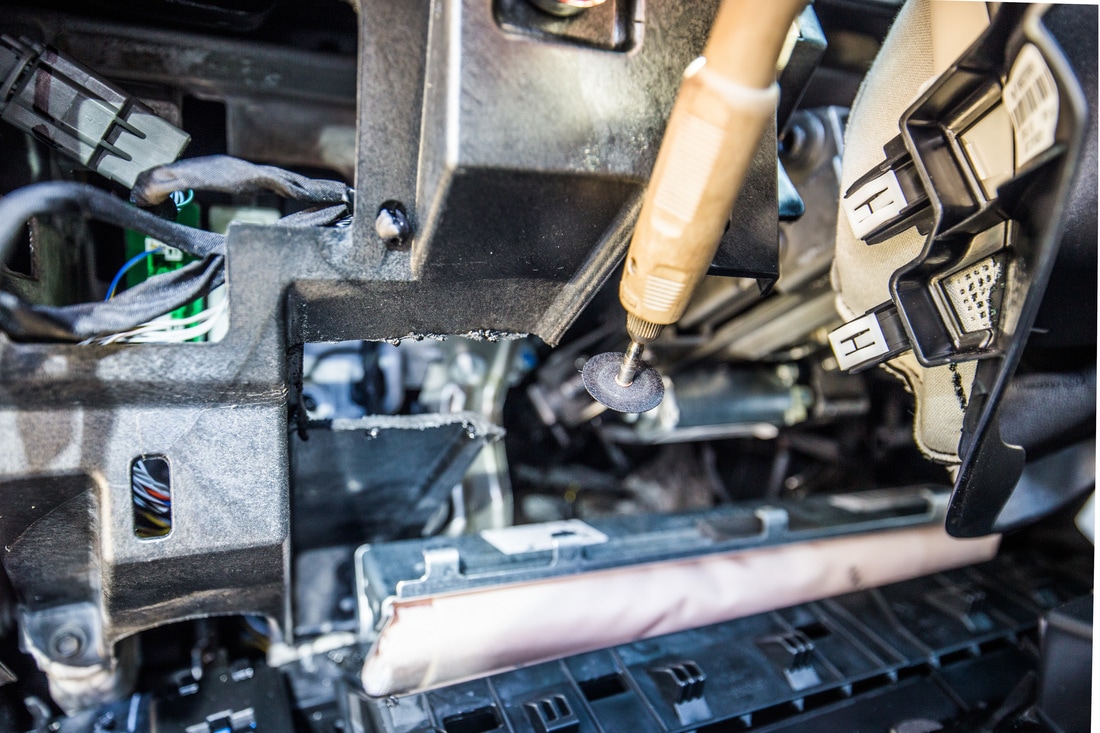
After measuring the switch panel and comparing it to the rear support plastic behind the dash panel, I cut out an appropriate section to fit the depth of the switch into the dashboard. After that came making the template for the switch assembly itself, and then taping off the region in the panel in which I’d cut the hole. This was the most nerve-wracking part of the project, as I wanted to make sure that if anything, I undercut the hole so that I wasn’t trying to fill any extra space in if I cut it too large. With the painter’s tape in place, I used the honeycomb print in the dash plastic to make sure the Dremel cut was level and even.
After the 2”x4” hole was cut I used a file to get the edges even and less rough, then did a few test fittings to make sure the switch panel itself would fit exceptionally snugly, which it did after a couple adjustments to the plastic of the dash. At this point I ran the 7-strand sprinkler wire harness through the Jeep and began plugging the crimp connections onto the switch panel to create the final product, leaving the +12v lead for the ignition lights coiled above the dash panel for me to work with at a later date.
 |  |
 | 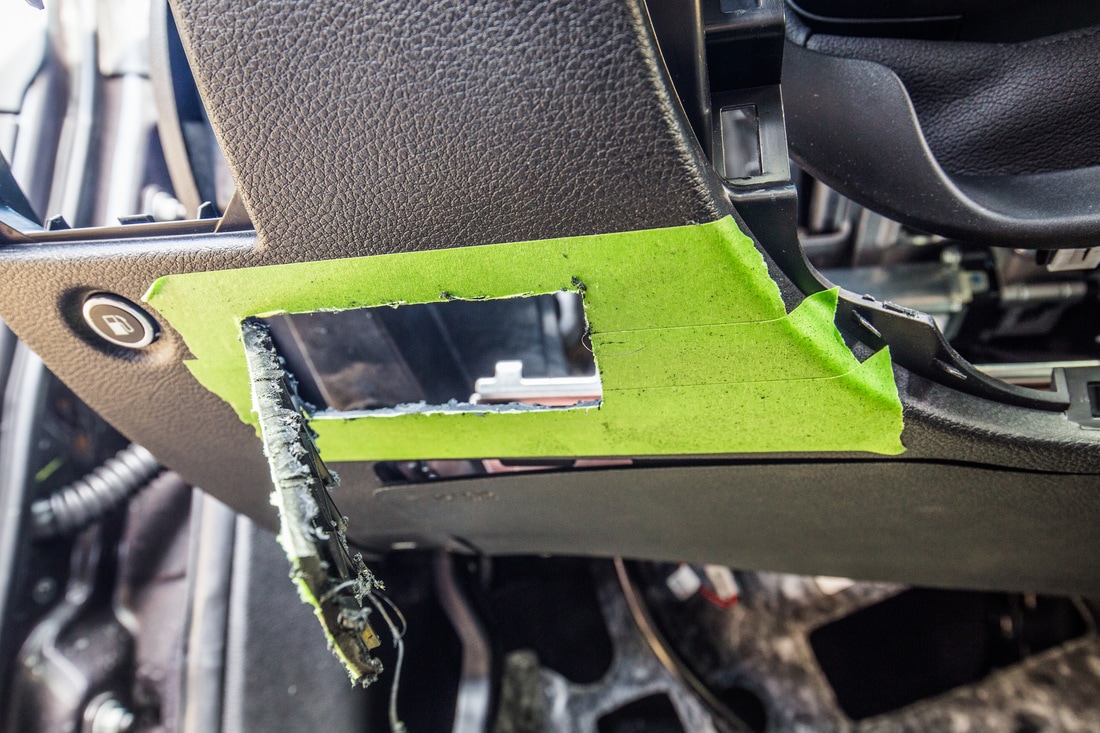 |
After the 2”x4” hole was cut I used a file to get the edges even and less rough, then did a few test fittings to make sure the switch panel itself would fit exceptionally snugly, which it did after a couple adjustments to the plastic of the dash. At this point I ran the 7-strand sprinkler wire harness through the Jeep and began plugging the crimp connections onto the switch panel to create the final product, leaving the +12v lead for the ignition lights coiled above the dash panel for me to work with at a later date.
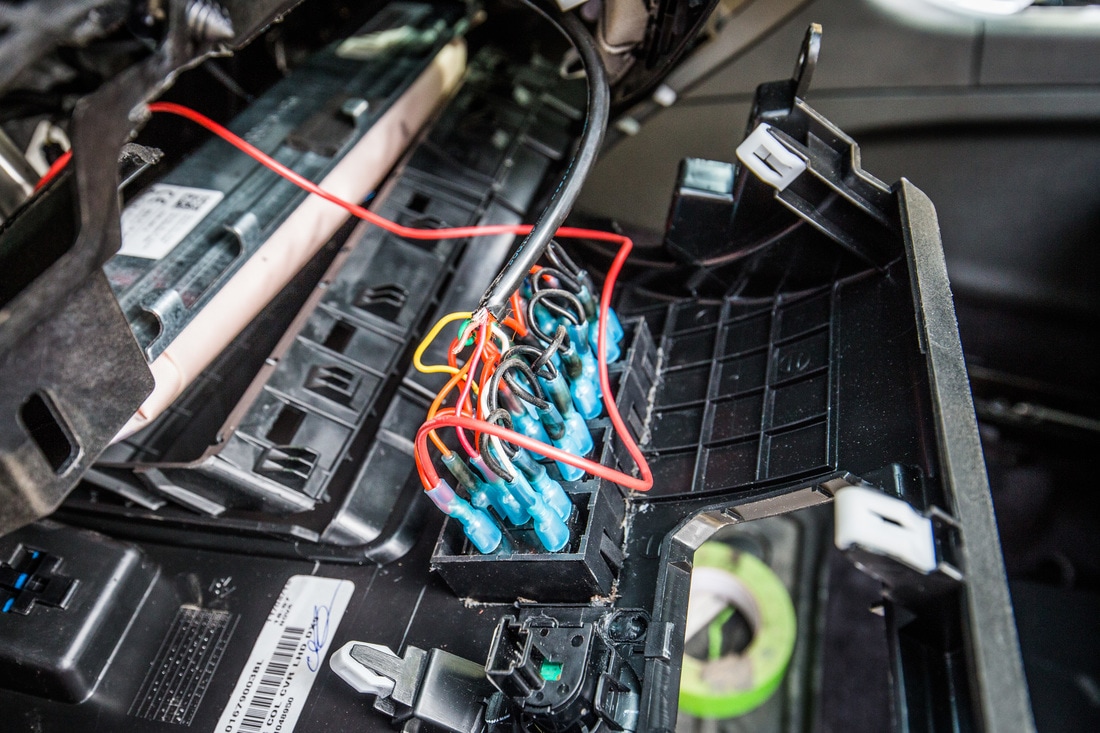

I reassembled the harnesses for the headlights and fuel tank, then began piecing the dashboard back together by reversing the above disassembly procedures. Once everything was back together (note the green tape on the air bag panel that I’ll glue back together), I ran the 18-7 wire harness through the trim pieces along the driver’s doorsill, back behind the B-Pillar, and up to the rear bench. I’ve yet to decide where the actual control box for this will live, so at the moment the remaining 10-feet of loom is spooled under the rear bench until I get around to the final assembly of the control box and relays.
So that’s that… the incredibly nervous process of putting a gigantic hole in the dashboard of a brand new vehicle. I don’t know how the XOverland guys do this all the time, but here I am one step closer to getting this Trailhawk to where I want it to be!
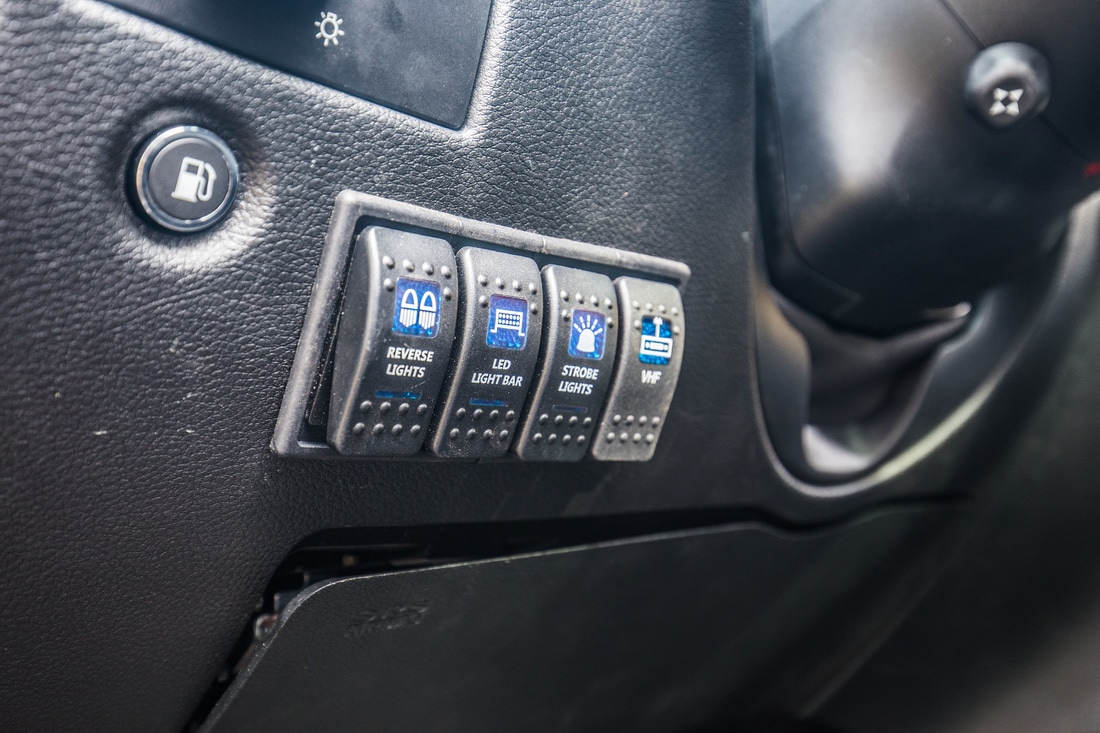
Final install picture once everything was re-assembled, which I'll replace once the air bag panel has been fixed.
So that’s that… the incredibly nervous process of putting a gigantic hole in the dashboard of a brand new vehicle. I don’t know how the XOverland guys do this all the time, but here I am one step closer to getting this Trailhawk to where I want it to be!
Final install picture once everything was re-assembled, which I'll replace once the air bag panel has been fixed.