2180miles
  • Home
  • Adventure Blog
  • Overland
    • Meet The Jeep
    • Mods & Installs
    • Overland Gear
    • Trip Reports & Videos >
      • Allagash Winter 2019
      • Greece Adventures 2019
      • Overland Expo East 2018
      • Allagash Wilderness 2018
      • Trans-Canada Overland 2017
      • QB-5 Adventure 2017
  • Long Trail
    • Trip Summary
    • Photojournal
    • Hike Statistics
  • Appalachian Trail
    • Trip Summary
    • Photojournal
    • Gear Talk
    • Hike Statistics
    • Financial Planning
  • Bicycling America
    • Trip Summary
    • Photojournal

Torro Offroad's SkyLux RTT

12/3/2019

11 Comments

 
Picture
FEBRUARY 2021 UPDATE:

After a year since first receiving my SkyLux, I can no longer recommend Torro Offroad. While the product has been great, I have seen far too many people struggle to receive their orders, struggle to get good customer service, and struggle to receive all the necessary parts when their tents finally arrive. Many people are commenting online that their tent orders take +6 months to arrive depending on when they placed the order. I urge you to do your own research and explore alternative options when searching for your hardshell roof top tent.


In the fall of 2019, I was approached by Corey Johnson, founder and owner of Virginia-based Torro Offroad, about testing out their new SkyLux Roof Top Tent (hereinafter referred to as RTT). It’s always a great privilege to be able to try out products for companies, but Corey immediately was adamant about wanting transparency with my thoughts on the tent given the experience we have with our previous COE Vehicle Solutions tent. His enthusiasm for that kind of feedback made the idea of taking the SkyLux off-road and into the elements that much more exciting to me.
 
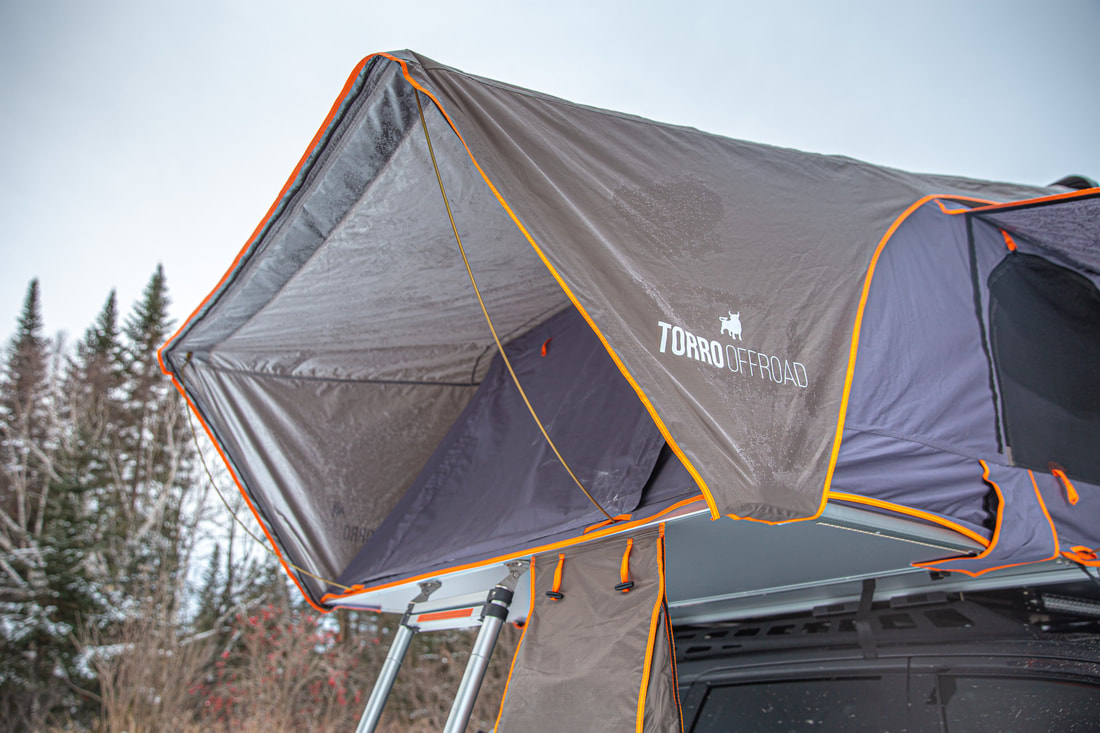
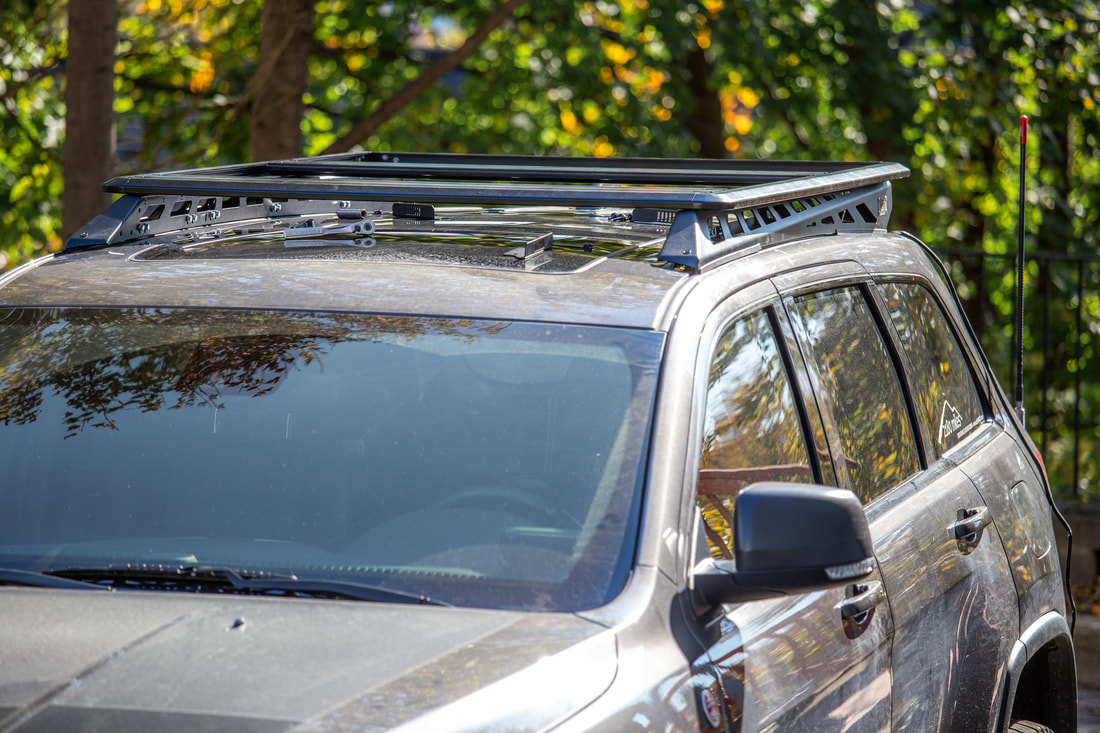
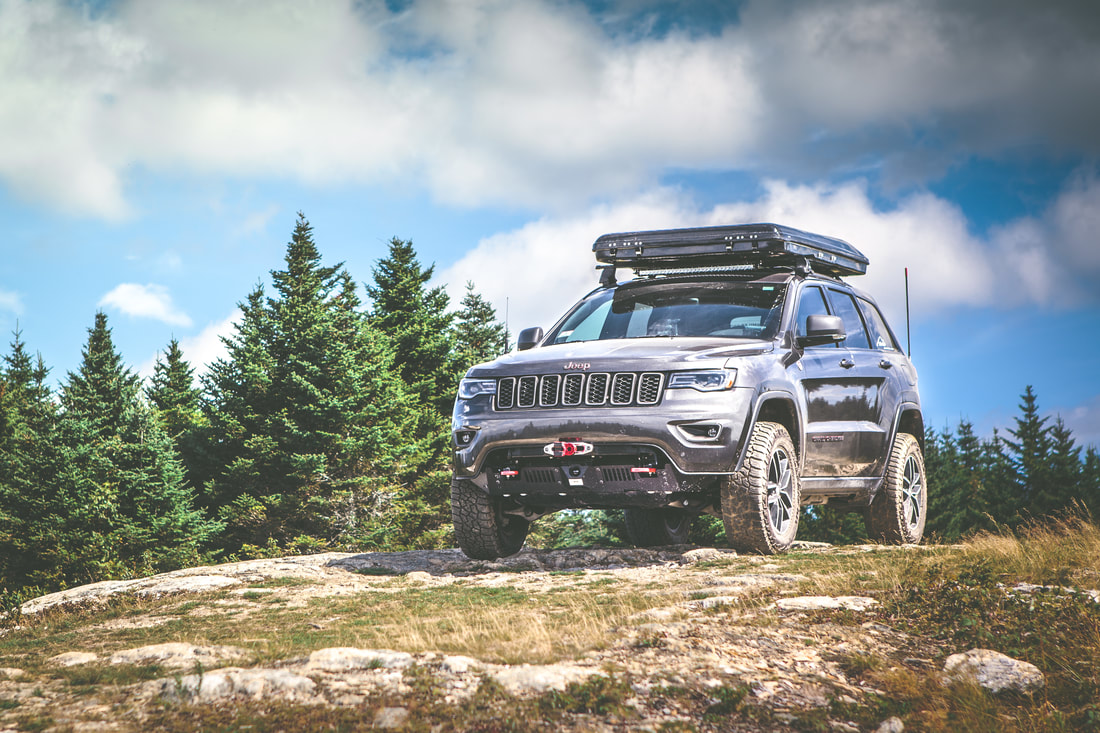
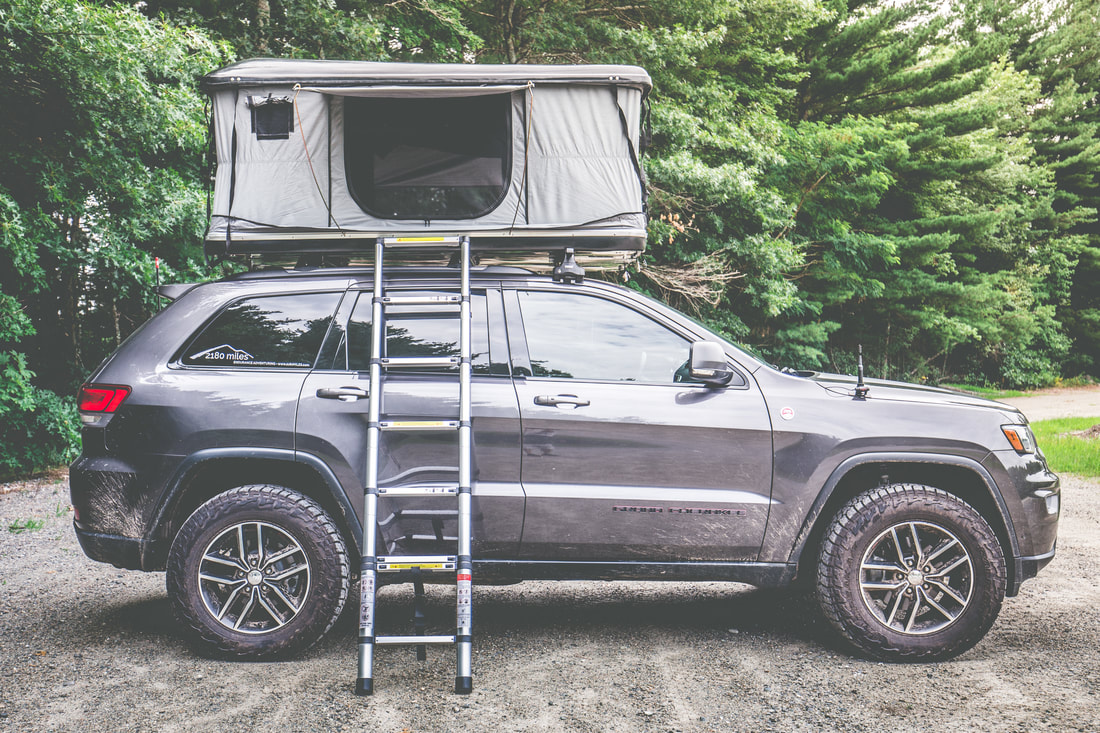
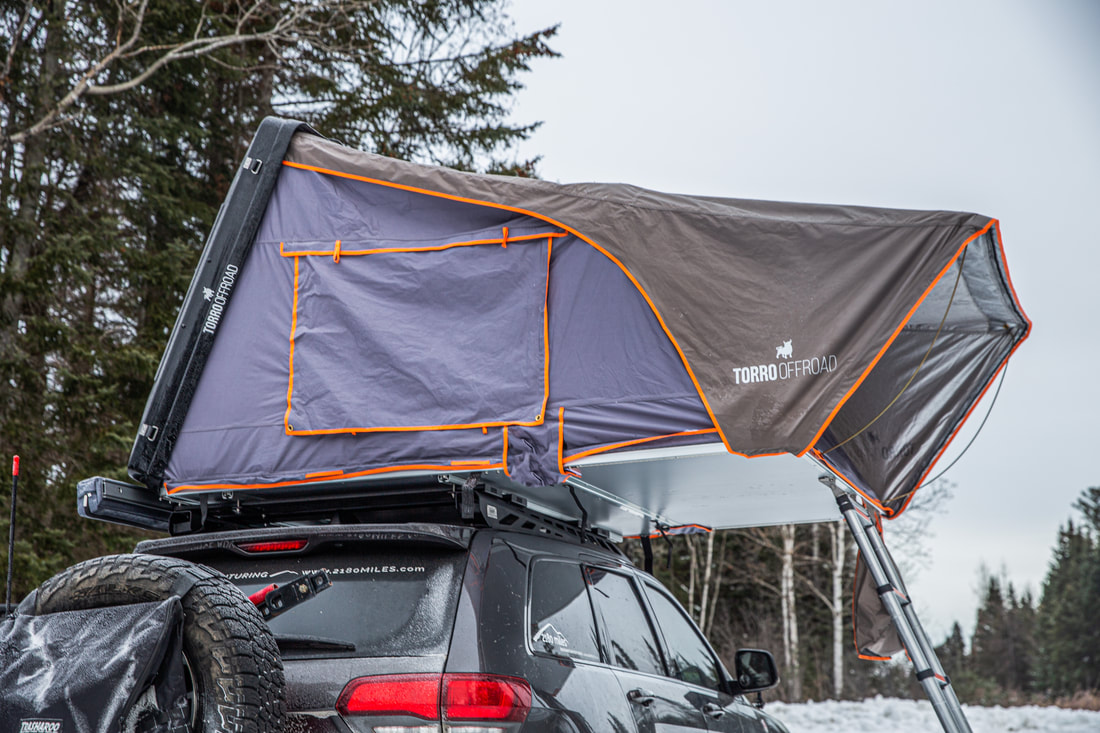
The SkyLux is a hard-shell styled tent that unfolds like traditional “soft” tents in the market. What makes this stand out so much compared to our current tent is that it doubles the sleeping space, up from a twin size bed to a king size, integrates an overhang from the elements, comes with a winter insulation kit, and even has integrated LED lights both inside and out for nights at campsites. All in all, a great lineup of features that our current tent (and many other tents, for that matter) simply don’t offer.
​
Picture
Picture

Unboxing & Installation

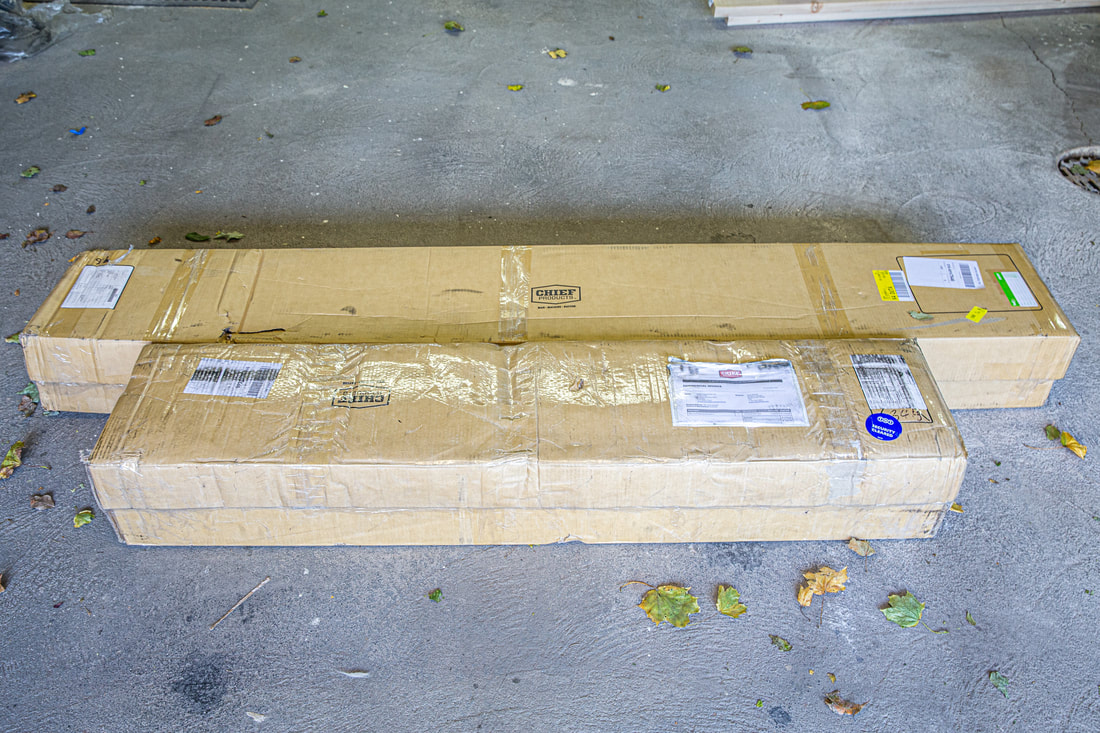
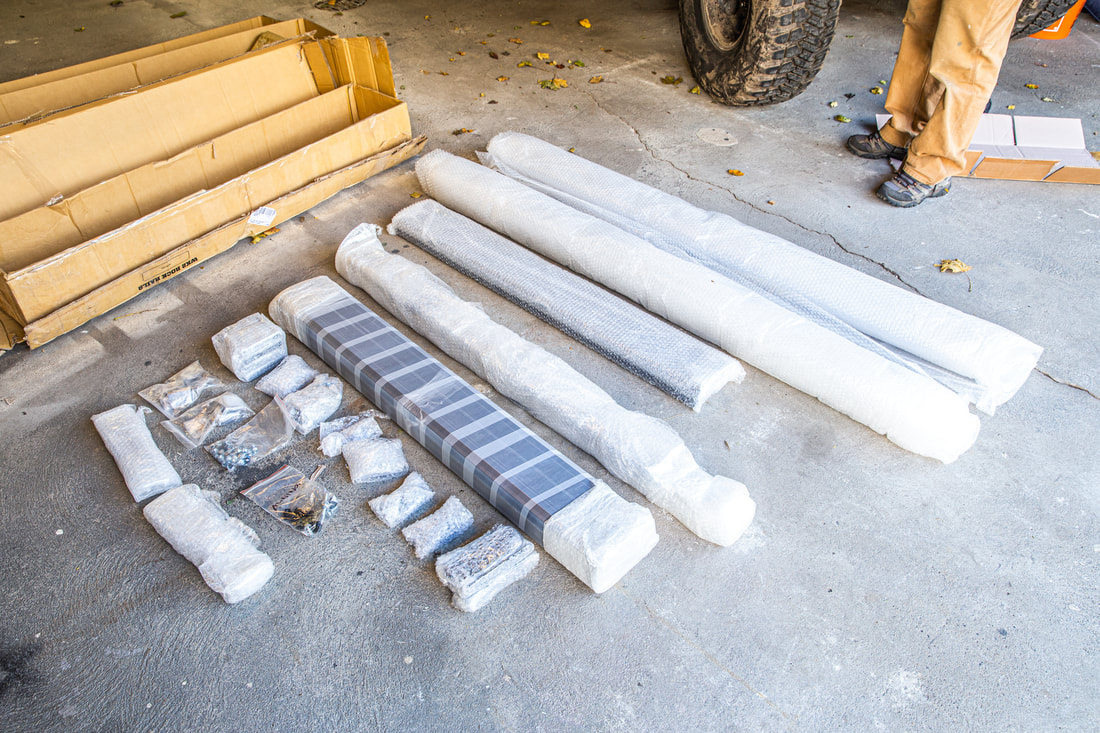
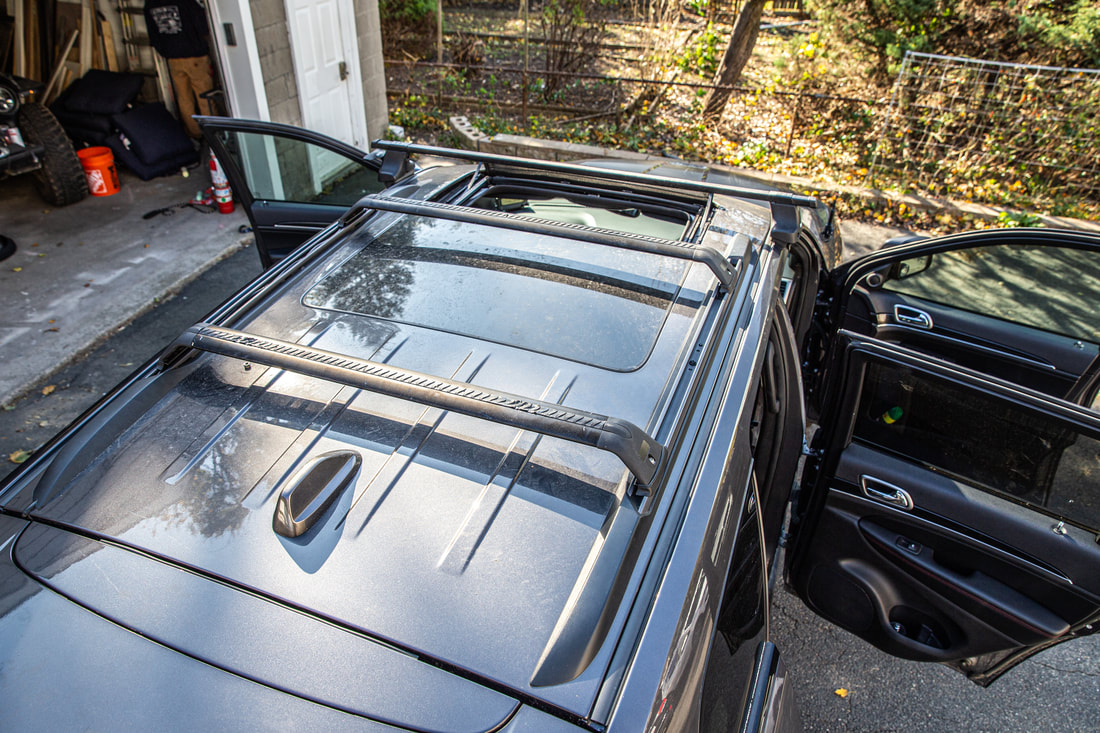
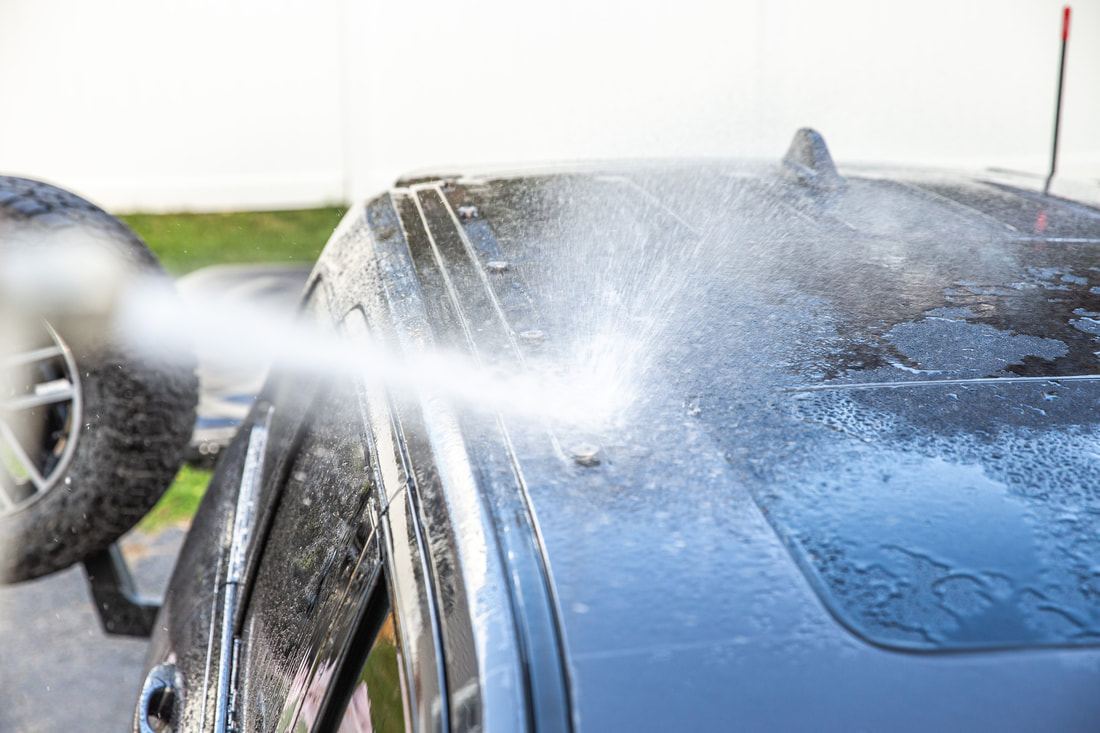
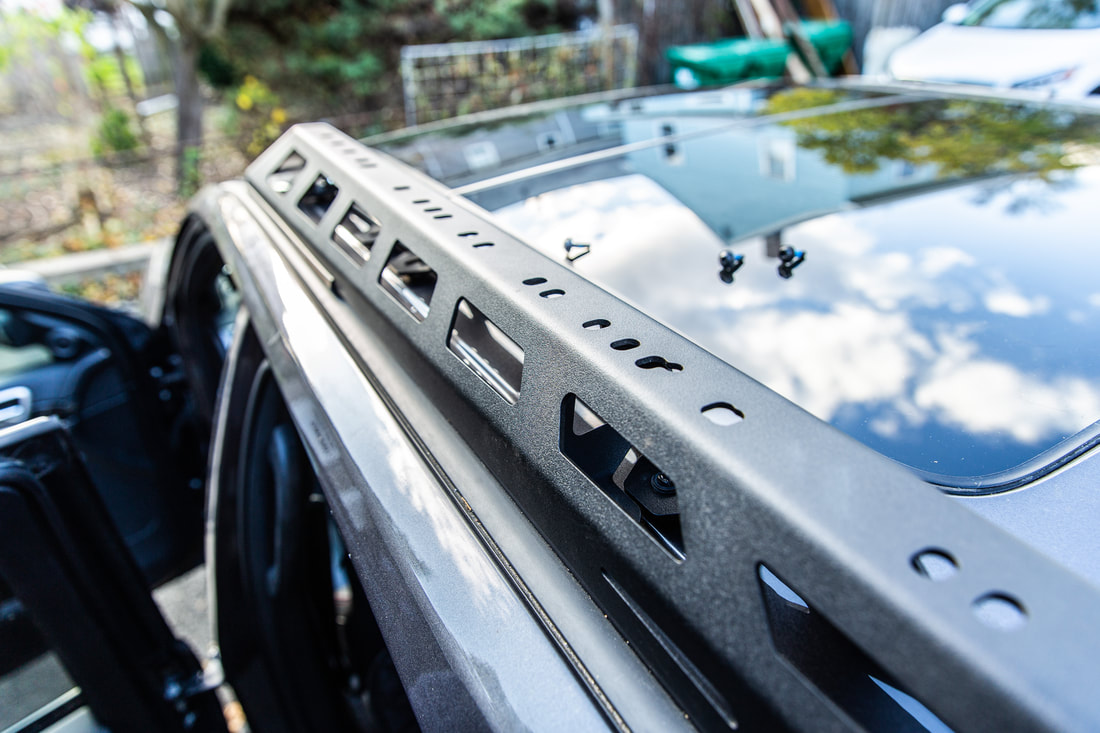
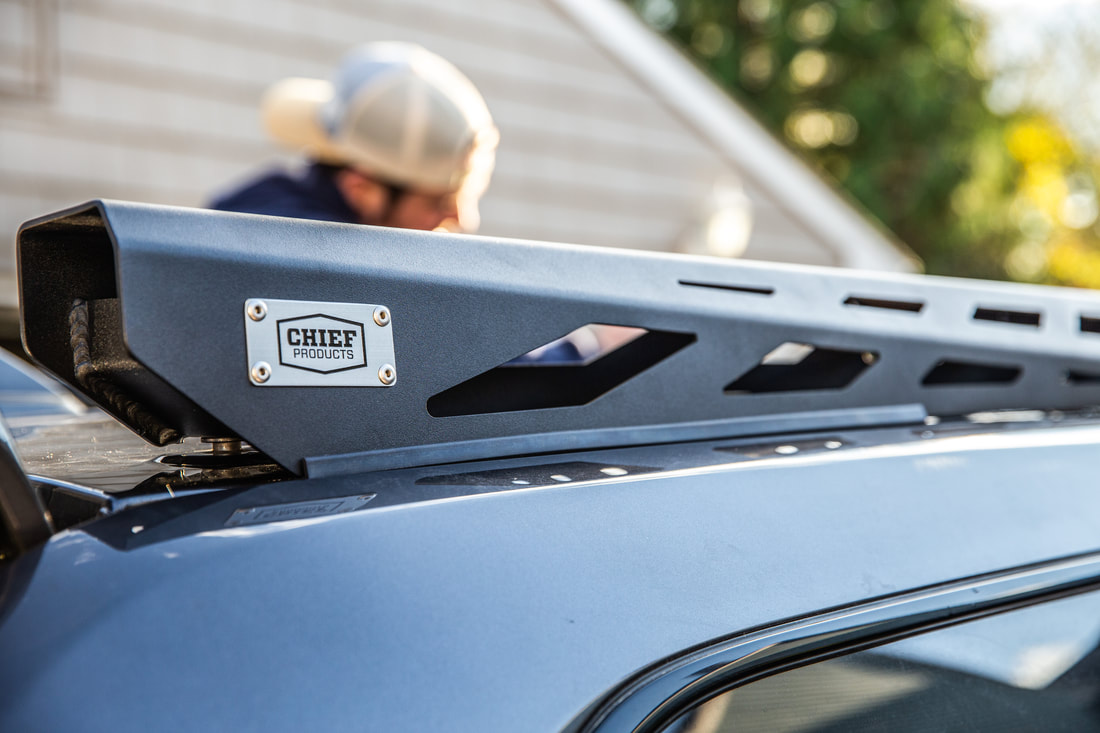
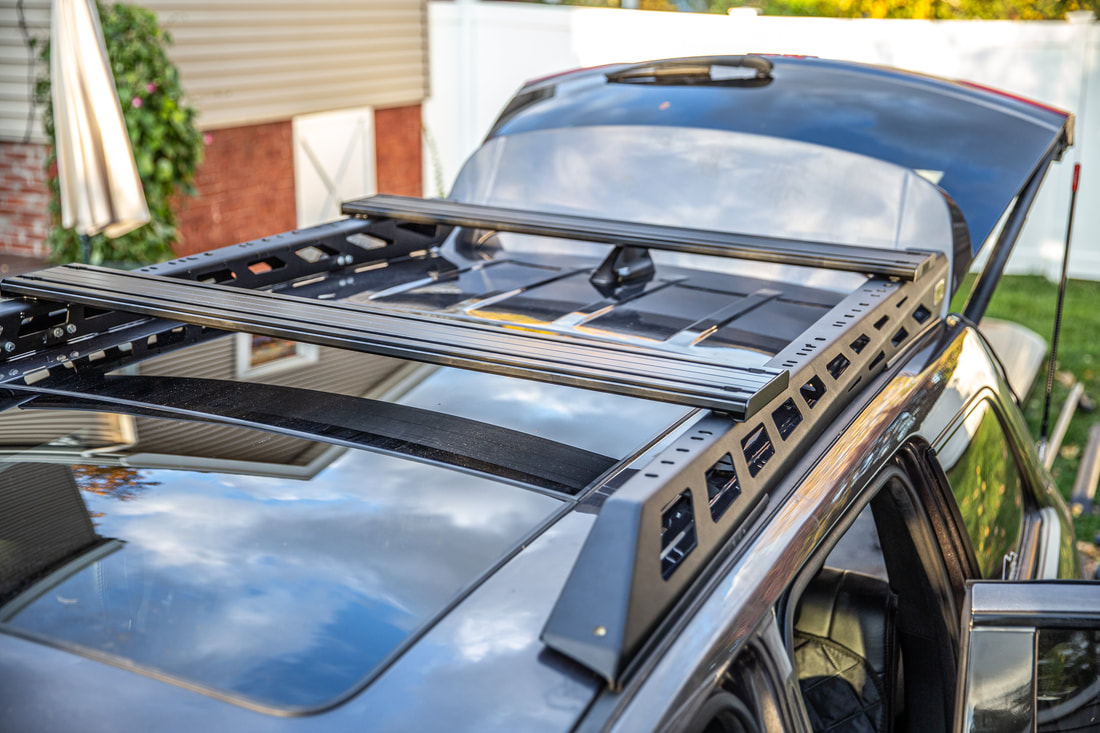
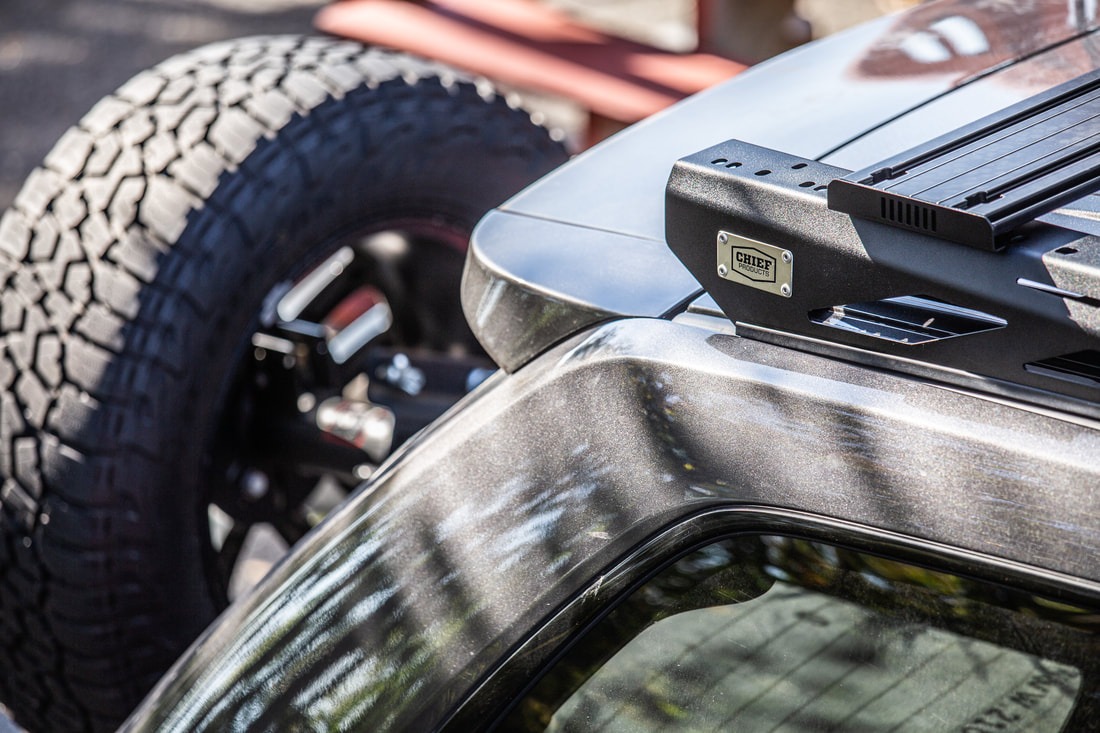
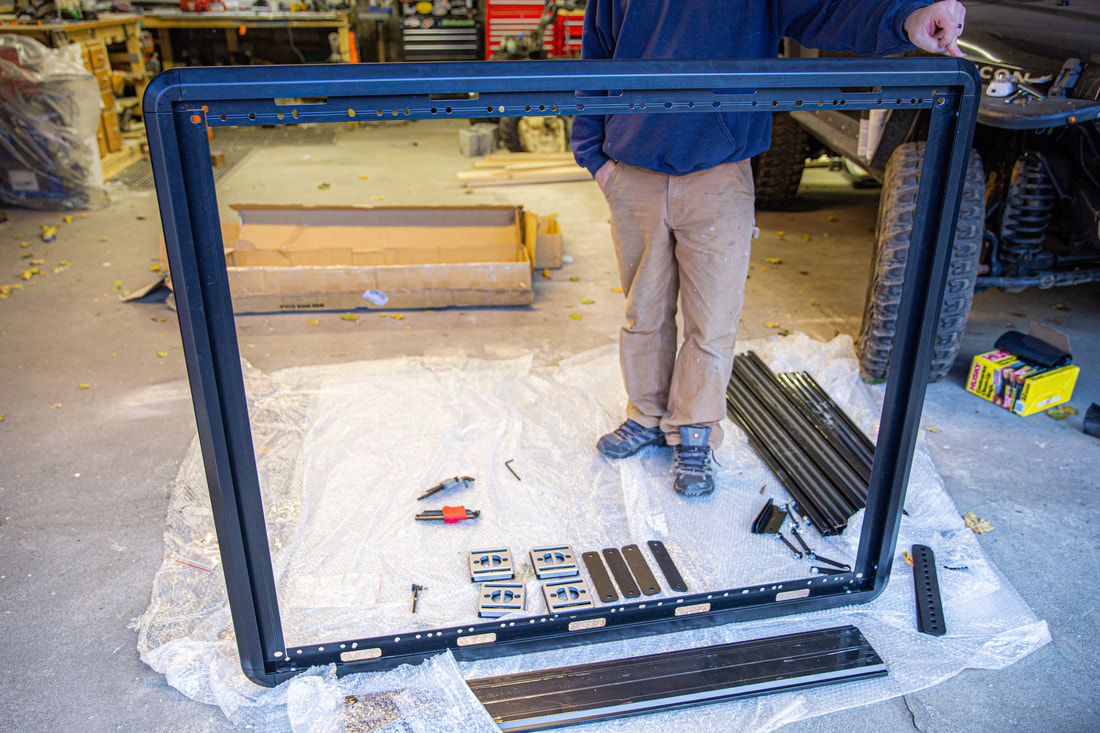
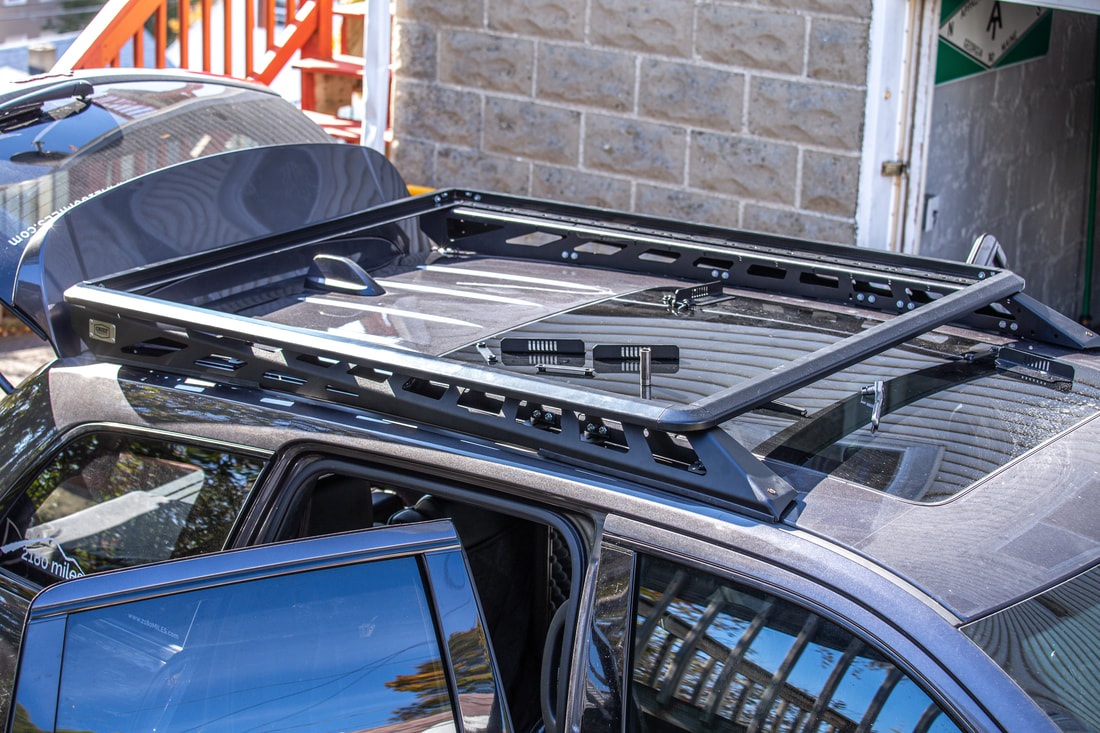
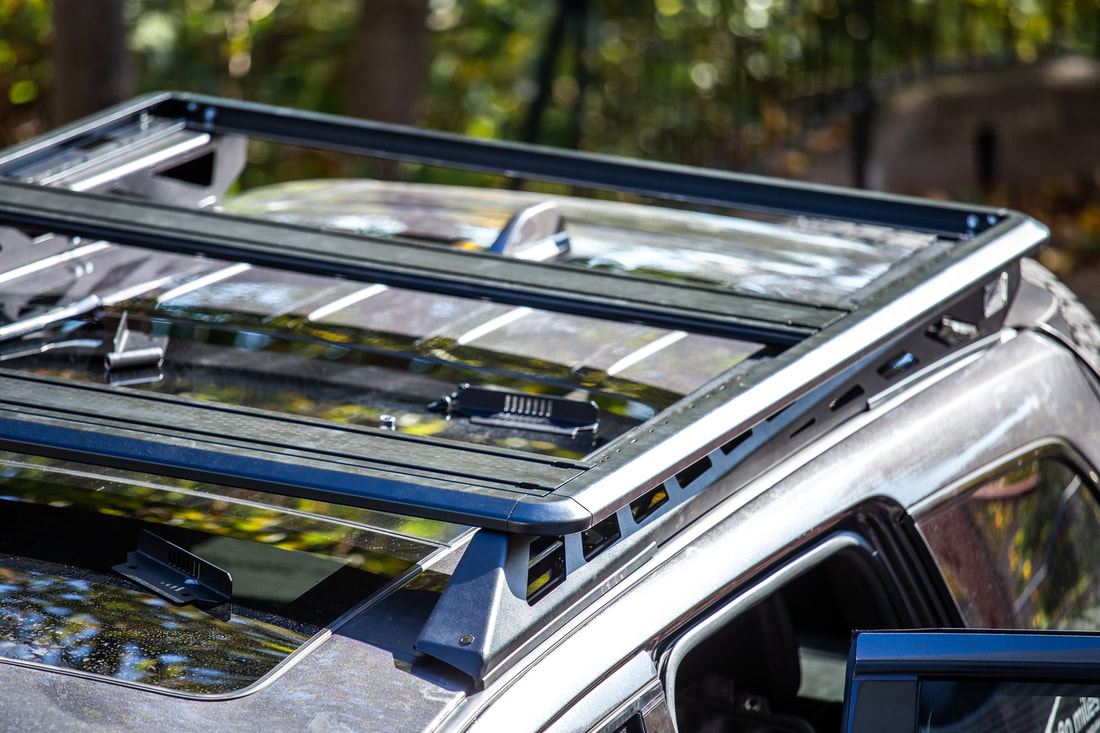
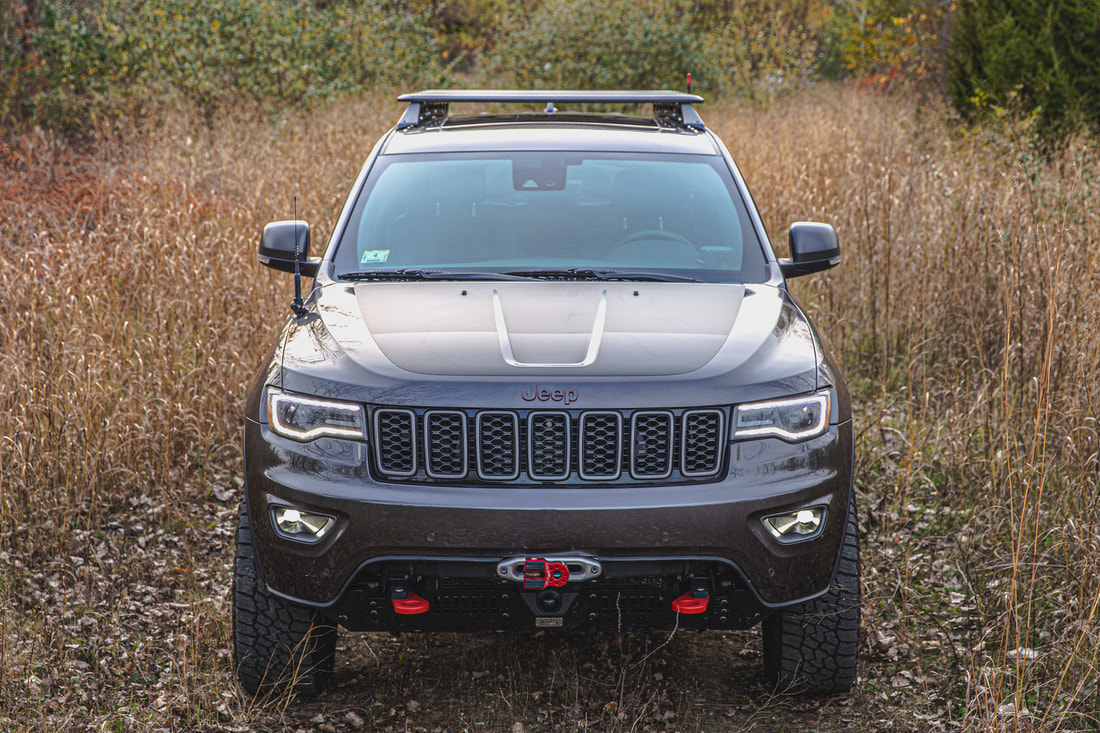
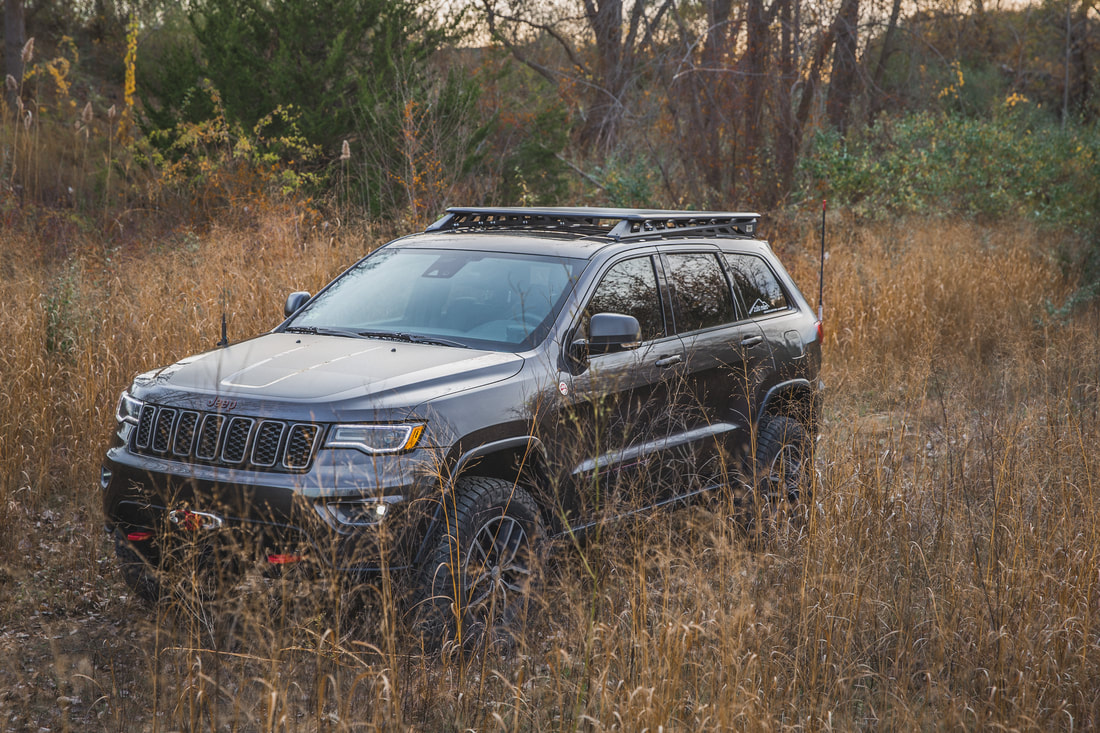
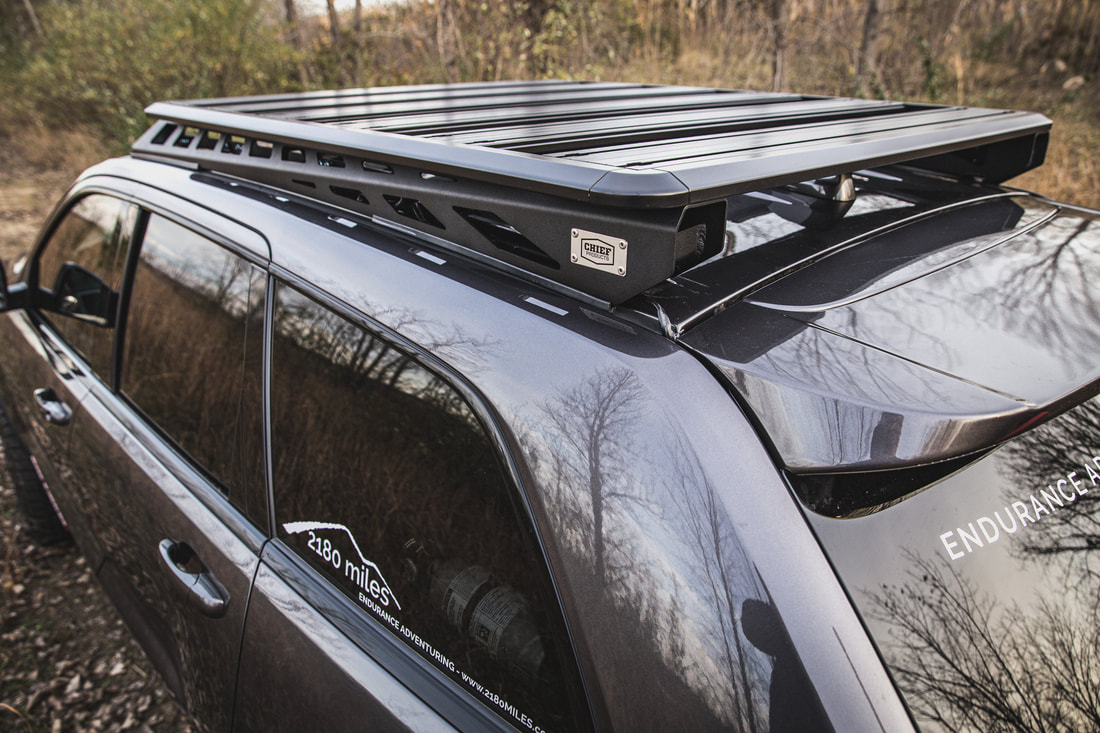
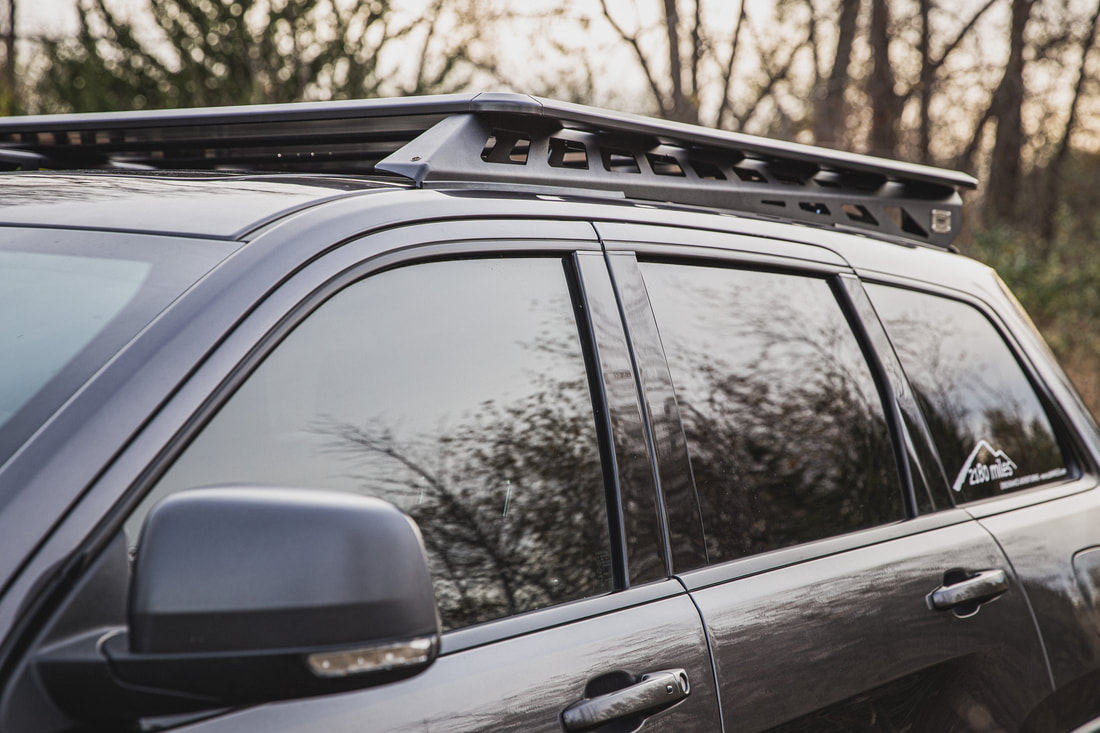
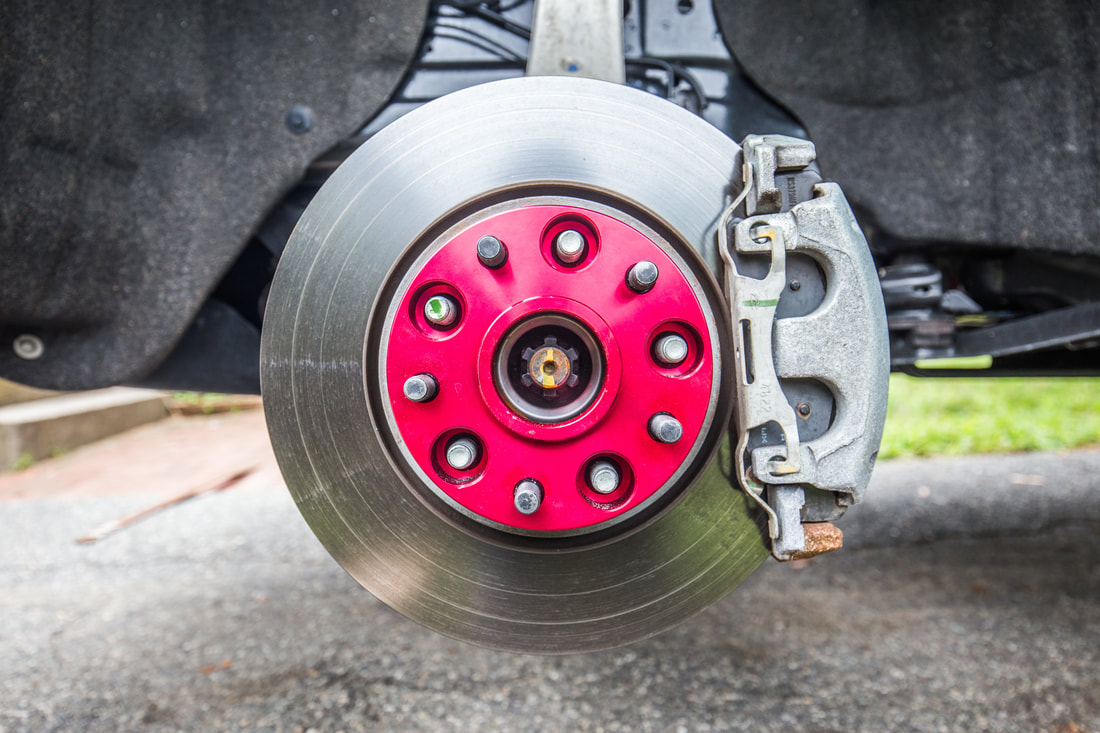
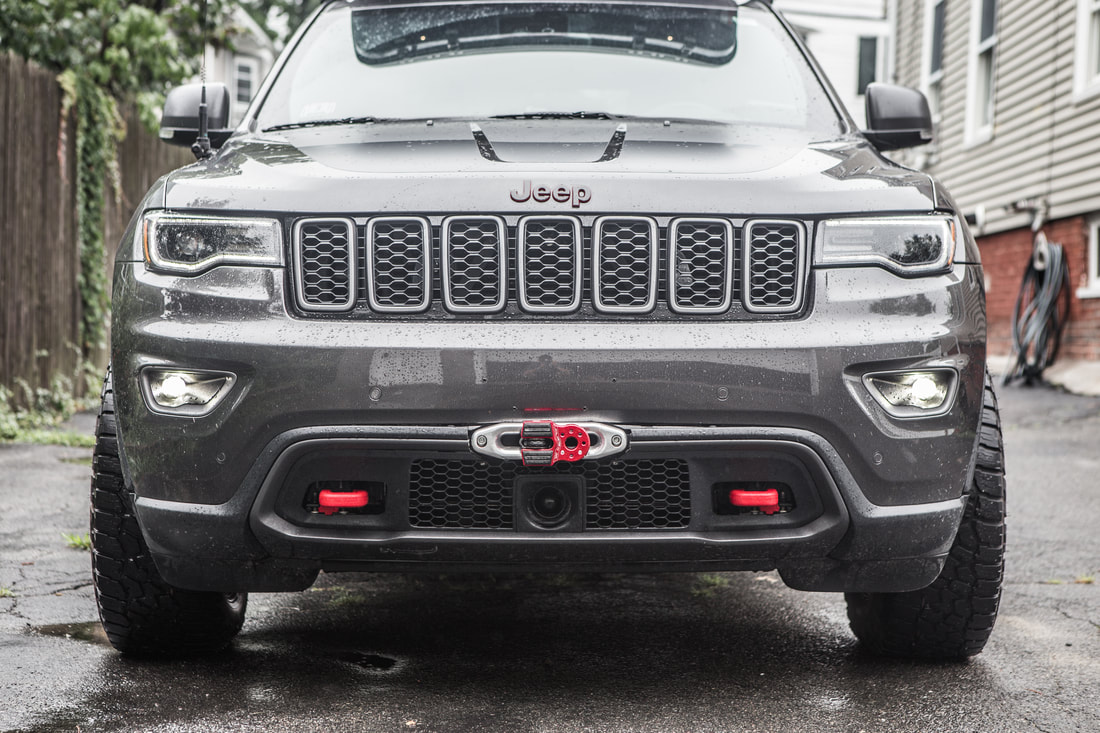
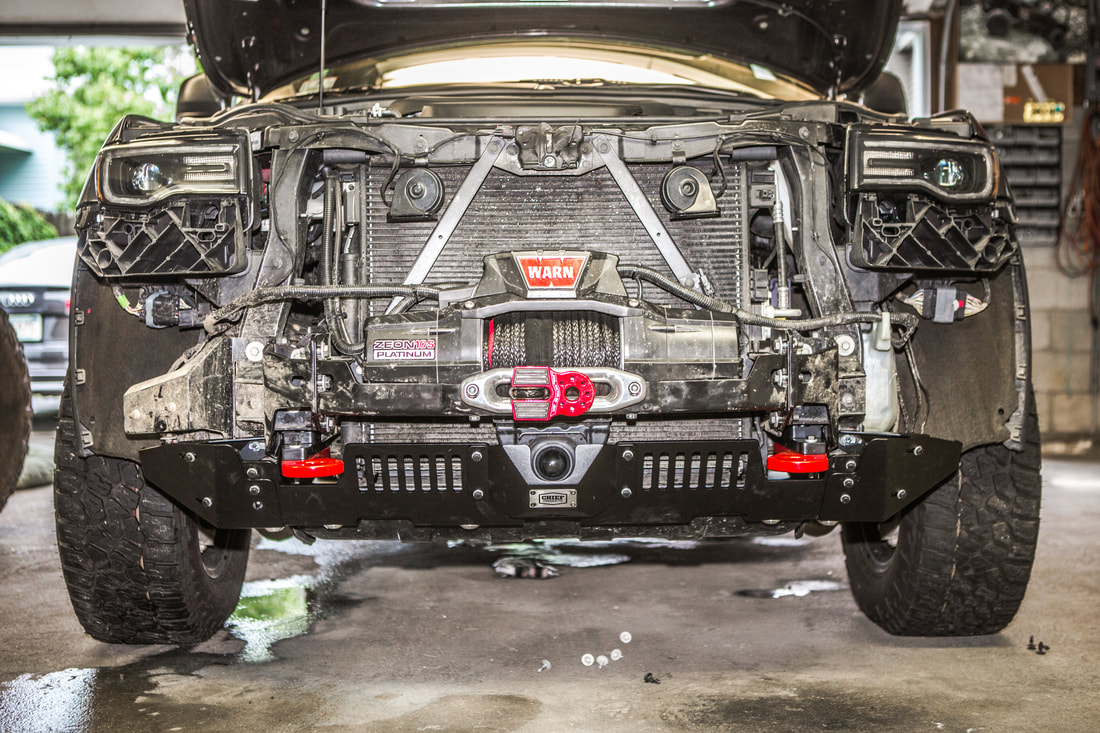
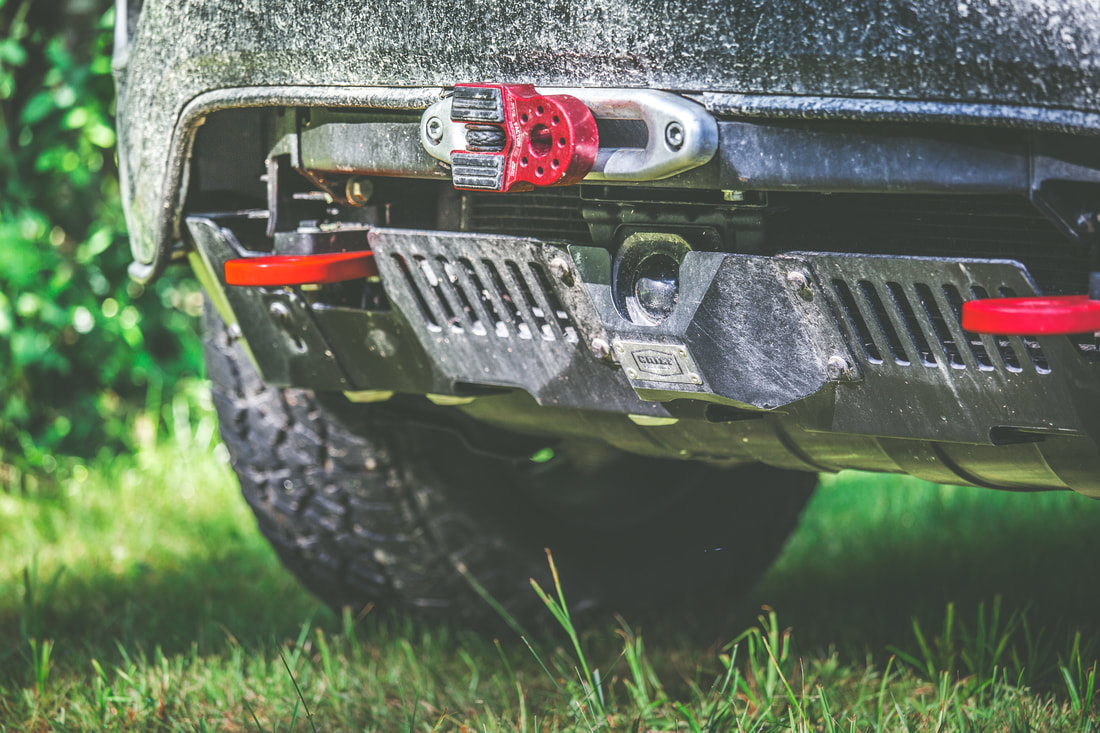
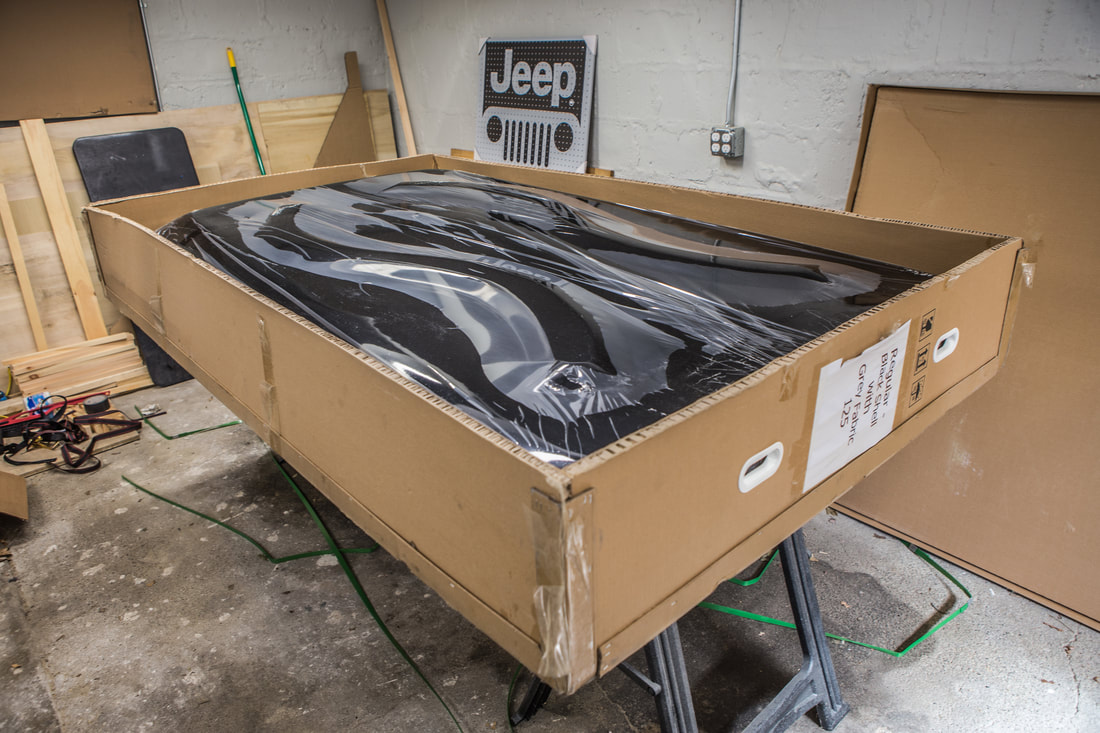
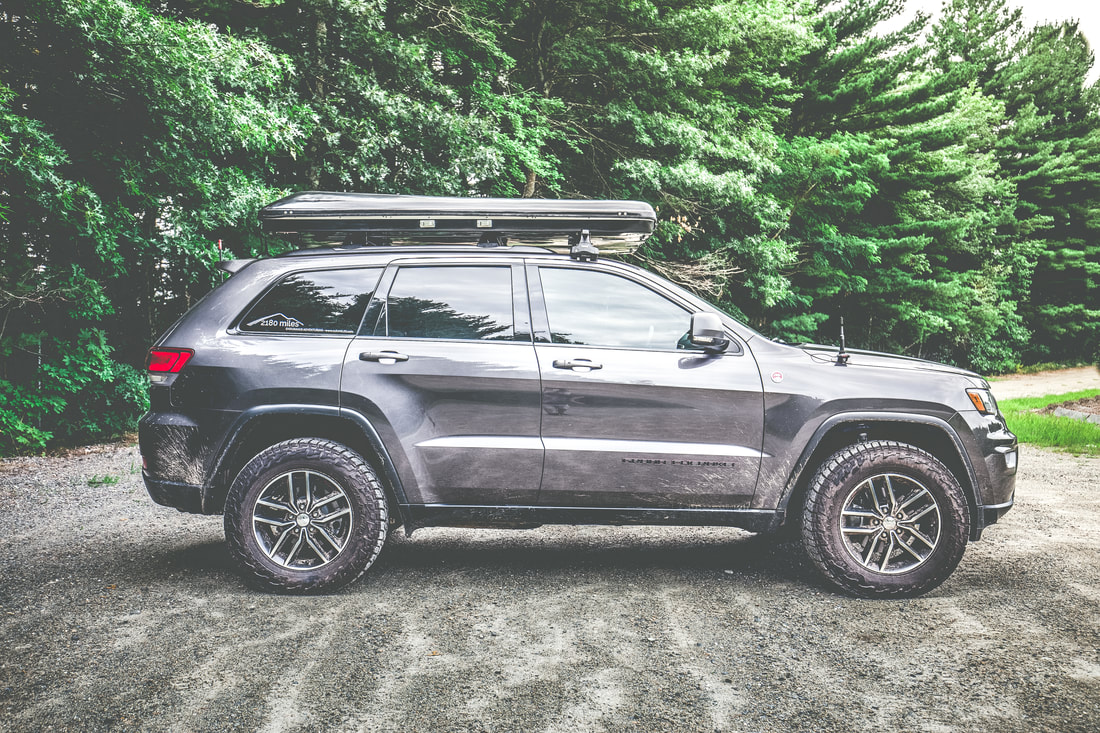
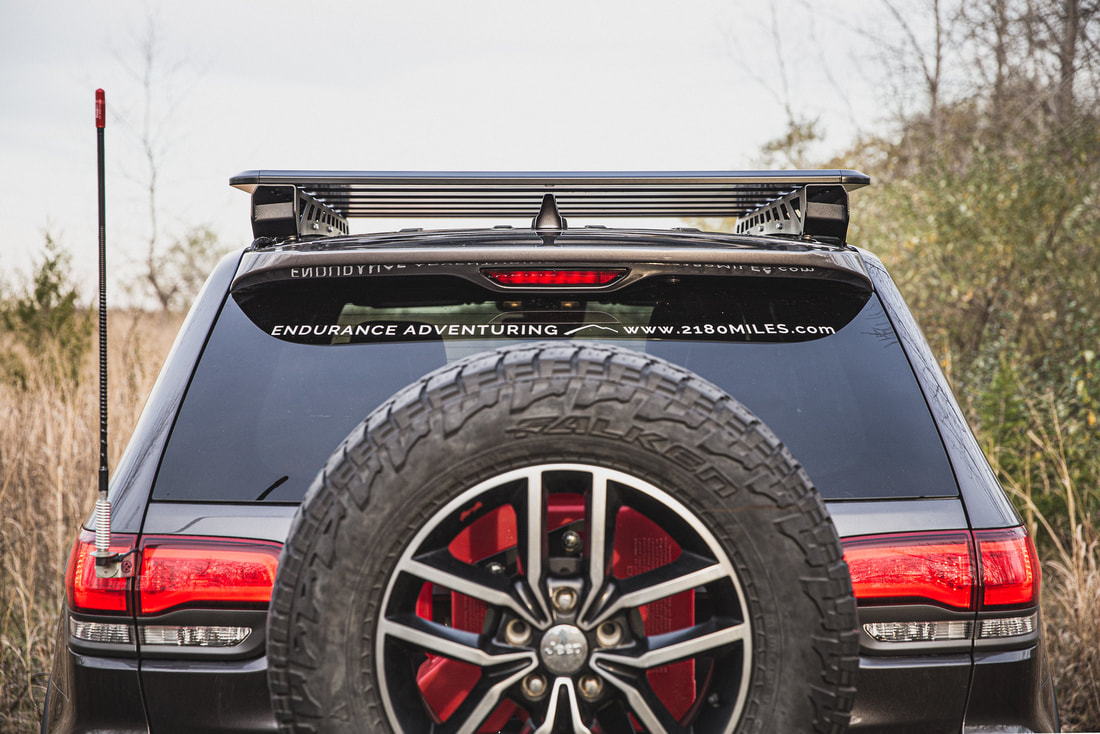
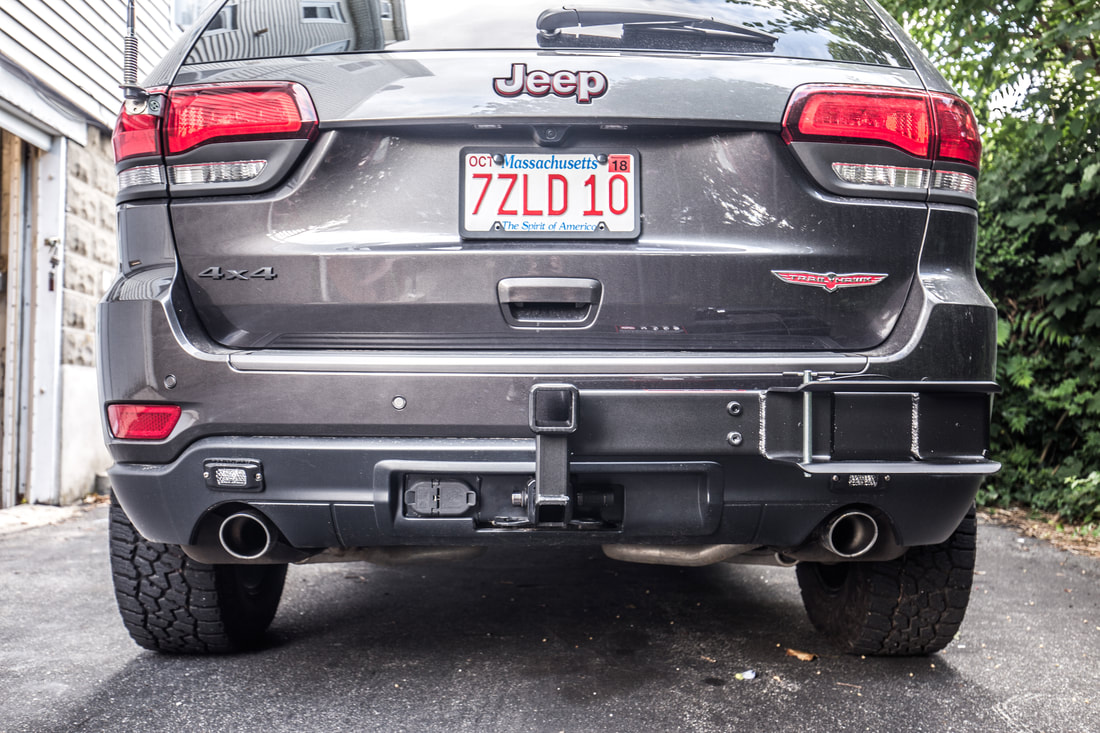
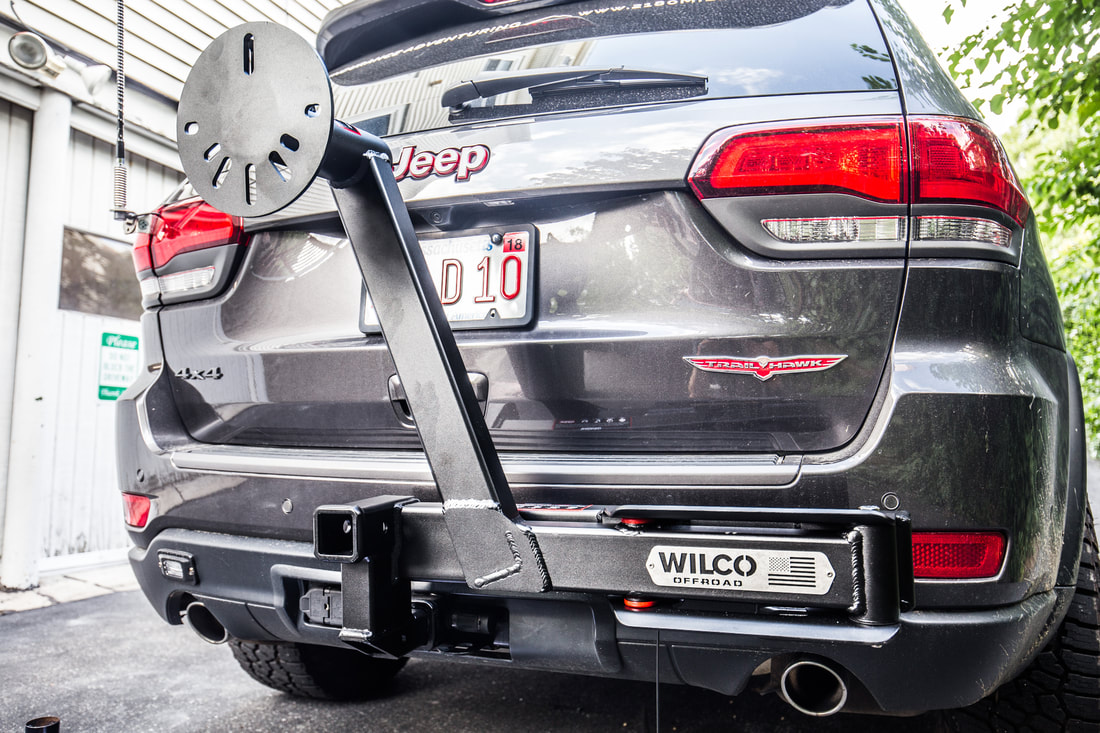
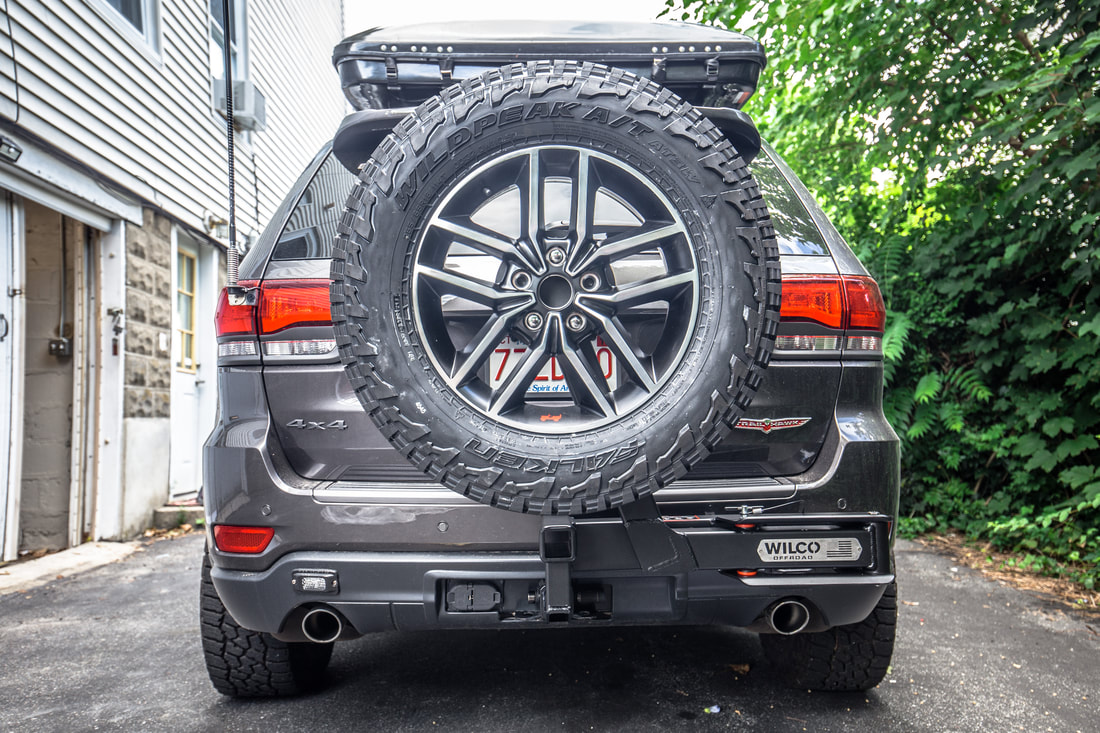
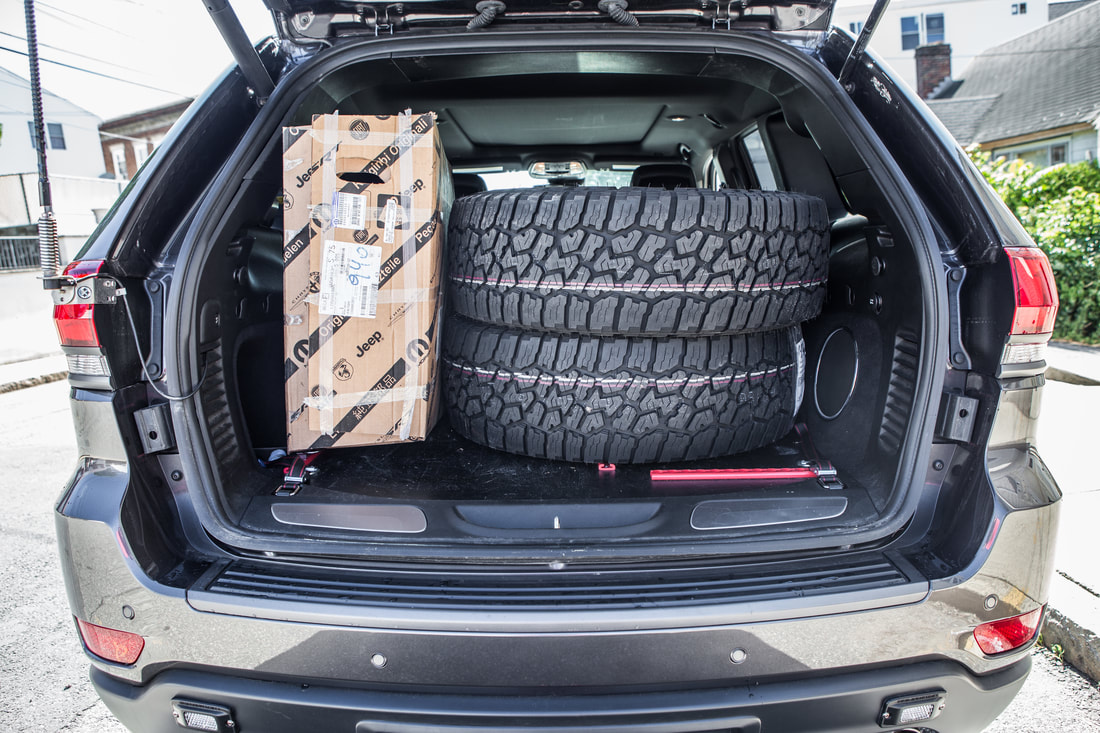
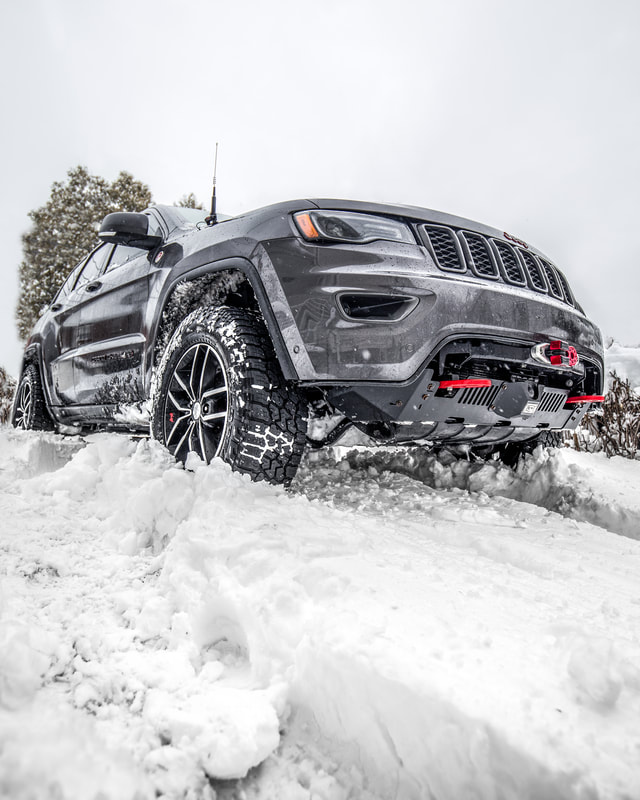
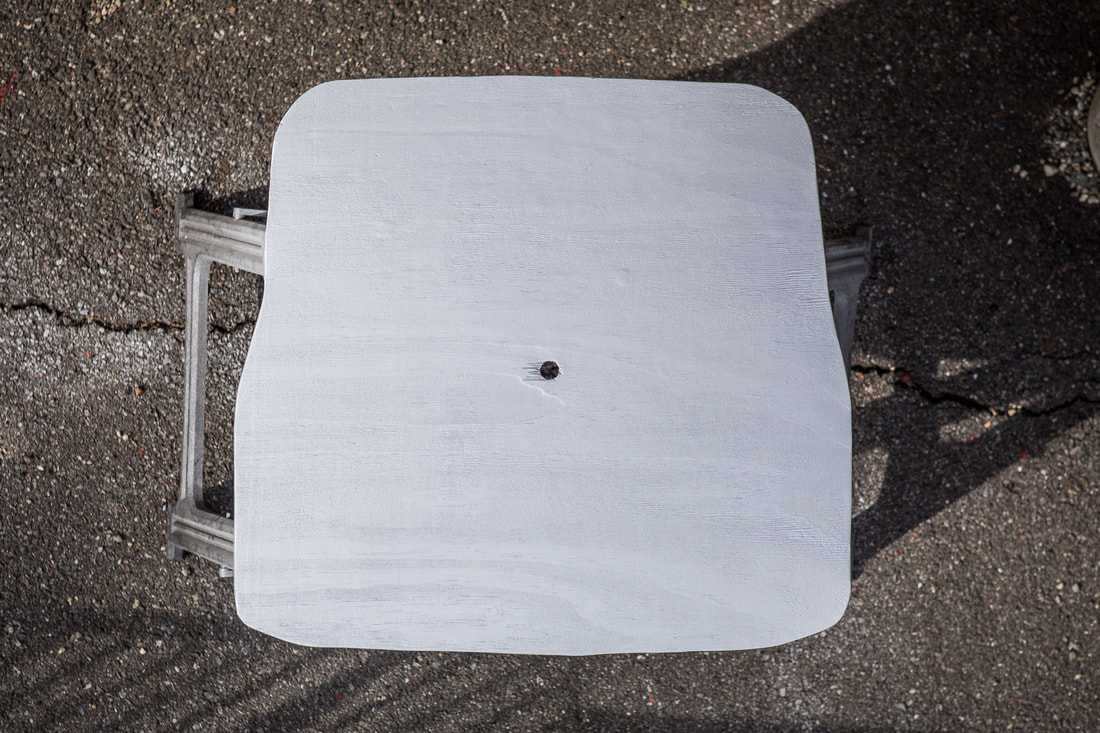
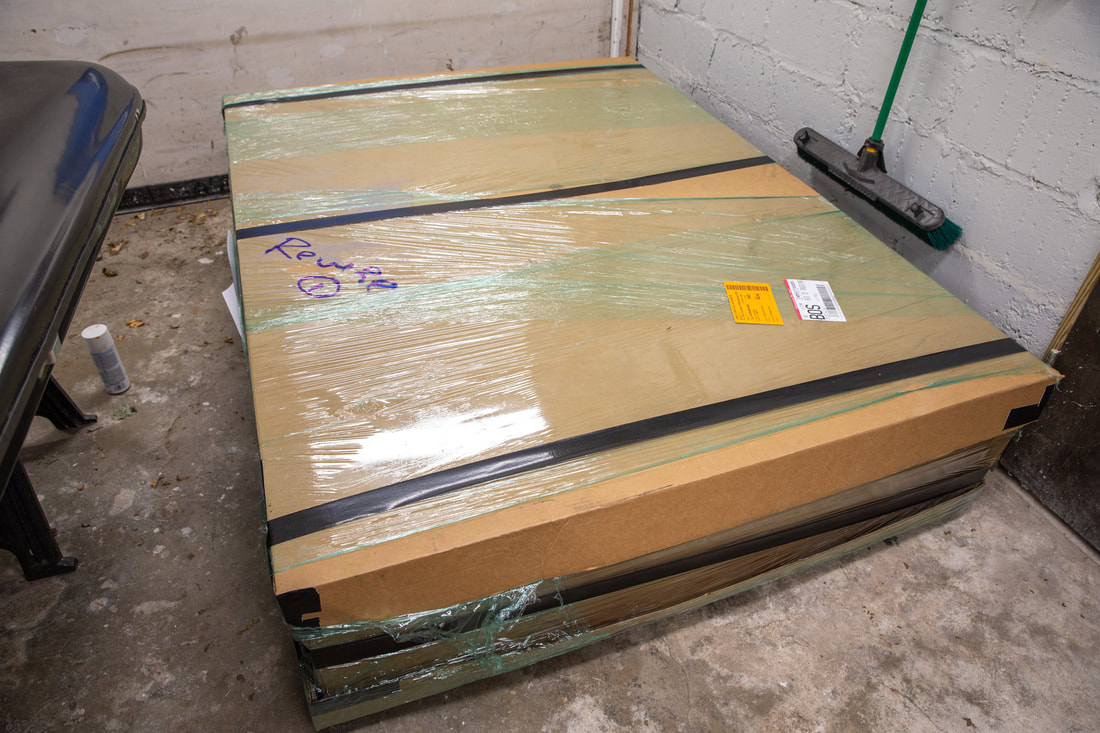
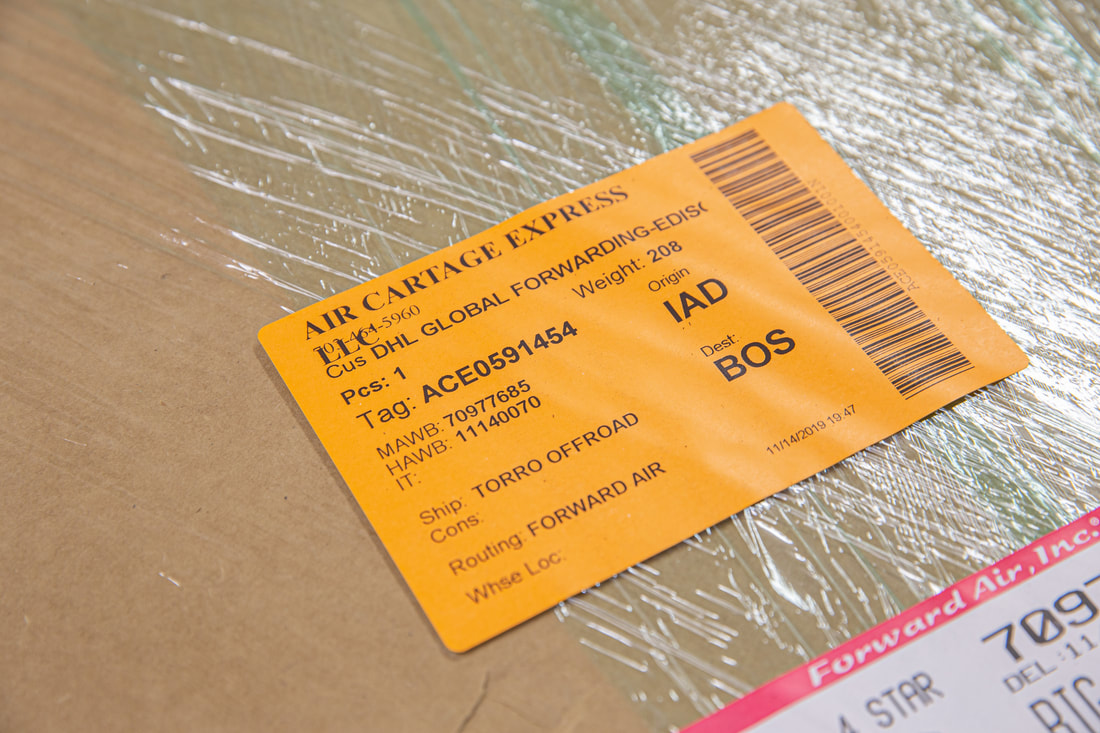
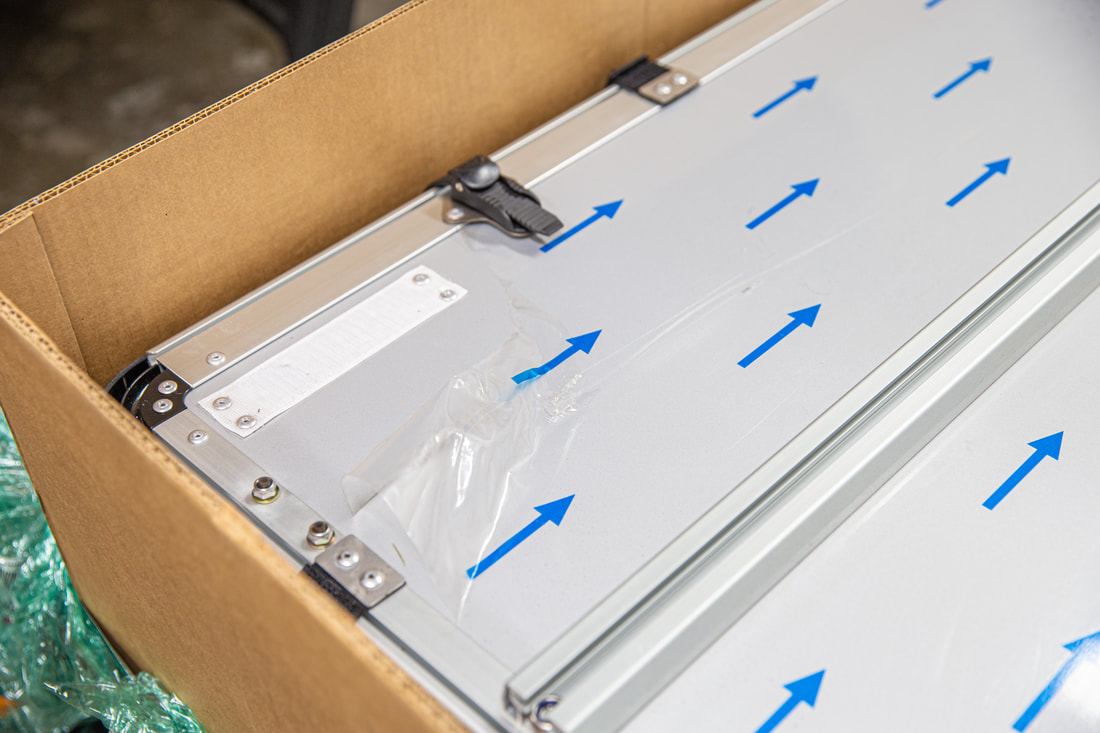
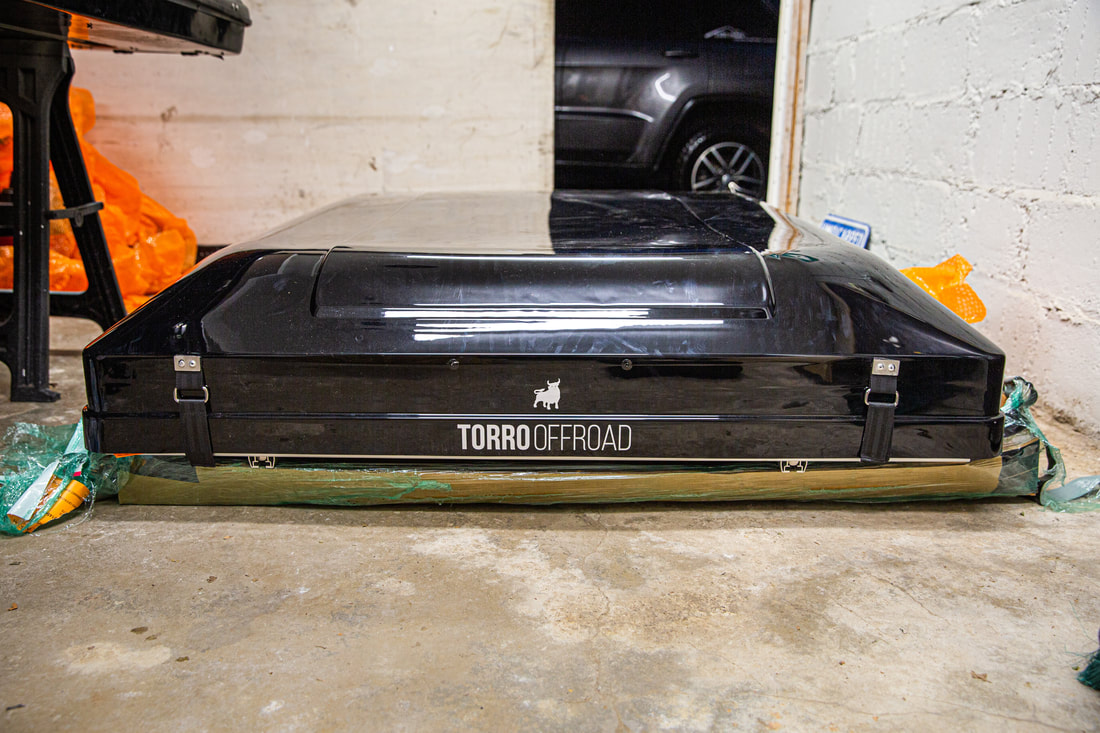
The Torro SkyLux arrived well-packaged in a shipping box alike other items of this size. The delivery company easily moved it around on a pallet and it was dropped inside our garage within a few minutes, safely out of the way of pending inclement weather in the Boston area. My Kershaw knife quickly cut through the packaging material and tape holding everything together, and after moving the large cardboard top piece off and away, I was able to lay my eyes on the sleek silver aluminum frame that comprises the floor of the tent. It came wrapped in a protective plastic which can sometimes be a pain to remove, so I used the tip of my knife’s blade to delicately run down the lengths and edges of the plastic to more easily pull it off. With it removed the underside was completely bare and ready for install, so I flipped the tent over to get a look at it right side up. It weighs in at about 150lbs, which is twenty more than our previous tent, but is comprised of a lot more surface area. I for one would rather know the flooring system is made to support me than to hear it creak every time I move around inside the tent, so the few extra pounds aren’t a huge problem. Chief Product’s new WK2 Roof Rack system is designed to carry over 300lbs dynamic (while in motion) so it’s barely breaking a sweat with the SkyLux up there.
 
Picture
Picture
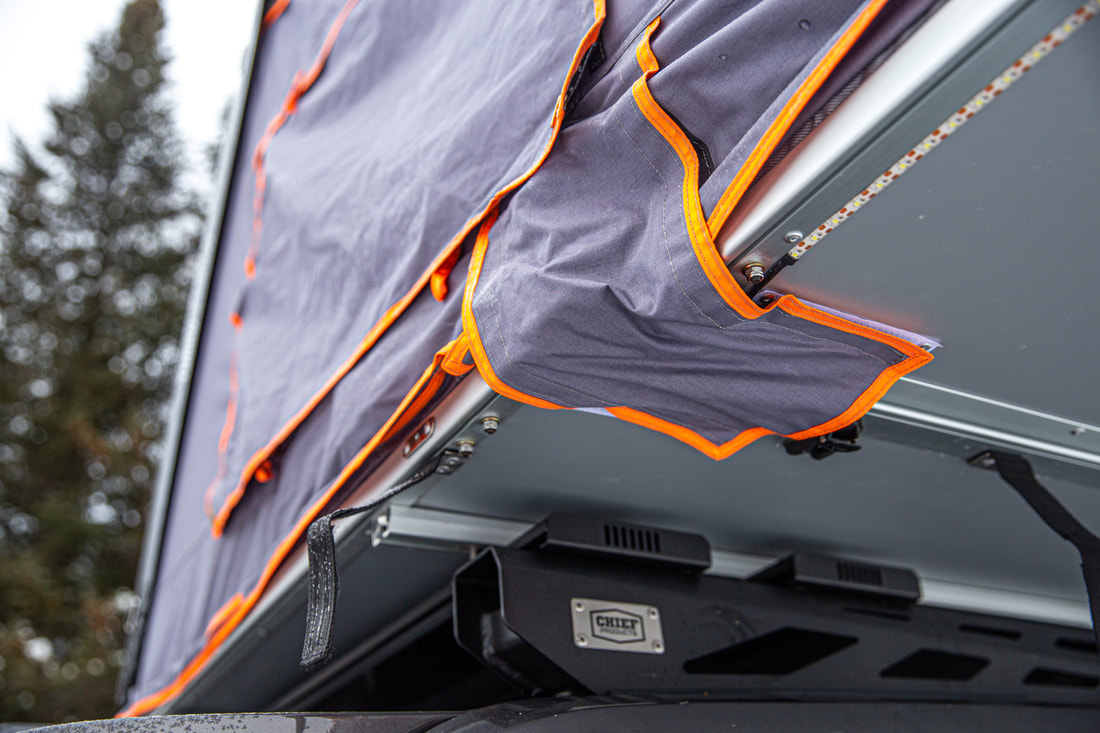
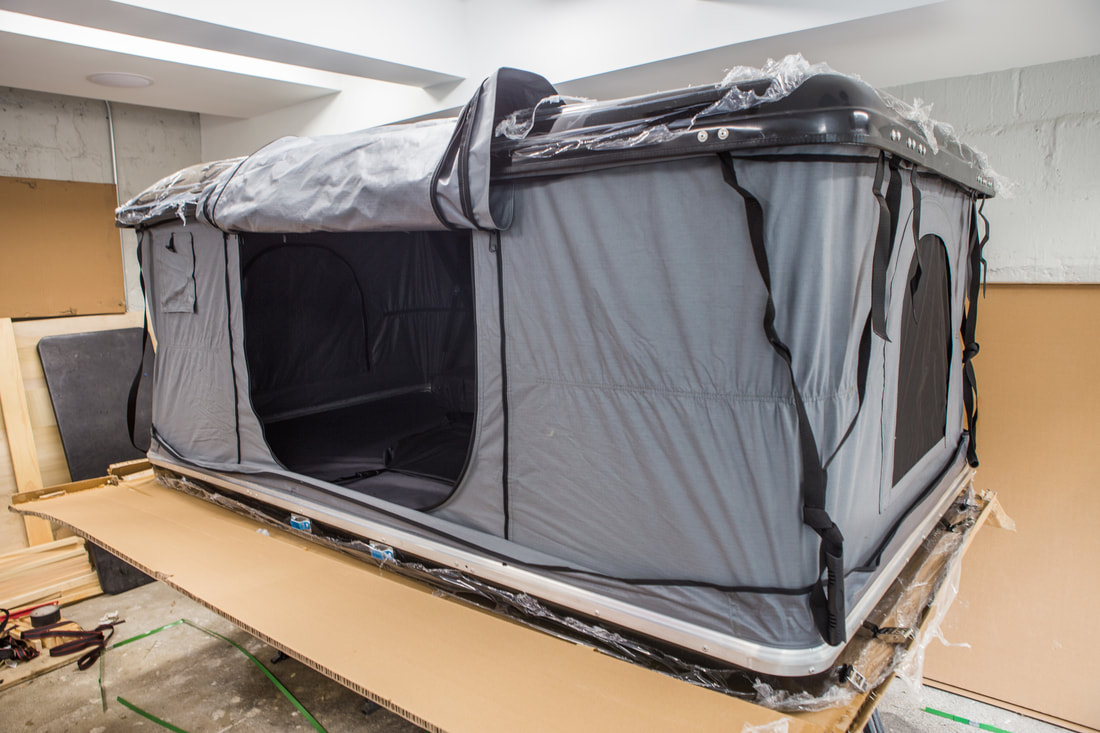
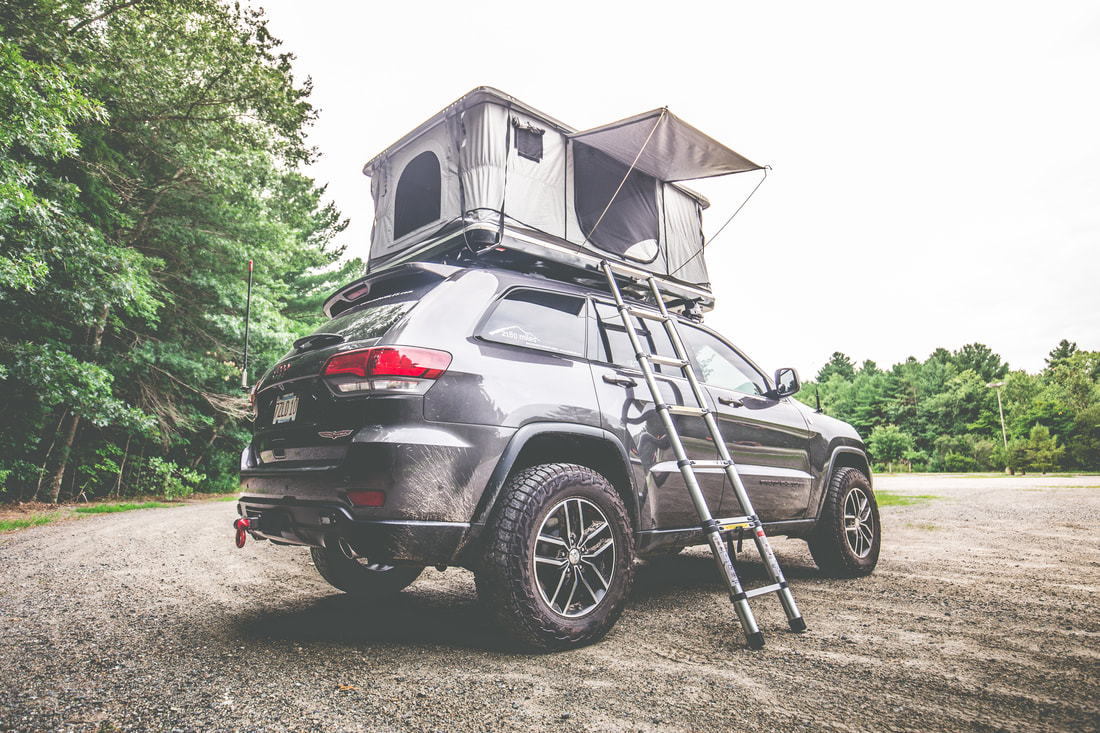
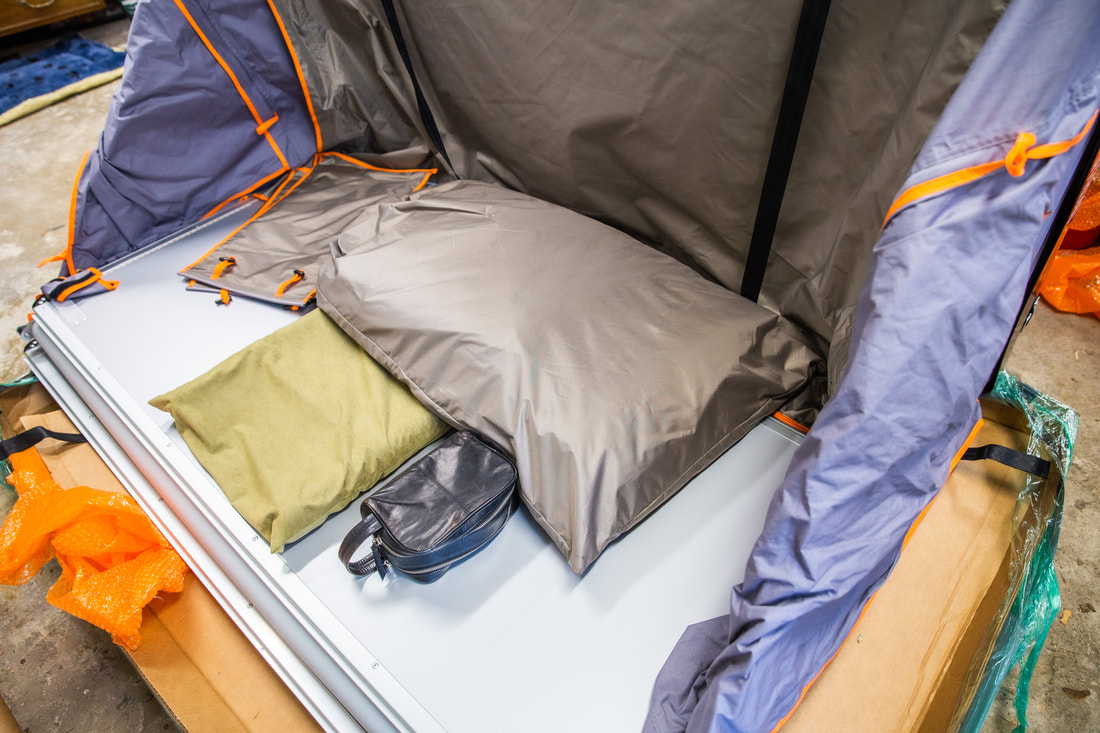
Once the tent was flipped over I made quick work of the six 2” wide Velcro straps and two 1” ribbed plastic retaining straps, and gently lifted the black plastic shell. The two internal pistons immediately took over and raised the clamshell roof to its 60ish-degree angle, exposing both the folded flooring of the tent and the myriad of accessories and hardware that the tent ships with. Included with the SkyLux are the insulation panels for frigid nights, two channel-hung pockets/containers for shoes and the like to be held outside of the tent at night, extra support braces for the gas pistons at super in the event of 40+ MPH winds, and a half dozen metal props for holding the tent’s entryway awning and side windows out when you wish to open them.
 
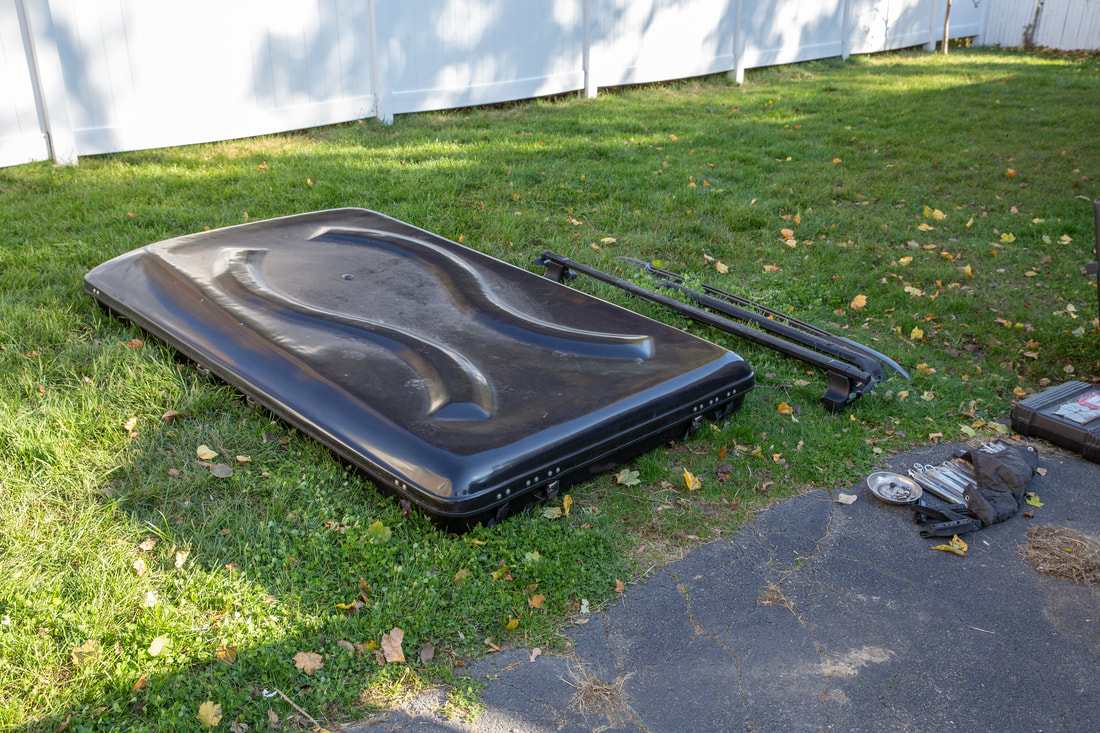
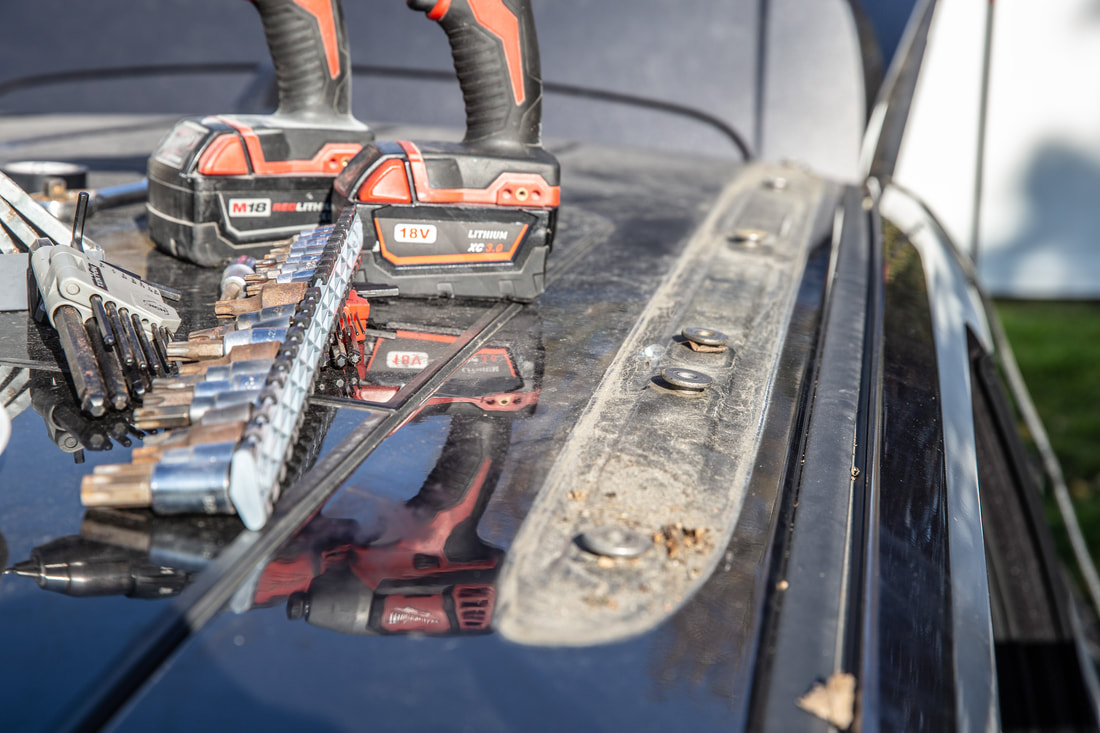
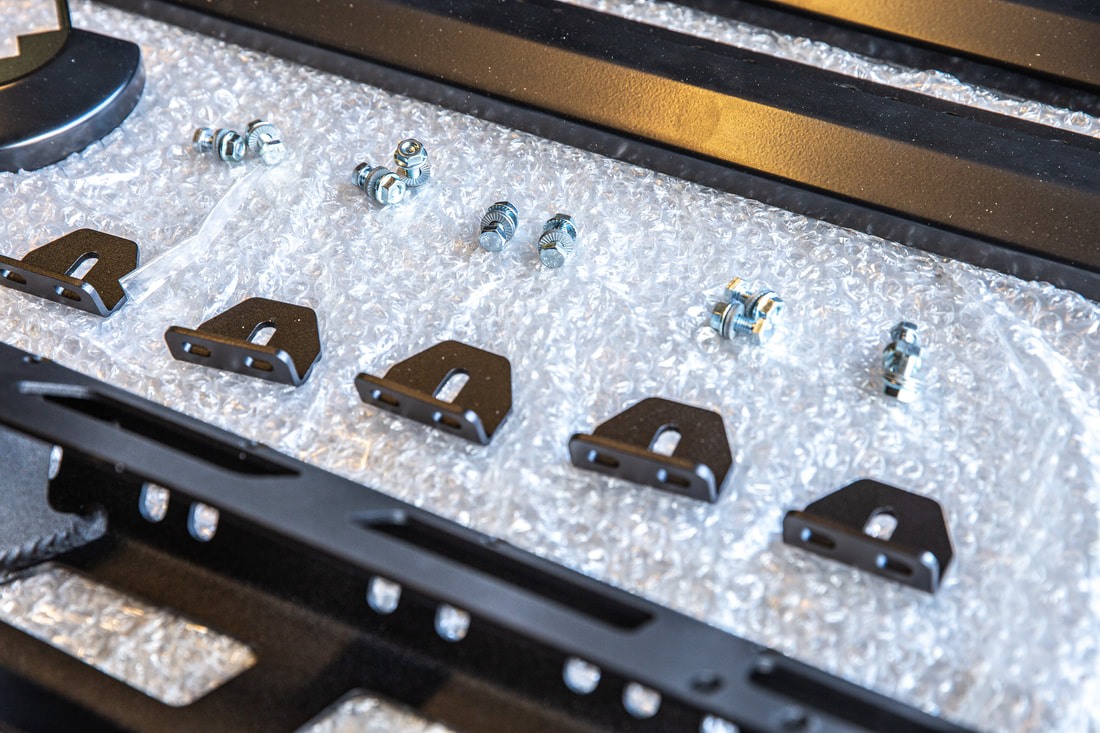
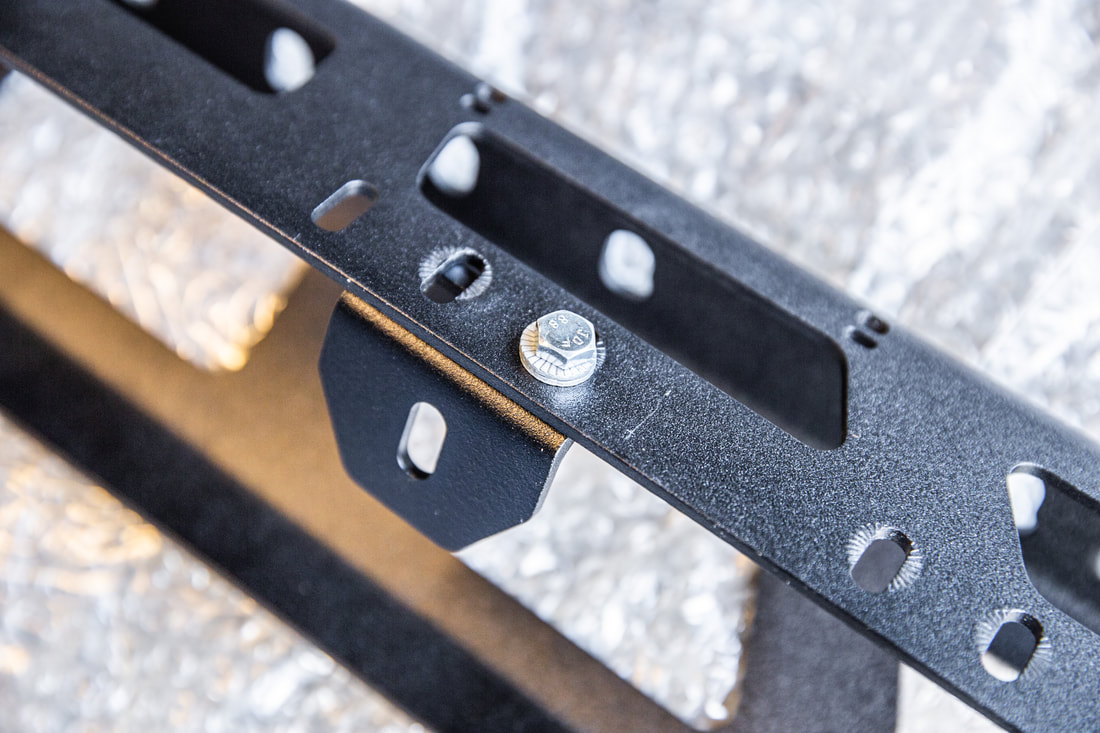
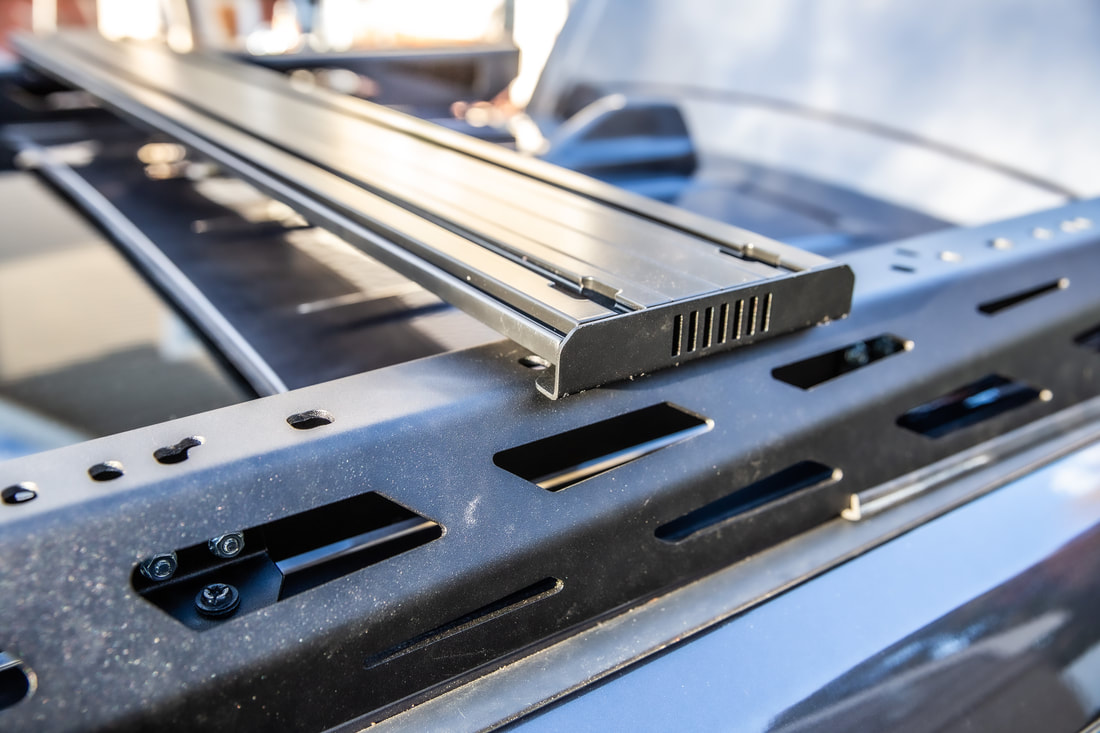
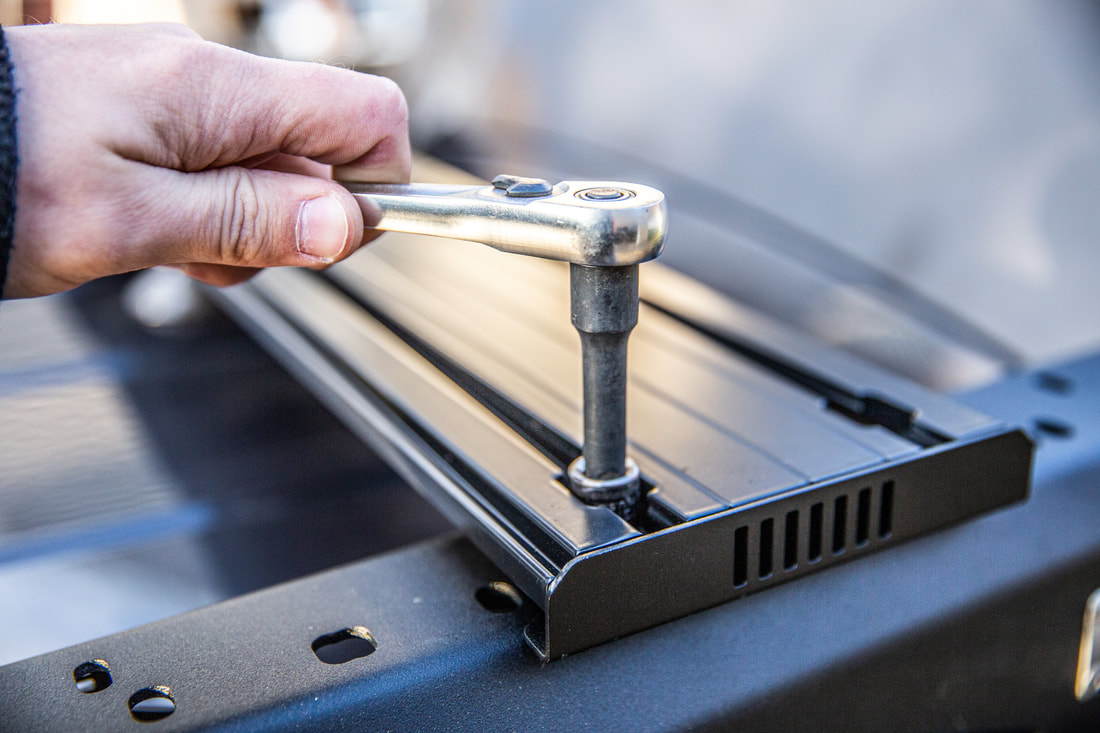
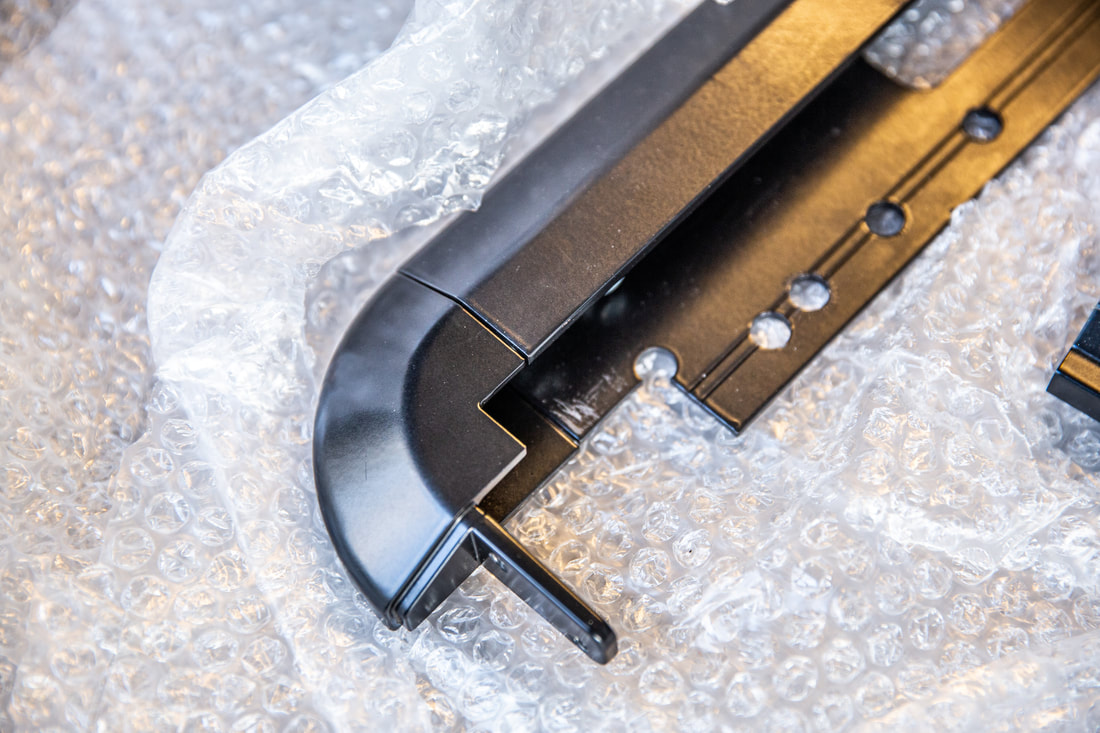
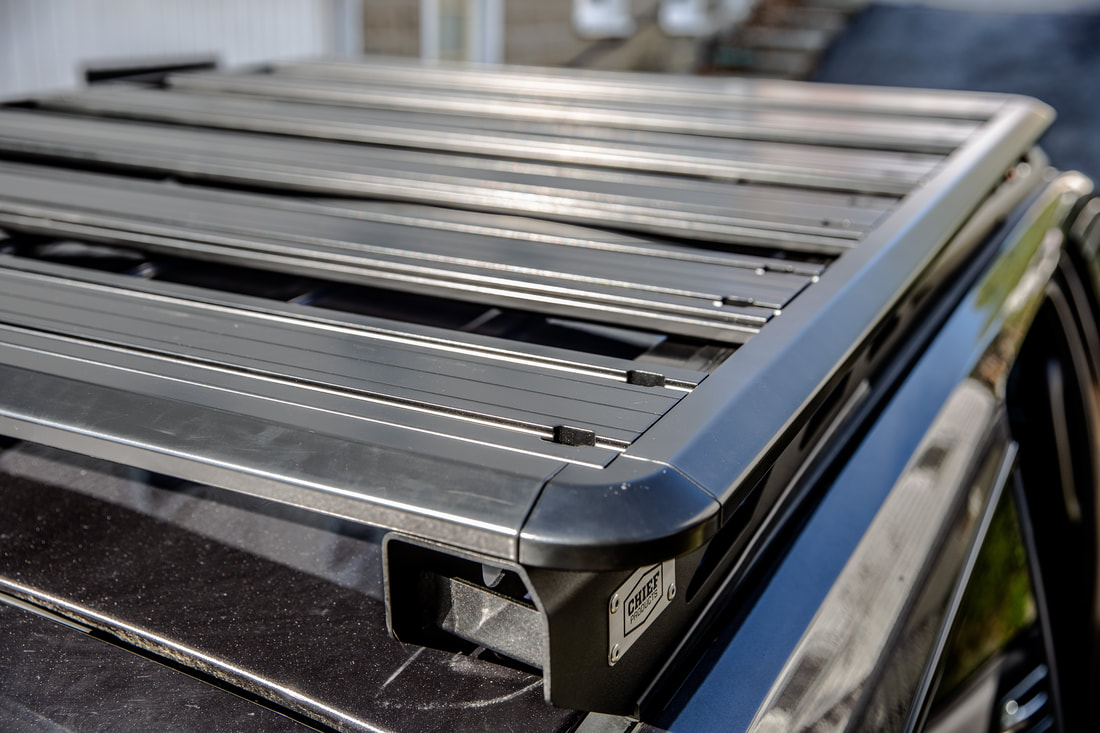
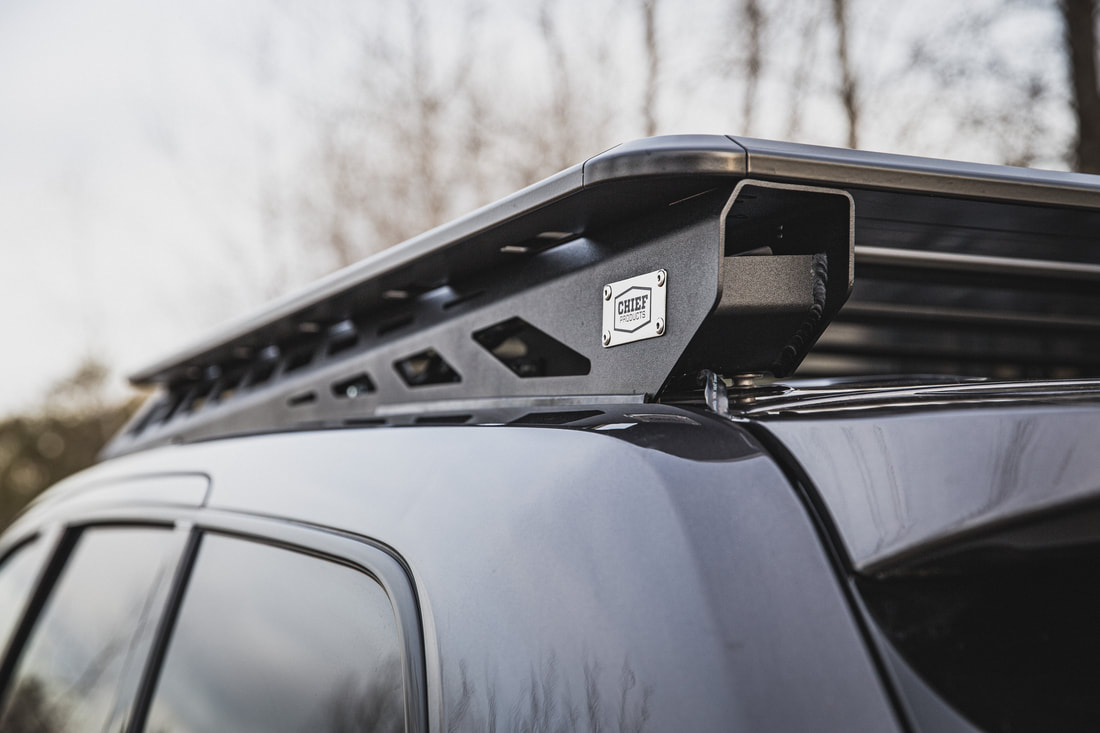
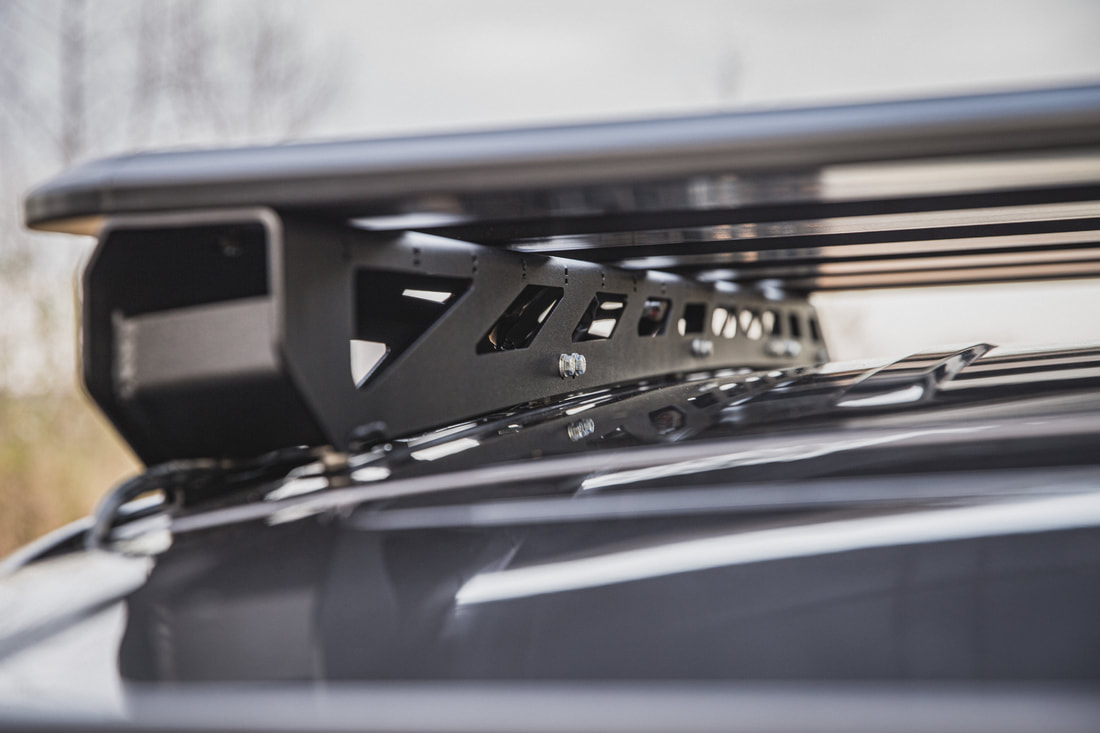
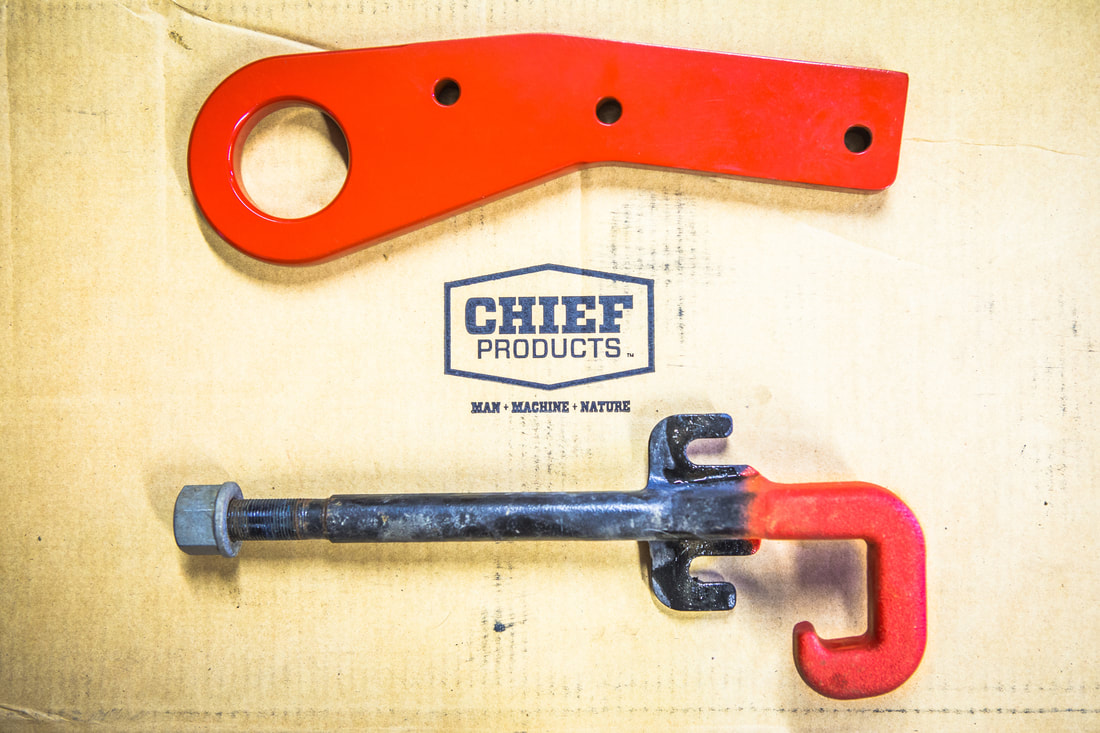
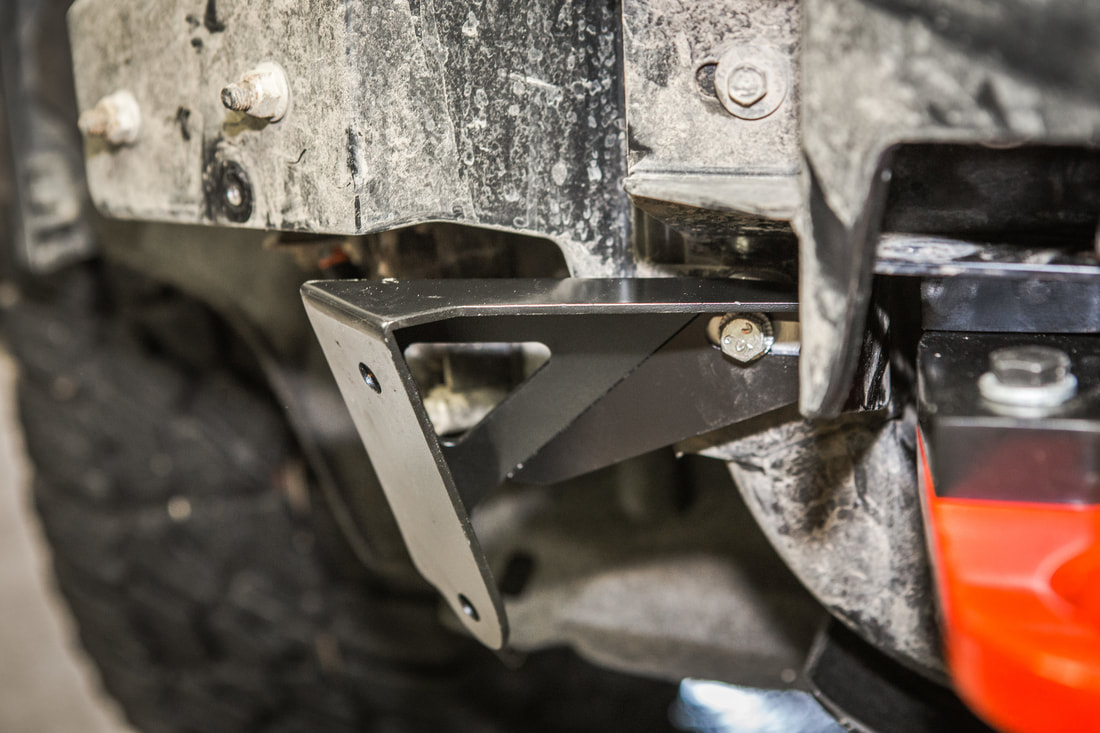
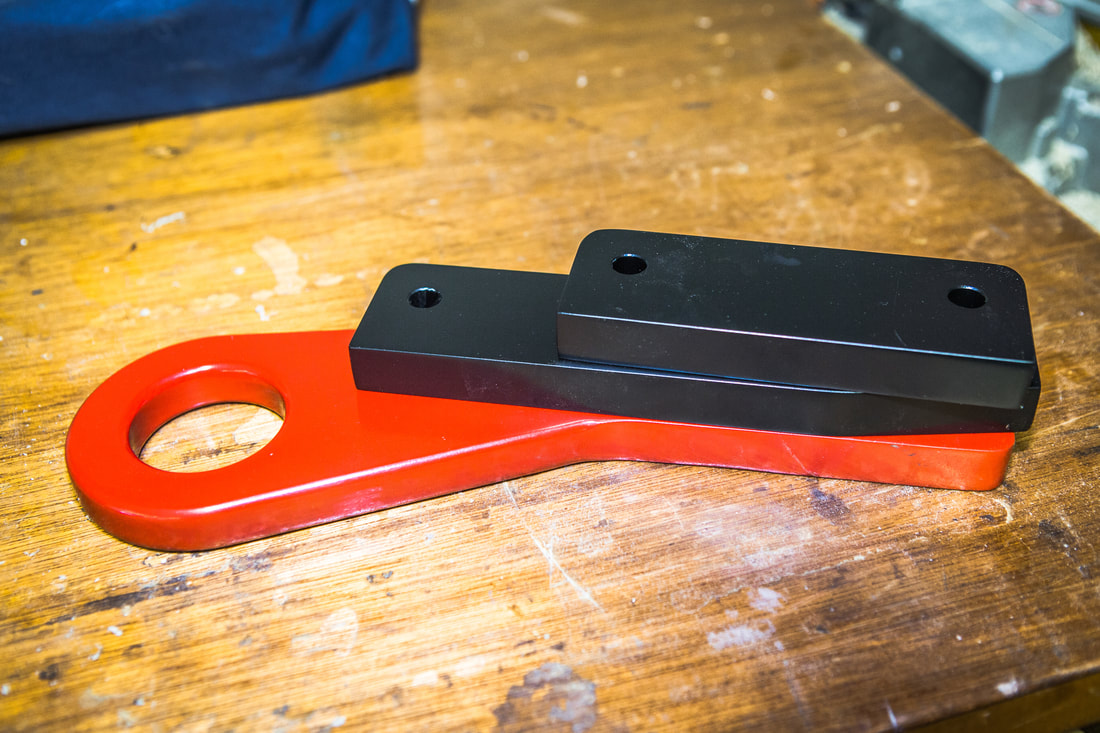
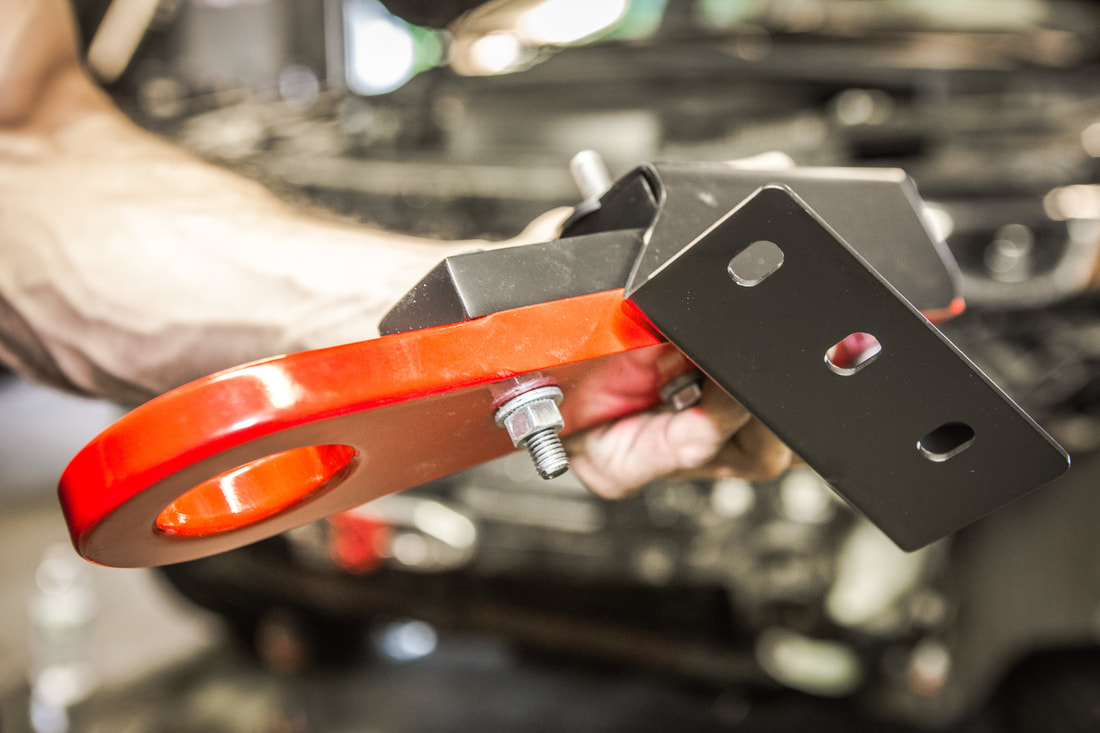
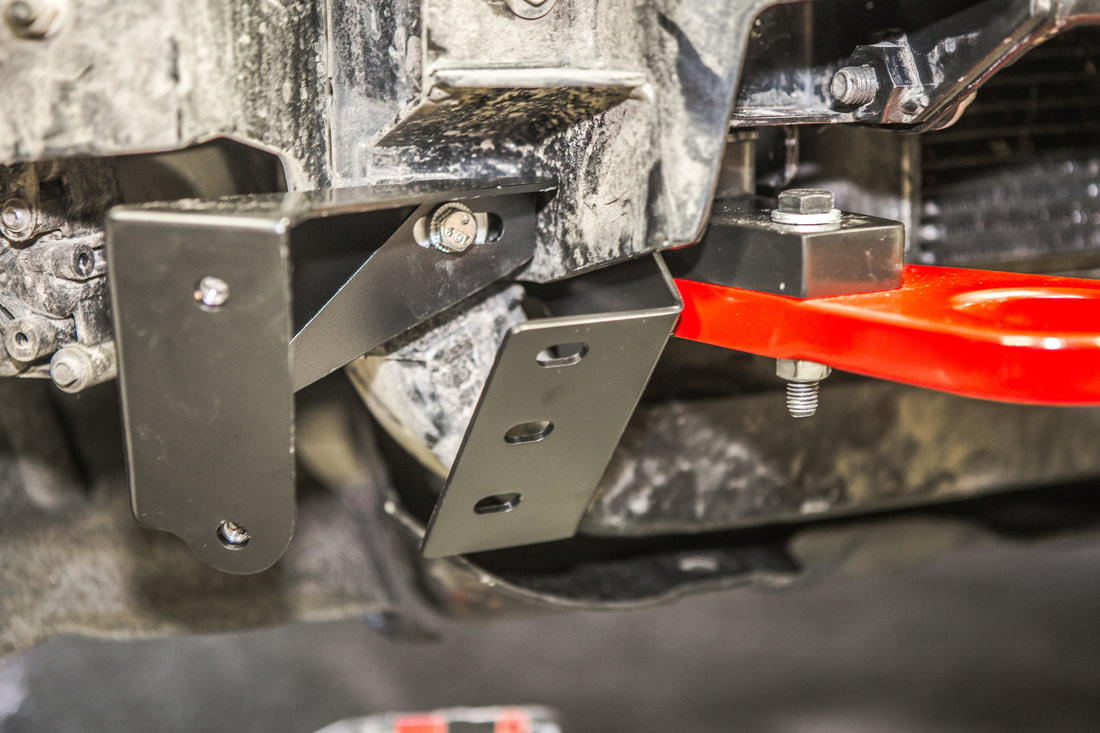
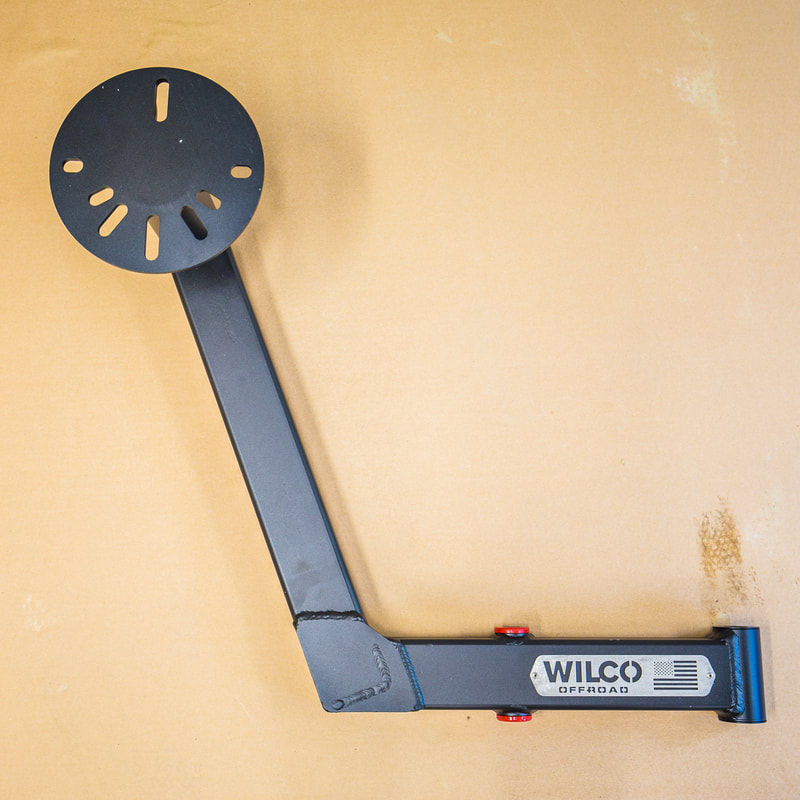
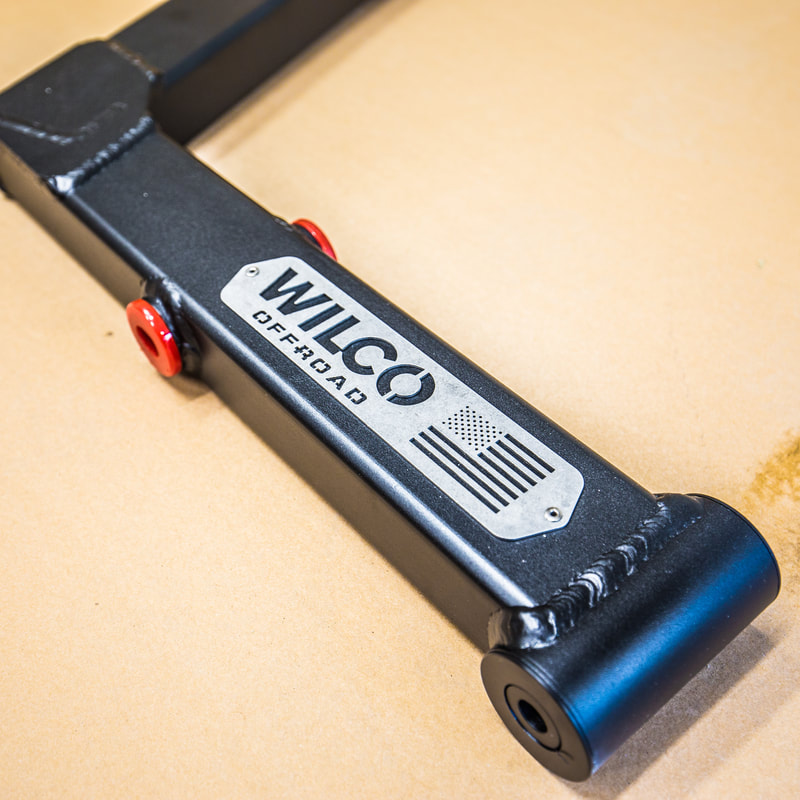
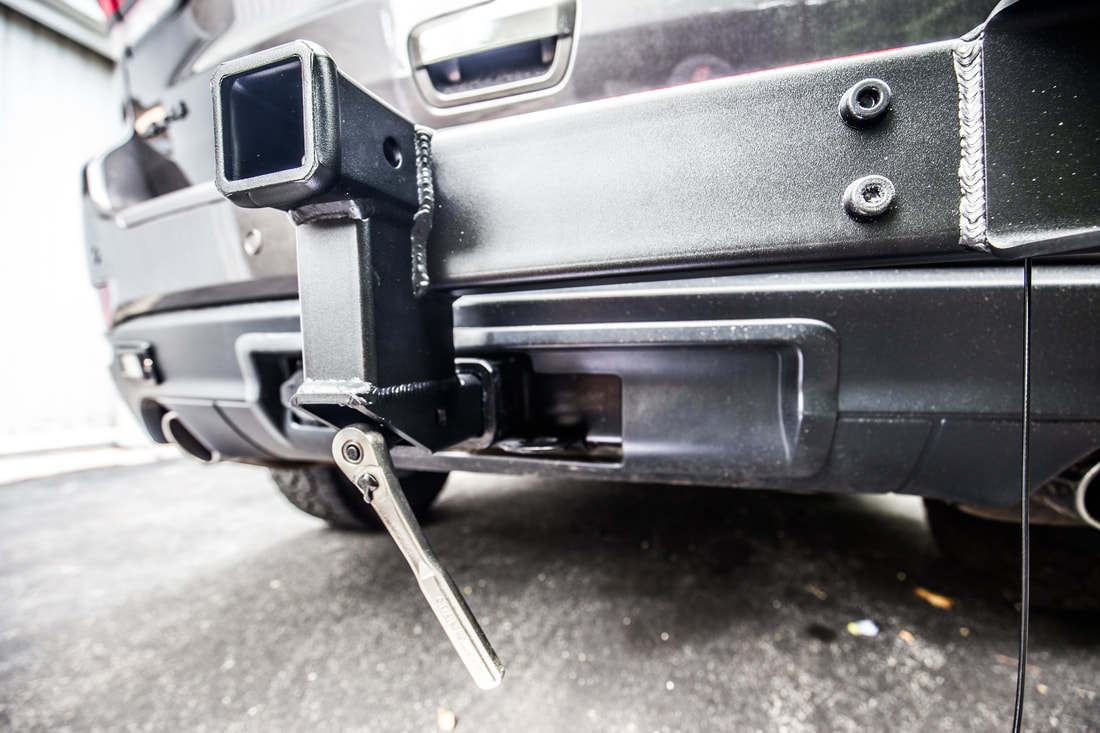
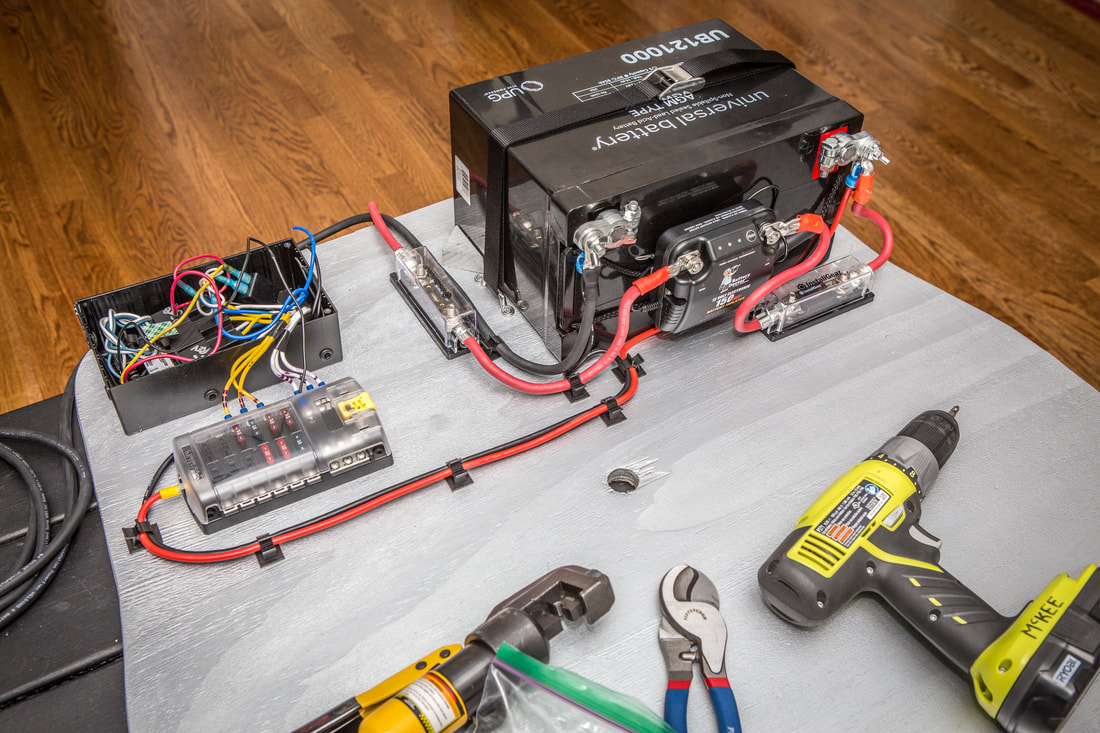
The hardware that’s sent along includes a 13mm ratcheting wrench, eight bolts, four brackets for connecting the tent to your crossbars. In further conversations with the Torro team they’ve told me that the brackets included here (on the left in the photo below) will be replaced with flat bars to cut down on unnecessary tightening on installation. To the right in that same photo are the RTT brackets that Chief Products sells for integrating a tent with their WK2 Roof Rack. The 1/4” steel plates are drilled out perfectly with the Chief crossbar Planks, and allowed the SkyLux to be installed without a hitch.

Picture
2x Channel-Hung Pockets
Picture
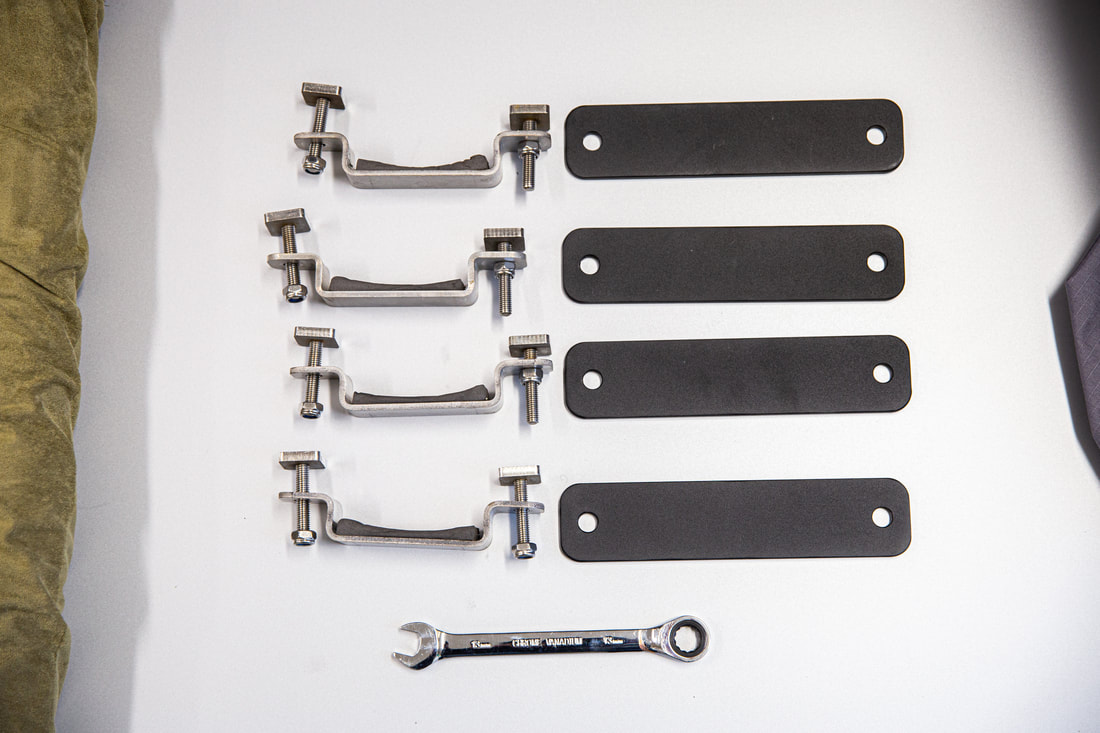
Torro Hardware & Chief Products RTT Hardware
Picture
Torro's Included Ladder, Insulation, Hardware, & Pockets

Real World Test Run

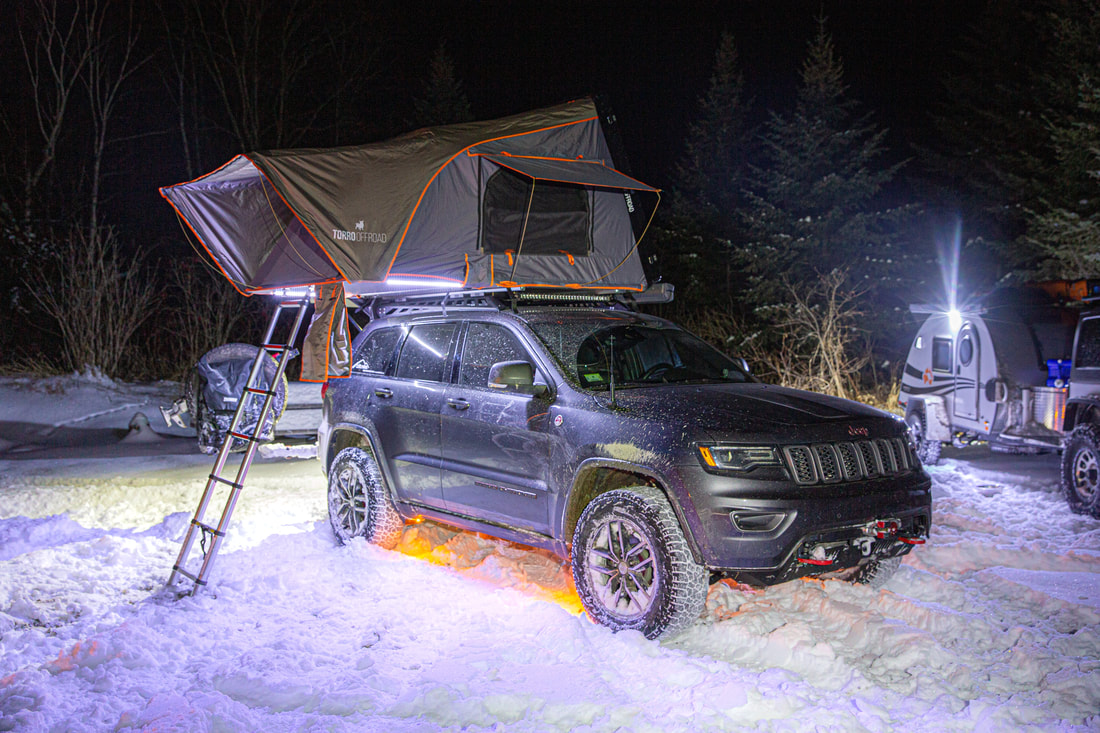
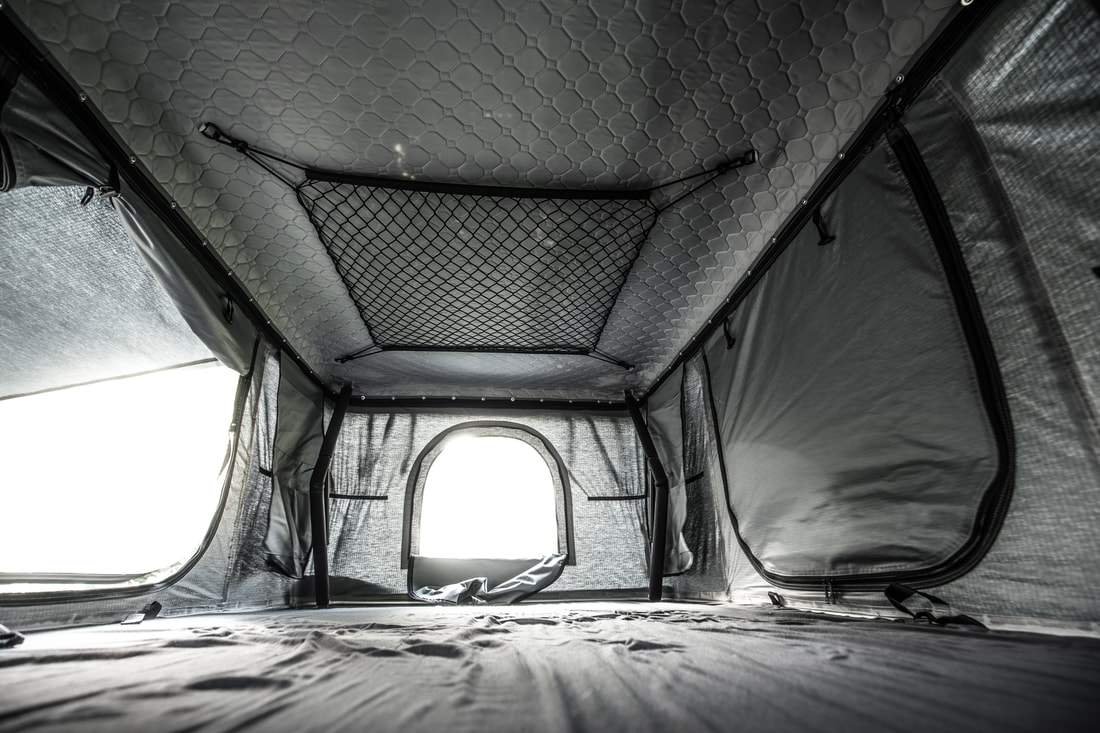
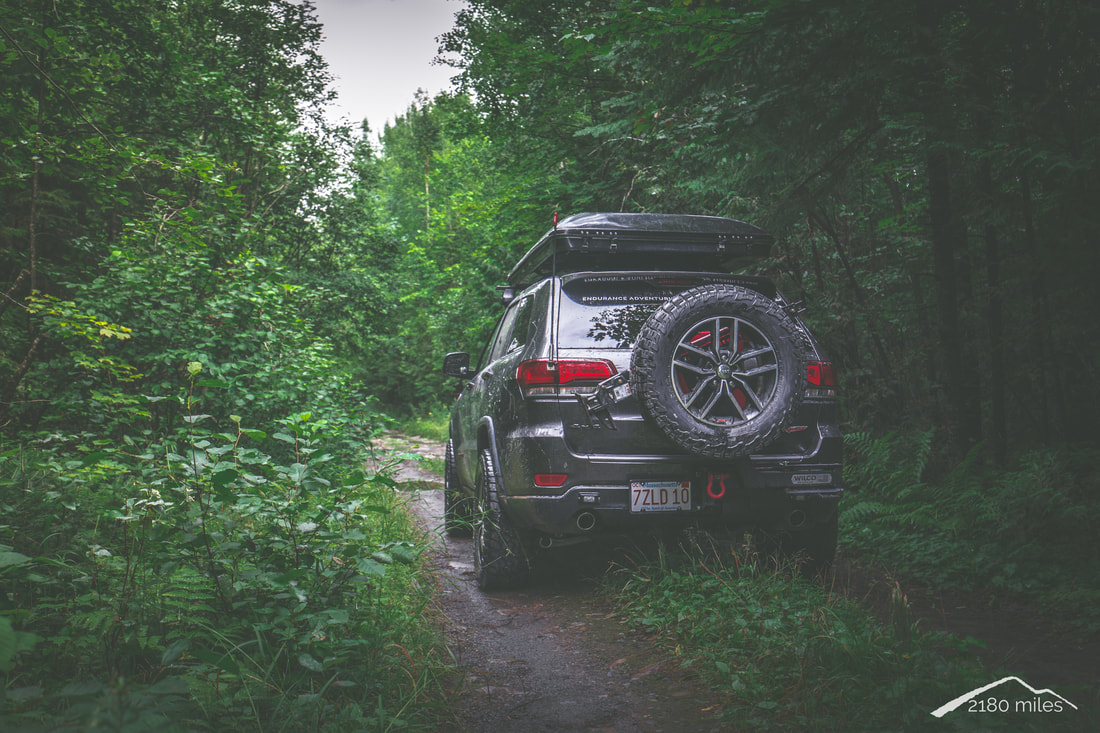
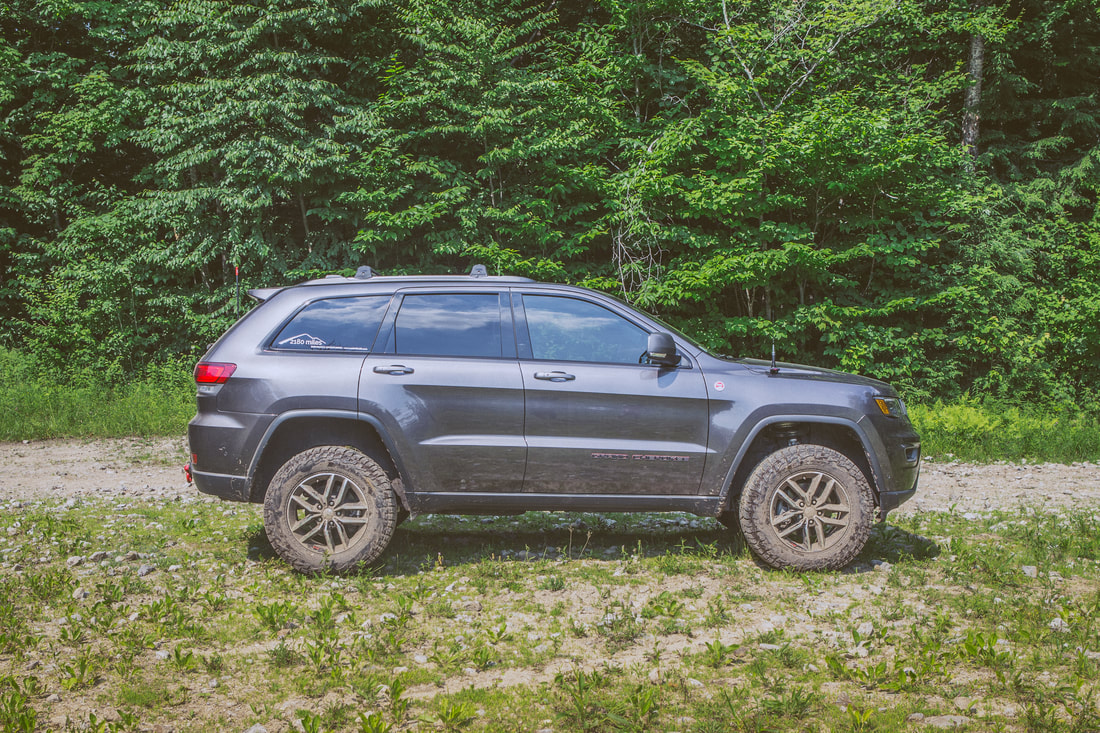
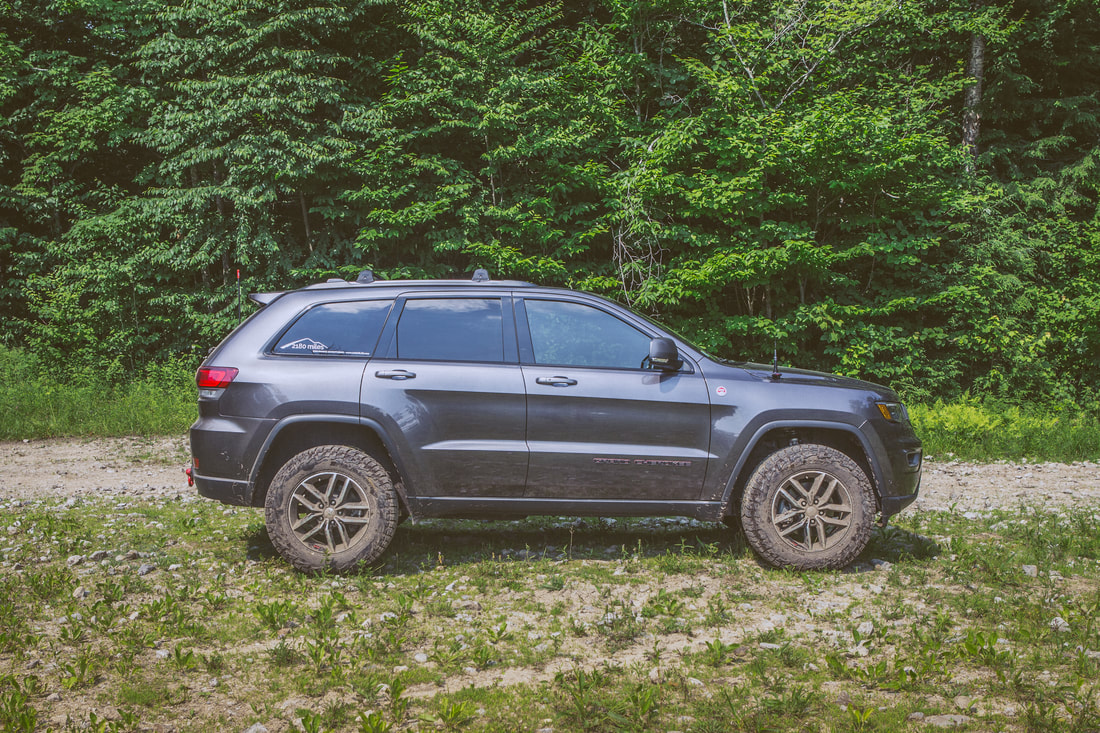
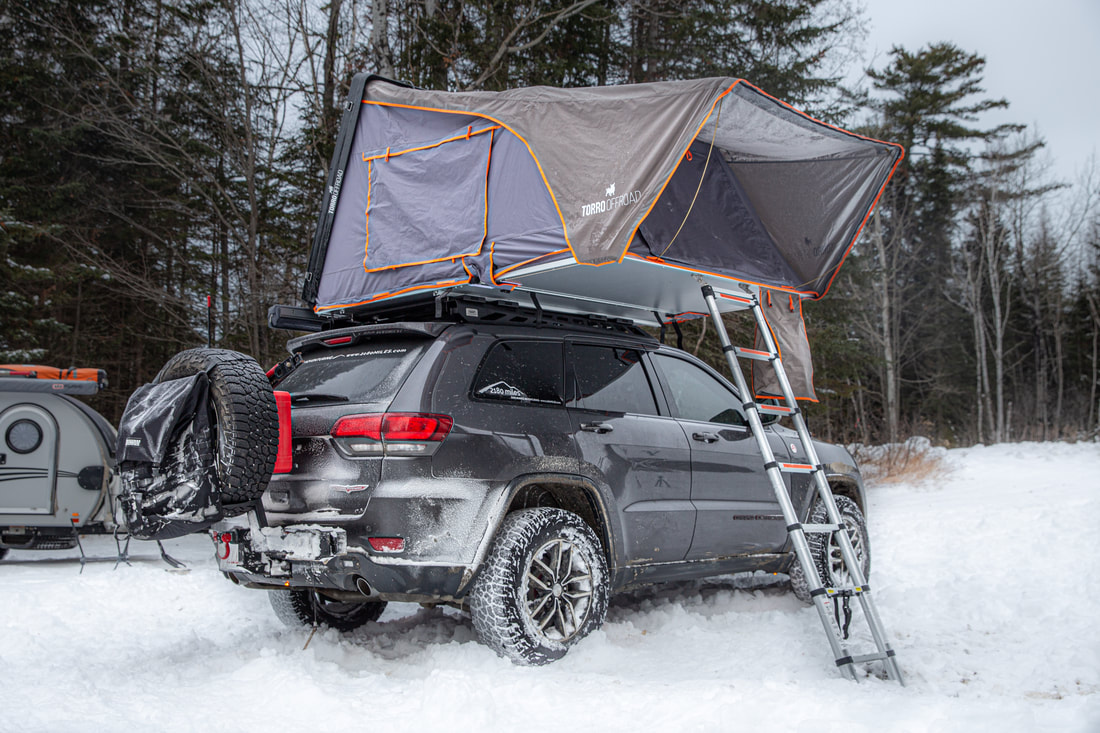
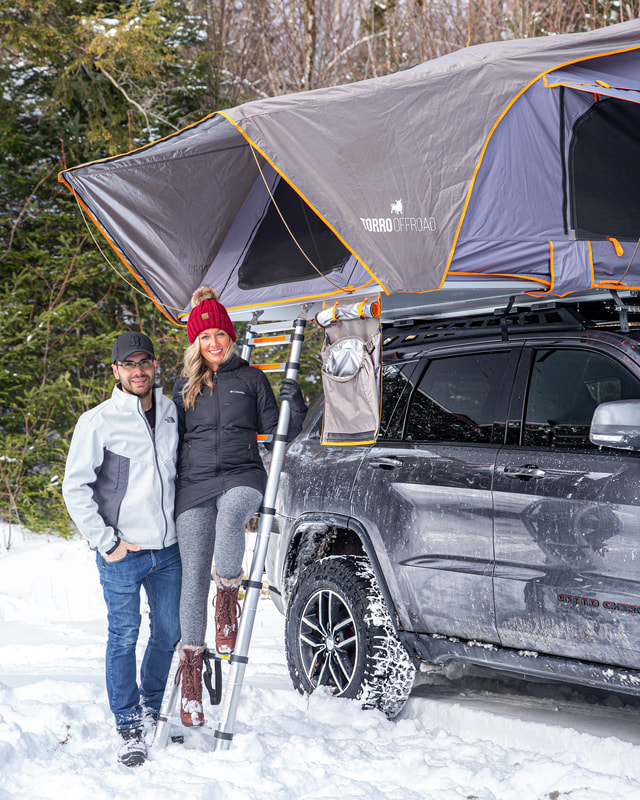
​A mere 24 hours after installation of the SkyLux on the WK2 Trailhawk, I took off for a five day overland trip through Maine’s North Woods with a few friends from our overland group. The temperatures would include single digit nights, 30+ MPH winds, and a thousand miles of travel from our Boston home. Our 1 year old black lab, Delta, came with me on the trip and shared the tent with me each night; not only were we dry in all kinds of weather including rain, hail, and snow, but also warm in our sub-zero sleeping bags. The SkyLux did a great job with ventilation and mitigating build-up of precipitation and only minor frost was exhibited each morning, easy to wipe down with a camp towel every morning. 
 
Having only set the tent up once in our driveway before departure I was quite happy with the 2-3 minute set-up time each night, and nearly identical take-down times each morning. The ladder extended easily and unfolding the tent into its fully opened position was no problem at all for a person to do solo. I mainly utilized the “front door” opening for our ventilation, but did open the side windows on one night for some additional air flow. 

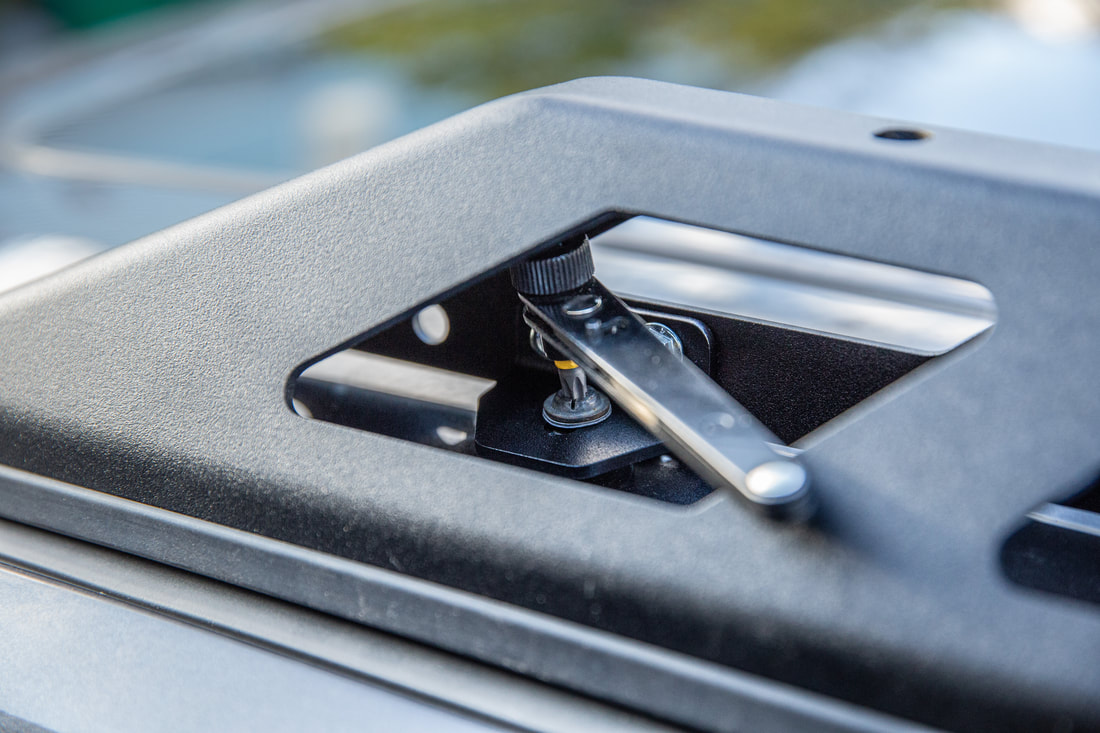
In the mornings I moved the sleeping bags to the driver’s side of the tent where the clam-shell hinge resides, which I found made closing the RTT up much easier. From there I’d remove the metal props that keep the doors and windows open, storing the window ones inside an included pouch in the tent, and the door props in the back of the Jeep for easy access at camp each night. This is a habit I’ve had since we first for a roof-top tent, as digging around for these while trying to set up camp isn’t always the most fun activity when all you want is a beer and a campfire.
 
Once the inside of the tent was set to be stored I collapsed the ladder simultaneously while pushing up and folding the cantilevered aluminum flooring up over onto the main portion of the tent. Think of the closed SkyLux as a tortilla shell folded over in thirds. With the flooring surfaces folded up I then climbed up and collected the fabric shell of the tent, shaking off any snow or ice build-up and tucking it towards the center of the tent before grabbing the nylon strap and pulling down the plastic shell of the tent. The same exceptionally easy Velcro straps were quick to affix, and the plastic locking straps snapped into place despite the snow and ice buildup I faced each morning.

This tent truly seems like it will be a great match for us and our future trips with myself, Dani, and Delta. The space inside, durability, multitude of well thought out accessories, and overall ease of use make it a fantastic product for veteran overlanders/travelers and the newly vehicular adventurous alike. Dani's thrilled about the king-size bed inside, and Delta loves the view from the top of the ladder more than I could ever describe.

I'll circle back after the next few trips and update this with photos and a more long term review, but for now I'll leave you with a link to Torro's website so you can check the SkyLux out for yourself... you might even recognize my Jeep and my wife on their website.

Picture
Picture
Picture
Picture
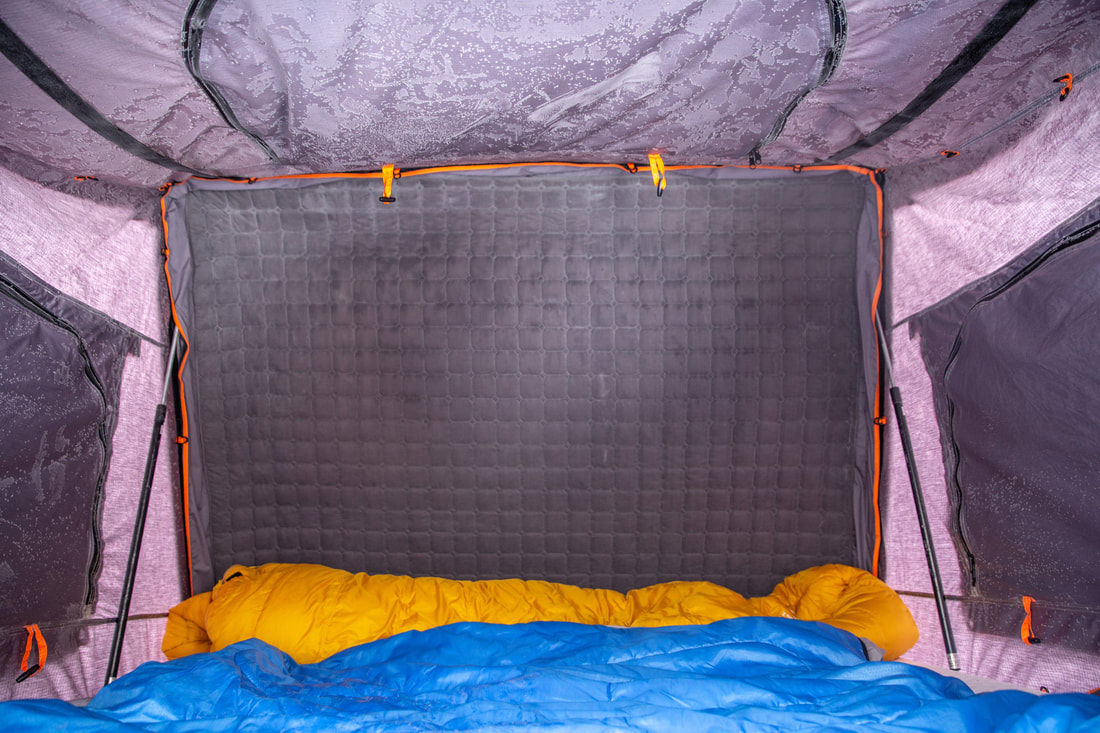
(don't mind the discoloration... it's frost buildup from a 4° night)
Picture
Picture
Picture
11 Comments

Chief Products WK2 Roof Rack

11/11/2019

12 Comments

 
Picture
Available now on the Chief Products website!

​It’s with great enthusiasm that I sit down to document this install write-up about the brand new Chief Products WK2 Roof Rack. A long awaited release from Chief, this rack steps in as one of few contenders in the industry for modern Grand Cherokees looking to move gear to the roof to save space inside. Boasting an unprecedented and engineer certified 330-pound dynamic weight rating and 1,332-pound dynamic rating, this rack is build to securely and safely handle whatever you can throw on it.
 
Whether you’re looking to store a spare tire, fuel canisters, LED bars, awnings, or a Roof Top Tent of any kind, the WK2 Roof Rack is the solution a great many people have been looking for. A very important thanks to my friend Nick for helping with the initial day of installation of the rack. 
​
Picture
Picture
Shipped to me directly from Chief’s warehouse in Australia, the entire aluminum rack (listed on their website as the “Full Roof Rack System”) came immaculately packaged and wrapped in more protective bubble wrap than even Amazon sends out. Each piece of the aircraft-grade aluminum alloy was perfectly powder coated, each piece of individual hardware bagged and labeled for assembly. If I’ve learned one thing over the years of working with Chief, it’s that they put thought into each and every aspect of the process, from unboxing to install to customer service, it’s all there.
 
To start the install of the WK2 Roof Rack I needed to remove my roof top tent and existing Rhino Racks and Thule Traverse crossbar, along with the OEM roof rails. Great news - all of this can be done with a simple T-30 torx bit. With all of that put down on the ground behind the Jeep, I washed two years of grime and dirt accumulation off the roof, and we got to work.
 
​
Picture
Custom 3-Crossbar Set-Up
Picture
Roof Top Tent Removed
Picture
OEM Roof Rails Removed
Picture
Washing The Roof

Mounting Rails Installation

The first step was loosely fastening the small angled brackets to the Mounting Rails in preparation for their installation on the roof. Each bracket mounts with two 10mm bolts and lock washers which, in true Chief Products fashion, sit securely into grooves pressed into the Mounting Rails themselves. Once these 10 brackets were finger tight on the two Rails, we placed the driver’s side up on the roof of the Trailhawk. Utilizing the factory T30 fasteners and an angled bit driver, we installed the bolts into the factory nutserts along the roofline, making sure to leave the whole system semi-loose so that it could wiggle around as the rest of the rack was installed over top of the Mounting Rails. We repeated the process on the passenger side of the vehicle before returning to the pile of parts on the garage floor (placed gently overtop of the shipping bubblewrap!) to continue the installation.
​
PictureChief Products WK2 Roof Rack Parts

Picture
Angle Brackets & Hardware
Picture
Securing Angle Brackets
Picture
Securing to OEM Roof Nutserts
Picture
Driver's Side Mounting Rail
Picture
Passenger Side Mounting Rail

Bare Bones ConfiguratioN

Depending on which multiple Roof Rack configurations you buy from Chief, there are a variety of methods of installation. While I was ultimately working with the Full System configuration, I wanted to ensure that people were able to see the variety of possibilities, so we went forward with installing what Chief refers to as the “Bare Bones” configuration. This consists of the Mounting Rails and two of the Plank crossbars.
 
The beauty of the Chief rack is the modular nature of the product, allowing these Planks to be placed almost anywhere up and down the length of the Mounting Rails. The full system comes with 6 planks for a complete installation, but is configurable with anywhere from one to all six of them depending on your needs. I figured most people would use a two-plank configuration, so we placed them in positions 2 and 6 to illustrate this set-up. You’ll notice the awesome end caps that flank the crossbar planks, machined out in the famous 7-slots that pay tribute to decades of Jeep history.
 
Each aluminum plank is drilled out for bolts to easily fall through them into the Mounting Rails where a bar with pre-welded nuts mates up to the bottom side. For those of us with larger hands it can be a bit of fun to hold the nut plates into place, but I found that getting one side relatively secure and then adding the second bolt made it a lot easier to get everything tight. Once all 4 bolts were tightened on the first plank we moved onto the second one, buttoning it up in just a few minutes after picking it up off the garage floor. At this point we were losing daylight in the Northeast, so I drove the Jeep back from Nick’s house and tested the wind noise with the windows and sunroof both opened and closed. I’m happy to report that the existence of the rack wasimperceivable at all rates of speed regardless of the window situation. Huge accolades to Chief for that accomplishment.
​
Picture
Plank Crossbar In Place
Picture
Securing Plank Crossbars
Picture
Bare Bones Configuration
Picture
Rear Plank In Place

Full System COnfiguration

The next day after checking in with Chief’s lead engineer Ben down in Australia, I moved forward with installing the Full System on the roof. The SINGLE most important thing to note here is that there’s a specific order to do this in to ensure that everything lines up appropriately. For the sake of this, let’s just jump forward to me having removed the two planks and standing in the driveway with just the Mounting Rails on the roof. 
​
Picture
Roof Tray Corner Piece
Picture
Assembled Frame
​ 
The first part of this process is to loosen all the fasteners holding the Rails down, including both the 10mm bolts attaching the angle brackets and the T-30 nuts into the roof nutserts. These all being loose (but not removed) is going to allow the whole set-up to shimmy around as the roof tray is placed overtop. The tray/surround itself is comprised of four straight pieces of aluminum and four rounded end-caps. The endcaps slide into the longer lengths and fasten with four small bolts per corner. Once the frame it assembled it weighs only a few pounds, adding to the beauty of this product where it’s entirely possible to install by yourself.
 
With the corner blocks tightened down I lifted it up onto the roof, following up by placing a plank in the first mounting position closest to the front of the Trailhawk. According to Ben the easiest way to get the entire tray lined up is to install the 1st and 4th position planks first, then to move forward with tightening down the mounting rails as the whole system is now in place to line up correctly. Once the rails and both planks were tightened down completely I lifted the rest of the planks into place and tightened them down accordingly. It’s worth noting that I did not re-install the 7-slot end-caps on the planks, as I don’t think they’ll fit in with the tray surround.

​
Picture
Frame In Place
Picture
Front Quarter View
Picture
Planks 1 & 4 In Place
Picture
Full System Configuration
Picture
FM/Satellite Antenna Clearance

Wrap-Up & Product Photos

With 6 crossbars into place and tightened down, I’d officially installed the Full System of the Chief Products WK2 Roof Rack. Total time, including figuring out how things went together and photographing as I went was around 2 hours. I can guarantee that in the future it will be much faster… I think I spent more time walking around the Jeep going back and forth between driver and passenger side than I did actually mounting and tightening hardware.
 
The roof rack in the full configuration set-up did have some noise in the 200-250Hz range at highway speeds, but I’ve spoken to the guys at Chief and they’ve said that they have a fix for it and that it’s largely due to the rack being bare/empty at the moment. I’ll report back with updates.
 
A week after installing this system, I took off, heading back up to Maine’s Allagash Wilderness for a winter trip, and installed my new Torro Offroad SkyLux RTT to test out before it went to market. I stripped the WK2 Roof Rack down to its RTT configuration and was exceptionally comfortable knowing that the tent, it’s weight, and myself were 100% supported.
 
A year later and many hundreds of miles off-pavement and fully loaded with an awning and roof-top tent, I can easily say that this is the best modification we've ever done to the Trailhawk. The rigidity, support, adaptability, and overall awesomeness is not something to overlook if you're in the market for a roof rack for your own build.
 
​
Picture
Picture
Picture
Picture
Picture
Picture
Picture
Picture
Picture
12 Comments

AlloyUSA Wheel Spacers

11/30/2018

13 Comments

 
Without question one of the most popular questions I get on forums, social media, in-person, etc. is regarding the wheel spacer installation on the 2180miles Trailhawk. I installed them in the summer of 2017 while running the factory Jeep Trailhawk wheels and tires, and have continued running them with the Falken Wildpeak AT3W tires that were installed in July of 2018 thanks to a partnership with Falken.

While I can't comment on whether you can get away without using wheel spacers on your specific vehicle with your specific tire set-up, I just wanted to provide links for how to go about piecing together the kit I did! Your mileage may vary, and the availability of a WK2 specific wheel spacer kit may someday exist, but for now these are the parts required to use a United States made AlloyUSA spacers.

DO NOT SKIMP OUT ON WHEEL SPACERS - THEY CAN KILL YOU. I have run AlloyUSA products on both my Wrangler and now Trailhawk for a combined decade between the two. I highly suggest them for both their products and customer support.

Comment below with your questions, issues, or success stories!

UTILIZED PARTS LIST:

1. AlloyUSA Wheel Spacers          2. Open Ended Lug Nuts*
​
​
3. Acorn Lug Nuts for Wheel Spacers          4. Lug Wrench Adapter (fits new Lugs to OEM Lug Wrench)

​
*Amazon has been changing these links so double check before you buy - you need 14 x 1.5" open ended lug nuts

Picture
Picture
Picture

BEFORE & AFTER PHOTOS

Picture
Factory Track Width
Picture
AlloyUSA Spacer Track Width
13 Comments

Chief Products Lower Front Guard & Recovery Points

9/18/2018

6 Comments

 
Picture
Throughout 2017 I ran the WK2 with the OEM lower fascia. During the installation of the Hidden Winch Mount by Chief Products, I was able to trim it cleanly to fit their hawse fairlead, but some off-road trips and high snowfall made it pretty obvious that the Jeep needed a facelift to protect the front end from impending damage from rocks and other things that we’d be moving through and over. Thankfully Chief has thought this need out, and created their Lower Front Guard to protect the front end of the WK2 and its components. Due to the way their products integrate, I’d need to also replace my OEM Tow Hooks as they are not compatible when combined with the Chief Products Hidden Winch Mount and Lower Guard.
 
In preparation for our August trip with our local overland club, I spent an afternoon with my Jeep buddy Shaun installing these two products on the Trailhawk. Due to me already having the Hidden Winch set-up with my OEM tow hooks I was required to take off some of the parts that came with that system, but I skipped over that in the photos.
 
First up, an artsy photo of the front of the Jeep, then the new Chief Products:
​
Picture
OEM Lower Fascia & Recovery Points
Picture
Chief vs. Factory Recovery Points
Picture
Lower Front Guard

​Shaun and I got to work by removing the OEM Lower Fascia and front bumper. I’ve done this before to install parts so it was a familiar process, taking all of 5 minutes and requiring nothing more than a set of pliers, two sockets, and a gentle hand maneuvering the front bumper to a resting point. It took some finagling to get the factory tow hooks off the Jeep, but after we managed that it was relatively smooth sailing for the first bit of our project. Once they were removed and the Hidden Winch set-up was bolted back together, we moved towards assembling the new Chief Recovery points. These things are BEEFY and make the factory tow hooks look like children’s toys in comparison.
 
Comprised of three pieces of CNC cut steel and bolted together in a stack to create the Recovery Point, Chief rates these for nearly 10,000 pounds of working load strength, and a breaking point just shy of 18,000 pounds… Holy crap! I’m pretty sure the Jeep would disintegrate to dust before I hit this load amount. Add in some beautiful powder coating, and these things are as beautiful as they are robust.
 
One important note to point out is that upon the installation of these two products at the same time, the tow hooks attach to the Lower Guard’s chassis mounting bracket, and should therefor not be installed until that time. Unfortunately I didn’t catch this fact, so we ended up installing (and removing) the Recovery Points two or three times.
​
Picture
Front End Stripped Down
Picture
Corner Guard Brackets
Picture
Chief Products Recovery Point Stack
Picture
Chassis Mount & Recovery Point
Picture
 
Following along with Chief’s exceptionally well-written instructions, we began by installing the corner mounting brackets to the WK2’s frame. These stick out to the driver and passenger side of the vehicle, and add rigidity behind the Lower Front Guard. From there we moved onto the (humorously final) installation of the Recovery Points with the chassis mounting brackets. From there the Center Section is ready to be attached on both sides of the chassis bracket to hang in front, awaiting more mounting bolts from the corner guards. Chief clearly lays out the tightening sequence as the final pieces of the puzzle are installed, ensuring that the Lower Front Guard is assembled and tightened appropriately. Shaun and I messed around with the idea of putting the OEM Front Fascia back on, as technically the Lower Guard is designed to work over/around the factory front end, but decided against it for the sake of aesthetics and function. 
​
Picture
Picture

As a final touch on the project I bought some ¼” edge trim from Amazon and wrapped the front lower bumper edge with it. With the fascia being removed the factory bumper edge leaves a bit of an unfinished look, but this quick $10 fix makes a world of a difference in having the bumper appear finished. It’s got a metal core and double grip edges to hold it on, making sure it’s not going anywhere once we’re on the road and trails.
​
Picture
Picture

In the month after installing the Chief Lower Front Guard we put nearly 500 miles on the Jeep off-pavement on a combination of difficult mountain climbing trails, long-ignored fire roads, and high-speed well-groomed dirt roads. There were a hundred times that we crossed over terrain that would have scratched up or even torn off the factory fascia as it hung low over the front end. While Chief notes the system doesn’t raise the front approach angle over stock, you can see in the photos it also does an incredible job of keeping the (undoubtedly expensive to repair) ACC camera safe from front impact and damage.

Whether you’re looking for a facelift to improve the aggressive looks of the WK2, or are in need of a system to improve the strength and resilience of the front end, the Lower Front Guard system is one-of-a-kind in its function and design. I for one spend a lot more time looking back at the Trailhawk and checking her out both on the trails, and in the grocery store parking lot ;-)

As usual, I’m happy to answer any questions about the install via the comments section below or by email - [email protected]!
​
Picture
Picture
6 Comments

Waypoint Roof Top Tent

8/7/2018

17 Comments

 
Picture
So back in March of 2018 I placed an order for what at the time was known as the Gen.3 version of the “Tacoma World Group-Buy RTT”. In the time since it has been branded, and an actual company has been formed to sell these at the rate the growing demand requires. I’m proud to announce that I’m the first non-Toyota owner to run the Waypoint RTT by COE Vehicle Solutions. After a 3-month wait from order placement (this is getting faster, don’t worry) I met the organizer, Chandler Coe, as he hand-delivered the tent in his brand new Dodge 3500 diesel, lifted and running 37s, towing a 30’ car hauler full of tents.  We talked for a few minutes, then he vanished into the night to finish his week-long haul of tents around the country.
**It has come to my attention that people are looking to purchase these tents. In speaking with Chandler, he's taken down the website until there's enough interest on the TacomaWorld forum group-buy list to warrant a container full of the tents coming over to the US. Once that list is nearing full he'll open the website back up to other interested parties. The TacomaWorld thread is located here.**
Moving it into the garage, it then came time to see what was inside. The box opening was labor intensive, but this thing was packaged well. I removed a bunch of plastic wrap, and excitedly opened it up for the first time as Dani looked on. The initial smell was a punch to the senses, so we let it air out in the garage for the better part of a week before moving on with installation. The tent itself is 85” long, and due to the roof crossbar spacing on the WK2, this left the front two+ feet of the tent cantilevered. To combat this design and support the front, I pieced together a Thule clamp-on crossbar kit from eBay and added what is essentially a third crossbar to hold the front end of the tent down.
​
Picture
Picture
Picture
 The mounting utilizes 8 bolts that fit into brackets that are to be positioned inside the recessed mounting track in the bottom of the tent. Slid into place at the 1st and 3rd crossbars, I tightened the bolts down with the supplied tools (ratcheting box wrench included!) and hardware. The compressed latter opened up easily, and we climbed up to see how comfy our new home-on-wheels was.
 
There’s a 2.5” foam pad inside, and the entire interior is covered in a stitched fabric.  The 4 gas struts to raise the roof are covered in padding, there are two hanging pockets for miscellaneous gear, shoes, etc, two overhead hooks for other stuff, and a netting suspended overhead for whatever you haven’t already found a place for. It’s incredibly spacious inside, and our two-person sleeping bag fits perfectly corner to corner. The tent itself has entry options from both sides, including mounts for the ladder to be affixed to. Each doorway (left and right) has a fabric outer door that becomes an awning, a fly made of netting, and another solid interior door for privacy at night or in the cold while retaining the awning. There are large windows at the front and back of the tent, and two 4” square ventilation pockets, one on each side. The tent is able to close with all of our stuff inside, including the sleeping bag, pillows, headlamps, etc. which will make it a dream when we’re on trips.

 
We’ve spent one night in the tent so far, and loved it. We’ll have to get used to climbing out if we have to pee at night, but the elevated position allows for a great breeze (wonderful on hot nights), keeps us away from little critters, and offers more privacy. While other tents charge a few hundred dollars more for a black shell, a few hundred dollars more for a larger size, and a ton for shipping, COE Vehicle Solutions has this on the market for $1,750 delivered. It was the perfect tent to get us into the RTT market while maintaining the sexy aesthetics of this Jeep build, and allowing for a minimal impact on fuel economy. A recent trip to upstate New York required us bringing the Jeep, and with both the new Falken AT/3W tires and the RTT mounted, we averaged 21.5 MPG round trip over 450 miles… not bad at all given the fact that the Trailhawk was basically expedition-ready the whole time.
 
Happy to answer any questions, and very excited to use this on upcoming overland expeditions.

Picture
Picture
Picture
17 Comments

Wilco Hitchgate Solo Hi-Clearance

8/1/2018

17 Comments

 
Picture
The Wilco Hitchgate came to my attention almost two years ago now when I began to research building a Trailhawk into a capable overland vehicle. Since at the time almost no information existed about really overhauling a WK2, I found myself with a ton of dead ends, and compiling information from different truck/SUV builds for future reference. Coming from the world of a Wrangler where there were a billion and a half aftermarket accessories, one of the most impressive non-vehicle specific parts I found was the Wilco Hitchgate, a trailer-hitch mounted spare tire carrier for ANY vehicle.
 
I booked-marked their website and kept it in the back of my mind as my Trailhawk build progressed. Once it came time to install a second battery in the trunk space, I knew that the spare tire was in need of a new (and more accessible) place to live. Revisiting Wilco’s online store and pricing out the needed add-ons, I finalized my order and eagerly awaited delivery day. One of the most impressive things about Wilco is that they are a proudly owned and operated American company, with all of their customer service, sales, and welding being done out of a southern California warehouse.
​
Picture
Picture
The production time took a little longer than I expected, and ultimately arrived just days before we left for a week-long overland trip through northern Maine’s remote Allagash Wilderness. For reference, I placed the order on May 12thand it was delivered on July 5th…. They make an exceptional product but the wait-time can be somewhat substantial, especially in the world of Amazon Prime where we all expect things in two days time, ha! Needless to say it was without a doubt worth the wait. The welds are gorgeous, the powder coating robust, and the product itself worthy of the acclaim it receives.

​Of the three Hitchgate Solo models available (Standard, High-Clearance, and XL) I specifically chose the high-clearance version. From what I had seen on social media at the time,  I was in the minority with this decision, but it was made deliberately in order to not block my recessed Rigid SRM reverse lights in the rear bumper. After having friends take measurement of their WK2s I was able to roughly guesstimate that the top of the main bracket’s steel boxing would line up with the lip of the rear bumper where the tailgate opens… good news – as you can see in the photos, it’s a PERFECT fit.

​
Picture
Picture
Picture
​The Hitchgate Solo is comprised of two main pieces, a lower arm that fits into the trailer hitch receiver and a tire-carrying-swing-arm with an impressive bushing for the lower arm mounting. Inserting the lower arm into the receiver, a socket set and extension arm allow you to tighten down their proprietary WedgeLock system, responsible for keeping the whole assembly tight when you’re cruising down the highway or crawling over some tricky terrain.
 
Greasing the supplied hardware and fitting the swing-arm bushing into the lower arm’s bracket, I tightened down the bolt and lock-nut to an appropriate tension to allow a “just right” amount of tension when swinging the tire carrier open. Mounting the add-on RotoPax fuel carrier bracket and license plate bracket, I took my time and was done with the install in about 45 minutes… a pretty quick project with a great return on investment!
​
Picture

Long Term Review:

After a year and nearly 10,000 miles with the Hitchgate Solo fully loaded – 32” spare tire set-up, 3 gallons of fuel in a Rotopax, and a steel HiLift jack, the Wilco unit has performed phenomenally. Even on the worst washboard roads, even with standing on the cantilevered end of the swing-arm, even with using the main brace to help load the roof-top tent, the Wilco has without a doubt been worth every single penny I spent on it. Having a spare tire on the rear end of the vehicle not only makes it look infinitely more bad-ass, but also is one of the most practical moves any overlander can make. Easy access to the spare tire, especially when compared to digging it out of the trunk space when we’re fully loaded, makes a world of a difference when stuff hits the fan and you’re left needing to swap in a spare deep in the backcountry.
​

Questions? Use the comments section below!

Picture
17 Comments

Falken Wildpeak AT/3W Tires

7/8/2018

55 Comments

 
Picture
After a few months of behind-the-scenes work, I'm excited to announce a new partnership with Falken Tires. The WK2 now has the OEM Goodyear Adventure tires replaced with the new Wildpeak AT3W all-terrain tires. While the Grand Cherokee can actually fit a larger tire than what I went with, I wanted to keep the appearance aggressive but not overdone, so I chose the less-popular 265/65R18 size, equivalent to a 31.6" tire. It's about an inch and a half larger in diameter than the factory tire, and has a great aesthetic and functional improvements for the Jeep.

I brought the Jeep to a local Firestone Tire center and for the whopping cost of $79 had the four main tires swapped, as well as the 5th OEM rim I bought back in April mounted up with the new spare and TPMS sensor. A Jeep friend bought the factory tires from me for his wife's WK2, so they're off to a new home!

Initial impressions with the AT3W are stellar... After taking the Jeep up to New Hampshire for some wheeling in the woods the weekend we had them installed, I got 24-25 MPG during the two hour ride up, and I know without a doubt that the Wildpeaks gave us better traction than the Goodyears ever could have on more difficult terrain than I've ever taken the Trailhawk on.

​I'll give a long-term review as the time comes, but for now here are some photos of the install...

​
Picture
Picture
Picture
Picture

WK2 Ride Height Settings: 265/65 R18
Click images to enlarge.

Height: Off-Road 2
Height: Off-Road 1
Height: Normal Ride
Height: Entry/Exit

ONE YEAR REVIEW:

It’s been almost a year since I teamed up with Falken and installed the Wildpeak AT3Ws on the Trailhawk. The 265/65 size looks aggressive and feels great underneath her, and they’ve handled everything I’ve thrown at them. With a thousand miles traveled off pavement last summer, a road trip to OverlandExpo East, and weeks of this winter spent up in New Hampshire’s snow-covered White Mountains, time and time again they’ve proved the worthiness of their accolades and the three-peak mountain snowflake rating. If you're in the market for a phenomenal All Terrain tire for your overland rig or daily driver, be sure to give these guys a look before defaulting to the options that the legacy tire manufacturers like B.F.G and Goodyear offer.

​I’m always happy to answer any questions about them in the comments or via any of the social media avenues. Let's chat!
​

Picture
55 Comments

Dual Battery System

4/24/2018

13 Comments

 
Picture
As discussed previously on a few web forums, I’ve wanted to move the WK2 to a dual-battery setup for quite a while now. The goal will be to move all the auxiliary electrical units (HAM and CB radios, fridge, lighting, device charging, etc.) to the deep cycle battery – hereinafter referred to as the House battery – and get them off the starting battery. By alleviating their power draw from the starting battery, we’ll be lowering the chances of a dead car in the middle of nowhere.

I knew the spare tire was going to be moved to a swing-out tire carrier, which opened up the possibility of mounting the new House battery underneath the rear deck I built last summer. Once the majority of parts were ordered (every single one of them available on Amazon with 2-day delivery) I got to work laying out how this project would go along. The full parts list will be updated once the project is done, but currently is as follows:
​


The full parts list will be updated once the project is done, but currently is as follows:
​
-  Universal Battery sealed 100ah AGM
- Wirthco 150A Intelligent Battery Isolator
-  Blue Sea Systems 12-post fuse block w/ negative bus
-  8”x5” ABS plastic project box
-  2x InstallGear 150A in-line fuses
-  2x 10-foot sections of 4AWG wire in red & black
-  Crimp-on 4AWG cable ends
-  Battery terminal ends
Picture
Acquiring Gear For Installation
So the first step here was to remove all my gear from the back of the Jeep. This included my Pelican case of recovery and winter camping gear, kept in there in case of an emergency while New England is getting pummeled with adverse weather. Luckily that time of year is almost over. I then pulled the fridge out and removed the rear deck I had built last year. Next up came removing the OEM included gear, the spare tire, jack, and plastic storage cubbies that fit around the wheel. This left me with the open wheel well, from which I removed the plastic surround trim piece.

I purchased a 4’x4’ piece of 3/4" plywood from Home Depot from this project, and had it set up on two sawhorses in the garage. A quick trace with a Sharpie and I had a template to fit inside the wheel well. The Jigsaw made quick work of this and within a few minutes I had a fitted piece of decking to use as a base for the electronics.

Picture
Factory Trunk Design
Picture
Spare & Jack Removed
Picture
Trunk Trim Removed
Picture
Tracing the Trunk Deck
Picture
Test Fitting

Once the deck was sanded, Dani asked what color I was going to paint it. While my initial thought was just to do it black, she asked for silver… so it’s metallic silver. This actually will work to my benefit, as it will push me even more to keep the wire routing clean, even though it’ll never really be seen. With paint dry, I moved the deck into the house and turned the living room into my mad science laboratory getting the fun part of the project underway.

I unfortunately spent an hour or so cutting up the existing wiring system in the Jeep, pulling out the control box and re-routing the existing auxiliary lighting and radio harnesses to the rear trunk area for use in a few days time. The relay control box was pretty tired after months of working with it and moving it to a resting spot, so I went ahead and ordered a new ABS project box to be installed in the new spot in the back. I chose one that’s a bit larger to allow for future expansion, after measuring and ensuring that it will fit on the deck.

I played around with the parts on the deck once it was in the living room and figured out a clean layout for the equipment. Battery will be on the passenger side, with the Wirthco Intelligent Isolator mounted on a bracket in front of it. In-line fuses to the side and again in front of the (+) post of the House battery. The Blue Sea Systems fuse panel and relay control box will live on the driver’s side of the compartment, and wiring will be routed between the two without needing much distance at all.

It took a quick trip to Harbor Freight to buy a handheld hydraulic crimper to tackle the 4AWG connections, but it seems like a good tool to have for the future. As of now the basic wiring is set, and I’ve pretty much gotten as far as I can before the last bit of parts arrive and I move this set-up into the back of the Jeep.

Lots of photos, and plenty more to come…
​
Picture
Picture
Picture
Picture

After getting the system tested with temporary wiring, I went ahead and got to work making the necessary wiring looms to get all of the electrical components (lighting, radio/comms, fridge) bought back to the Blue Sea Systems fuse panel and connected appropriately. This took quite a bit of time, and was sort of a pain in the butt, but I think the cleanliness of the end result was worth it. 

In order to get the wiring into the trunk area I was hoping to use some kind of brush-plate from home A/V installs, but in my searching I found a computer-desk type grommet for wiring, which turned out to be perfect for my use. It measures about 2.25" across, and using a hole saw I cut out the appropriate hole in the trunk/tire surround trim to allow wiring to pass through. It's high enough to clear the rise in the floor of the vehicle and allows wiring to fit in the minimal gap between the suspension air tank and the floor. This took some tricky snaking, but the end result was worth it. I used adhesive silicone to seal the grommet to the plastic trim, and though it's not 100% perfectly adhered, it has done a good job making it look clean.

After pulling all the loose ends of the aux. component wiring into the trunk space I then had the fun (read: tedious) task of cutting them all to the appropriate lengths so they fit cleanly and were able to be loomed up together in the trunk. Testing each fixture one at a time, reappropriating the right fuse size to the connection point, and checking the dash panel switches as I went to make sure everything was functioning appropriately from a control standpoint. Once all was great I used some more of the adhesive tie-downs to secure everything in an organized manner, then took some photos and put the storage deck back on top, calling it a day.

For now the system is fully functioning and seems to be doing so flawlessly. In the next few weeks I'm going to install a 12v meter by the fridge so I can monitor the house battery without lifting the storage deck lid, and also a switch to disable the isolator system. Because it's intelligent and not just passive, it draws a tiny amount of power to see if the starting battery is on or not... where I travel a lot and the vehicle sits in the garage, I'll be able to use the switch to disengage the grounding wire of the isolator to shut it off, essentially disabling the charging capabilities of the second battery until I turn it back on. I've got miscellaneous switches in the basement, so when I've got a meter and time I'll add those to make the entire setup even easier to use.

Final Dual-Battery Install Photos:

Picture
Picture
13 Comments

Kidde Auto Fire Extinguisher

2/20/2018

0 Comments

 
Many years ago one of my first projects for the Wrangler was a fire extinguisher bracket for under the driver's seat, an easily accessible location in the event that I ever needed it. I recently stood in the Fire Extinguisher section at Home Depot kicking myself at the realization that we did not carry one with us across Canada this past summer despite the fuel canisters in the Jeep and open gas stoves we used every night to cook around dry pine needles and the like.

With that lovely narrative, let's get to work on installing a fire extinguisher in a WK2 without it being aesthetically annoying or too much in the way:

Tools needed:
- Drill
- Small Drill Bits
- Pop Rivet Gun
- Medium-length Rivets
- Painter's Tape
- Sharpie

I bought a 3.7lb Kidde B/C (Auto/Marine) fire extinguisher in a snazzy silver color for $17 at Depot. It came with a plastic mount, but I had horrible visions of a high-speed crash where the plastic would break and the extinguisher would become a missile into the back of my skull in the driver's seat. No problem - quick trip to my local Grainger Supply and I was in possession of a $7 Kidde mount, made from metal and with a metal latching strap. I did have to do some modifications to the bracket to widen the space where the neck of the extinguisher goes in order to make it fit. When it came time to touch up the paint, I ended up painting the whole thing black to make it less visible inside.

I knew I wanted the extinguisher in the rear trunk space, as when we cook with the stove it would be the most accessible. Realistically I think the stove catching fire has a higher likelihood than the engine bay (but fingers crossed for neither), so it's located accordingly. 

First off, I put some painter's tape down on the window sill space of the rear-most driver's side window. Driver's side because the fridge is on the passenger side and it seemed too crowded in there for easy access. Holding the bracket up in the space, I used a sharpie to mark through the holes I drilled out for this specific purpose. They're on the flat planes of the bracket. Once the marks were made, I drilled them out with a drill bit appropriately sized for my rivets.
​

Picture
Picture

I had to use some dikes/diagonal wire cutters to get the rivets cut flush, and then was able to fit the extinguisher itself. I used the super scientific "wiggle" test, and the whole assembly seemed sufficiently secure. Ideally I'll never need to use this thing, but I'm glad to know it's back there now.

Final photos:
​
Picture
Picture
Picture

The shear strength of these rivets is rated around 420lbs in a "perfect" scenario... where I'm into plastic, the plastic obviously becomes my weakest point. In reviewing it with an engineer friend Rob, he suggested a third rivet to form a triangular fastening situation, which I'll do when I get home. In a usual crash scenario, to its benefit, there's not really a clear path for it to go forward, as it would come into direct contact with the C pillar before moving too far forward. There's only about 6" of space in there after the nozzle of the extinguisher.

It's right to think there's concern with the extinguisher becoming dangerous in a crash because of its mounting, which I believe I put a bit of thought into, but I may re-evaluate beyond a triangulated rivet if I see an issue. I'll keep this updated if any further changes happen.
0 Comments

Kenwood D710-G & Diamond NR72B HAM Installation

1/21/2018

6 Comments


Diamond 1/4 Wave Antenna Installation:

This is the Kenwood D-710G dual-bander with GPS/APRS and a lot  of other features. I chose the Diamond NR72B antenna for aesthetics and function, it's 14" tall and 1/4 wave. This is my first installed mobile rig so it may not be the world's best gear matching (mainly talking about the antenna) but the height was appealing and the range should still be suitable. Diamond shows 2.15dB gain on both 2m and 70cm. The mount is the ever-popular Diamond K400NMO with multi-axis tilting, and this will get mounted on the hood as there aren't many other places on the WK2 where there's enough folded metal to allow for a mount. 
​

Picture

I finally got a break from Boston's single digit/sub-zero temps and began the installation of my Diamond K400 mount and NR72B antenna in the WK2. Full disclosure, the photos were taken on two different days: first when the Jeep was a mess from the blizzard that had just passed, and the other after a few hours of interior and exterior detailing. Please forgive the dirty ones.

I chose the K400 mount for a hood installation as I'm not quite ready to drill into the roof, and I'm also hoping to get a RTT up there for this year, which would probably negate the ability to have a roof mounted antenna anyway. The hood may not be the single most optimal position for the antenna as far as gain and interference go, but it's clean and will be functional nonetheless. The K400 mount was recommended by a friend and allows for an unobtrusive installation wherever there's a crease in the body panels of a vehicle. It has two adjustable axis which allow to get the antenna vertical regardless of the mounting plane you put it on.

The mount comes with the necessary tools for installation, and is padded on the bottom to protect your vehicle's paint. With four simple allen key'd set-screws underneath that press a stainless steel metal bar against the underside of the mounting location, the bracket becomes secured in place. It took me a few test fittings to get the antenna perfectly vertical from all planes, but once it was aligned correctly I tightened down the adjustable axis allen heads and mounted the Diamond NR72B antenna. Standing only 14" tall, it's sleek on the hood and isn't overly obnoxious for my field of view while driving. This will be perfect for everyday use, and I'll test it on overland trips with the group... It has crossed my mind to maybe get a full 36" antenna as well for long haul trips, much in the same way I have a 3' and 5' CB on my Wrangler for when we're on trips that might separate us more. (There's no mobile dual-band radio in the TJ, just handheld)
​

Picture
Picture

Once the antenna was mounted, I moved on to routing the supplied 13-foot coax line that came with the K400 bracket. Being spoiled by the Warn Zeon Platinum's Wi-Fi remote, I've never actually had to run cable through the firewall of the Trailhawk, so this was going to be a new adventure for me. I did some Google research and read about grommets above the gas and brake pedals, but wasn't able to locate them on this specific model. My hope was for passenger side installation, so I continued digging until I found an article referencing a grommet on the A-Pillar, passenger side of the vehicle. I pulled the necessary internal trim pieces, door sill and the kick plate on the right side of the foot-well, and located the grommet the forum was talking about. I began snaking the tiny coax through the engine bay, down behind the passenger front strut tower, through the wheel well trim, and down into the rocker panel trim piece. I then fed it up a tiny gap in the rocker trim up by the fender flare, and pulled the remaining slack through. This was no easy process, and I was constantly wishing for warmer weather, and to not be lying on the snow covered ground on my back running the cable underneath. 

Once the cable was ready, I popped the A-Pillar grommet out of its position and drilled a small hole in it, solely large enough for the cable to get through, which required some good pressure on the tiny SMA adapter at the end to get it through the hole. Once the cable was passed through the grommet I used a coat hanger to puncture a small hole in the vehicle's insulation that was stuffed in the A-Pillar, then taped the SMA adapter to the coat hanger and pulled it back through into the cabin. I ran the coax underneath the door sill trim piece and then under the passenger seat mounting bracket, arriving at the same spot at the CB coax, directly above the battery compartment.
​

I put all the trim pieces back together, ensuring the coax was not pinched or stressed as the hood opened and closed, and set to work with moving around the comms system in the cabin. While I don't love the idea of having two transceiver mics in such a small amount of space, I'll be retaining the CB for when we do our local Jeep club runs, and the dual-band for overland trips with my more tight-knit group. I used 3M's "super heavy duty could probably hold up an elephant in an earthquake" double stick tape, and mounted a black plastic mic holder to the dashboard not far from the original mounting position. the Kenwood mic then fit into the original mic mount I made for the CB almost a year ago. It looks okay. It's fine. Dani said there's no loss to the passenger legroom, so we'll run it like this for now until I come up with something better.
​

Picture
Picture

​Kenwood D-710G Installation

When we left off, I had just finished installing the antenna, coax cable, and transceiver mic into the Trailhawk. Next up on the project to-do list was the installation of the Kenwood D-710G transceiver itself, as well as the head unit. After seeing a plethora of installs in WK2 Grand Cherokees with the head unit stored inside the center console cubby (i.e. where the USB charger, 12v plug, and aux input are), I decided I wanted mine to not be as hidden, and also to not be blocking anything useful like the things I listed above.

After some searching on Amazon I discovered the MagicMount universal phone mount. It's small and magnetic, with an exceptionally strong pull for whatever is mounted to it. I decided that I'd figure out a way to mount the 710 remote head to the Magic Mount and place it on the left side of the dashboard by the driver's A-pillar in the cabin. I used the supplied Kenwood remote mount, took my Dremel cut-off wheel to the two mounting/screw tabs, and made it flush across the back for the magnet portion of the mount to adhere to. I re-painted it and attached it to the Kenwood before moving on to installing the MagicMount. Sticking the mount to the dash after cleaning the area with an alcohol, I applied pressure for 60 seconds or so before letting it “cure” overnight. Once that had settled I magnetically attached the D-710G head unit and it's been holding without issue ever since.
​
Picture
Picture
Picture

With the remote head in place I then had to connect it to the transceiver with the supplied Ethernet/Cat-6 cable. My initial hope had been to run it under the door sill trim on the driver's side, but the presence of the 6-strand cable for the auxiliary lighting switches made it too difficult to run both wires back under the front seats neatly. Slightly disappointed, I began brainstorming other solutions.

Always hoping for a clean, factory-looking install I removed the A-pillar panel from the dash, the kick trim from the driver's foot-well, and the carpet trim above the brake and gas pedals. I ran the Cat-6 from the top of the A-pillar down to just below the dash trim, then over the foot-well region, following along the tranny tunnel, pushing it ever so slightly up under the trim until I had worked my way back past the driver's seat to the backseat of the Jeep, following along the console in the back and returning it to underneath the passenger seat where the transceiver will live for now. To better illustrate this cable path for anyone interested in following it, I've used a dotted red line on the images below to give you a better idea.
​
Picture
Picture
Picture
Picture

To facilitate the easy removal of the Kenwood base unit if ever need be, I used industrial strength Velcro (or hook-and-loop depending on where you're from in the world) on the top of the battery compartment tray. The passenger seat has a ton of flexibility with positioning and only comes into contact with the transceiver if it's all the way down in position… luckily my co-pilot isn't the tallest girl around so there shouldn't be any issues squishing it.

The wiring situation isn't immaculate right now so I do not have any images of the battery compartment, but I will be cleaning that up soon and ideally circumventing the potential for even messier wiring by moving to a dual-battery set-up if a few more cards fall into place over the next few months. I used some YouTube videos for help with setting up the basic functions of the radio, and after some trial and error got the APRS set up appropriately. Within an hour I was able to see the GPS location of the Jeep on www.aprs.fi - a great trick that will be very handy in areas with no cell service throughout the continent.

Final install photos of the radio in the main cabin... it's well out of the way of my line of sight while driving, and despite most of the functions being able to be recalled with the mic head, I can easily access the buttons on the head unit if need be.
​
Picture
Picture
6 Comments
<<Previous

ADVENTURES

Trans-Canada Overland Expedition
The Long Trail
Appalachian Trail
Bicycling Across America

Overland Build

Meet The Jeep
Backcountry Gear
​Modifications & Installations

Everything Else

Read The Blog
Photography
Guest Book
Contact

Picture
© COPYRIGHT 2019
​All Rights Reserved