As discussed previously on a few web forums, I’ve wanted to move the WK2 to a dual-battery setup for quite a while now. The goal will be to move all the auxiliary electrical units (HAM and CB radios, fridge, lighting, device charging, etc.) to the deep cycle battery – hereinafter referred to as the House battery – and get them off the starting battery. By alleviating their power draw from the starting battery, we’ll be lowering the chances of a dead car in the middle of nowhere.
I knew the spare tire was going to be moved to a swing-out tire carrier, which opened up the possibility of mounting the new House battery underneath the rear deck I built last summer. Once the majority of parts were ordered (every single one of them available on Amazon with 2-day delivery) I got to work laying out how this project would go along. The full parts list will be updated once the project is done, but currently is as follows:
I knew the spare tire was going to be moved to a swing-out tire carrier, which opened up the possibility of mounting the new House battery underneath the rear deck I built last summer. Once the majority of parts were ordered (every single one of them available on Amazon with 2-day delivery) I got to work laying out how this project would go along. The full parts list will be updated once the project is done, but currently is as follows:
| The full parts list will be updated once the project is done, but currently is as follows: - Universal Battery sealed 100ah AGM - Wirthco 150A Intelligent Battery Isolator - Blue Sea Systems 12-post fuse block w/ negative bus - 8”x5” ABS plastic project box - 2x InstallGear 150A in-line fuses - 2x 10-foot sections of 4AWG wire in red & black - Crimp-on 4AWG cable ends - Battery terminal ends | 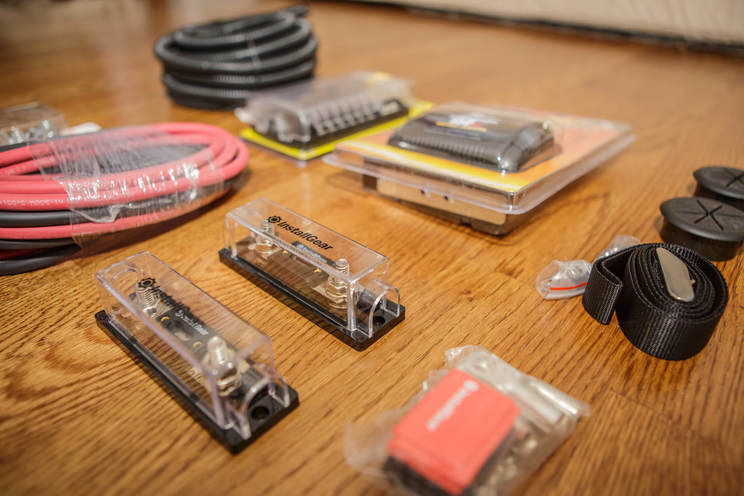 Acquiring Gear For Installation |
So the first step here was to remove all my gear from the back of the Jeep. This included my Pelican case of recovery and winter camping gear, kept in there in case of an emergency while New England is getting pummeled with adverse weather. Luckily that time of year is almost over. I then pulled the fridge out and removed the rear deck I had built last year. Next up came removing the OEM included gear, the spare tire, jack, and plastic storage cubbies that fit around the wheel. This left me with the open wheel well, from which I removed the plastic surround trim piece.
I purchased a 4’x4’ piece of 3/4" plywood from Home Depot from this project, and had it set up on two sawhorses in the garage. A quick trace with a Sharpie and I had a template to fit inside the wheel well. The Jigsaw made quick work of this and within a few minutes I had a fitted piece of decking to use as a base for the electronics.
I purchased a 4’x4’ piece of 3/4" plywood from Home Depot from this project, and had it set up on two sawhorses in the garage. A quick trace with a Sharpie and I had a template to fit inside the wheel well. The Jigsaw made quick work of this and within a few minutes I had a fitted piece of decking to use as a base for the electronics.
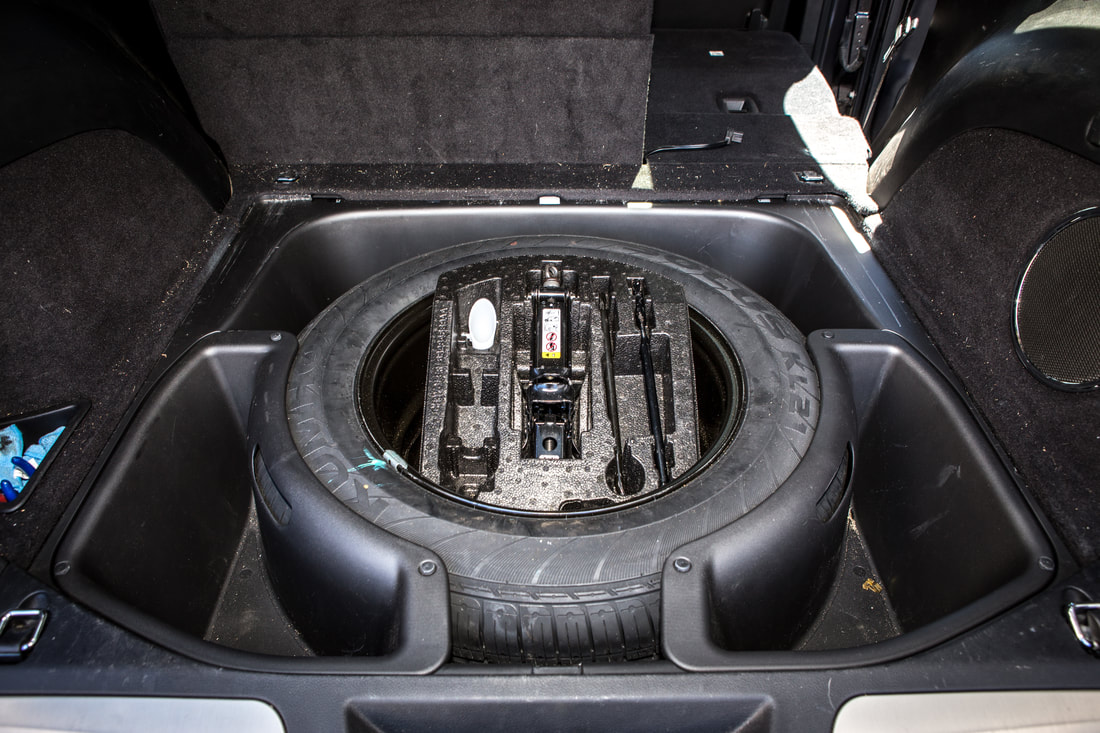 Factory Trunk Design | 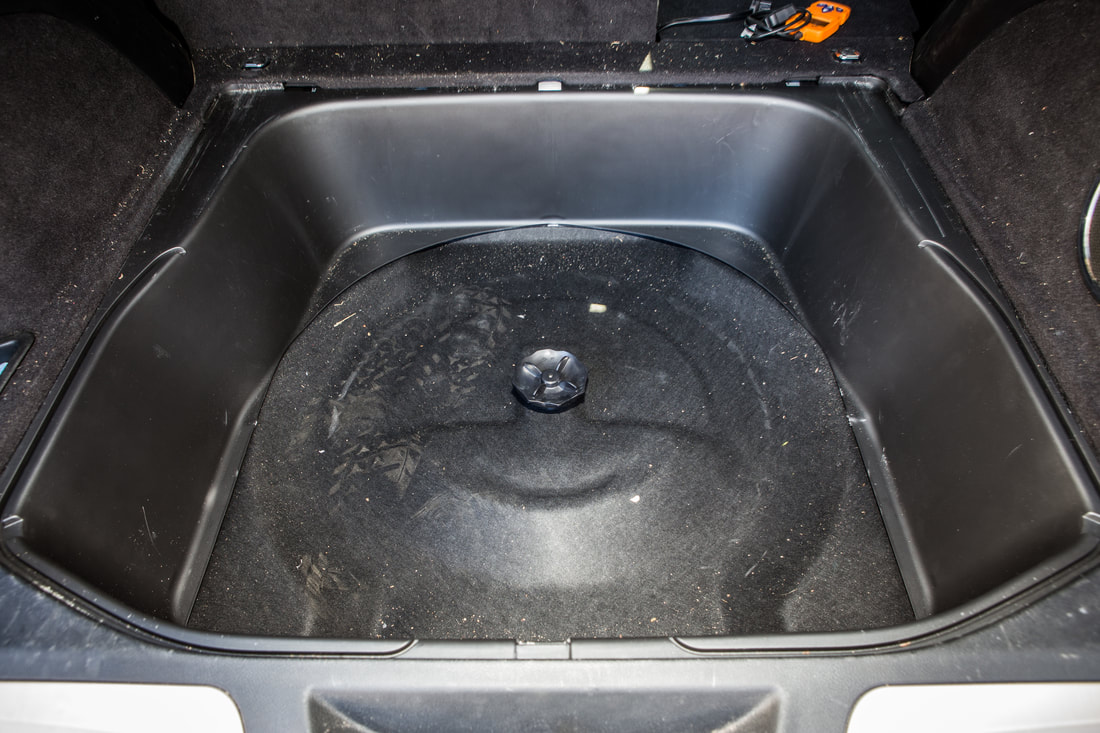 Spare & Jack Removed | 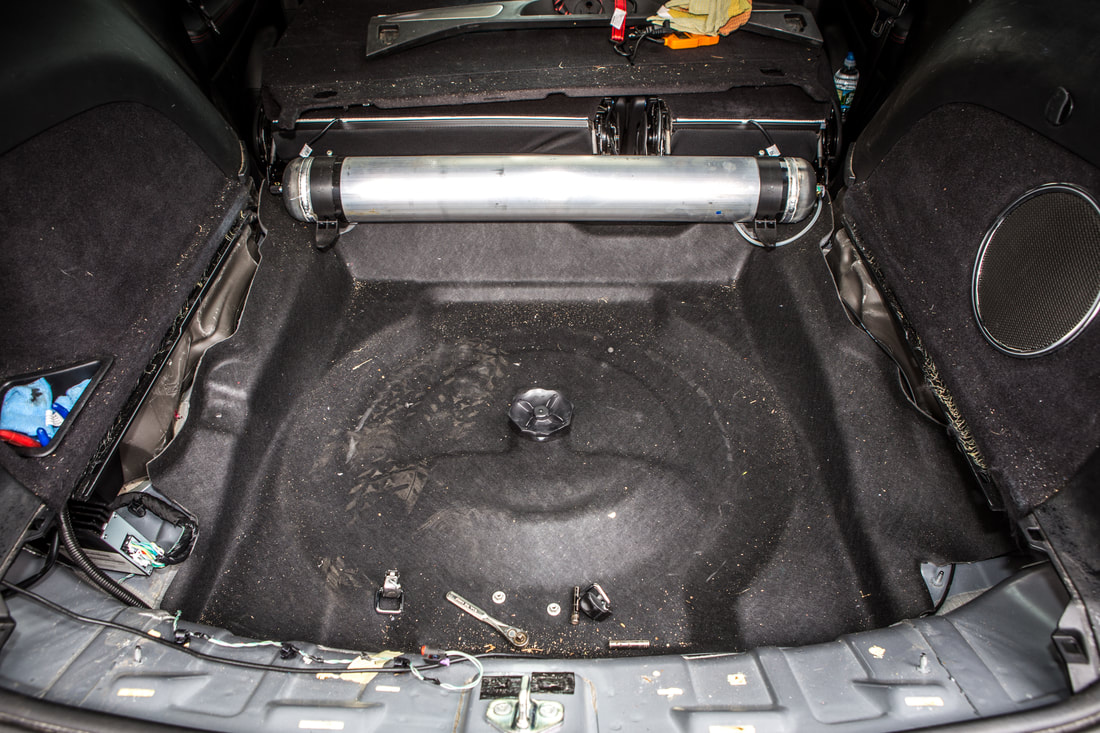 Trunk Trim Removed |
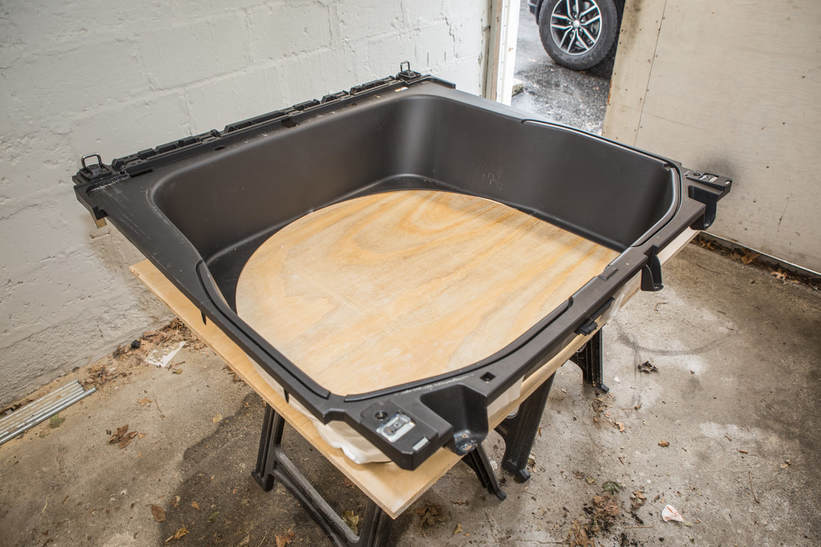 Tracing the Trunk Deck | 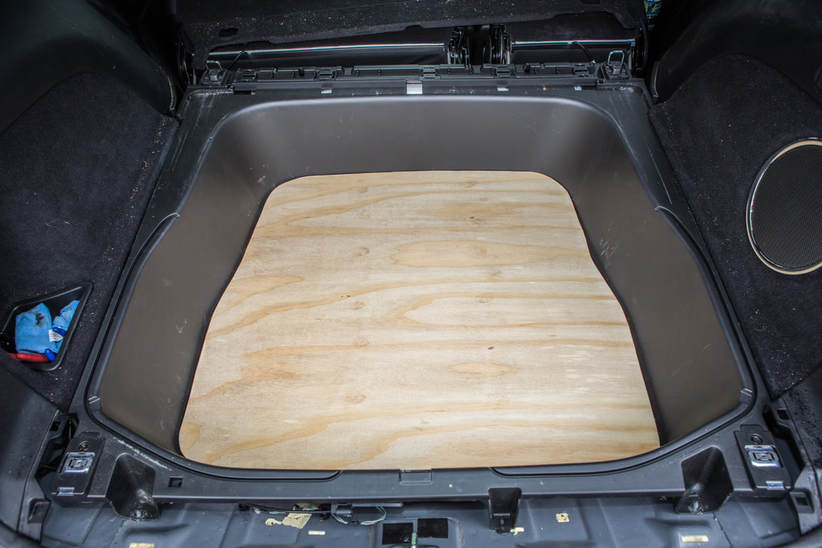 Test Fitting |
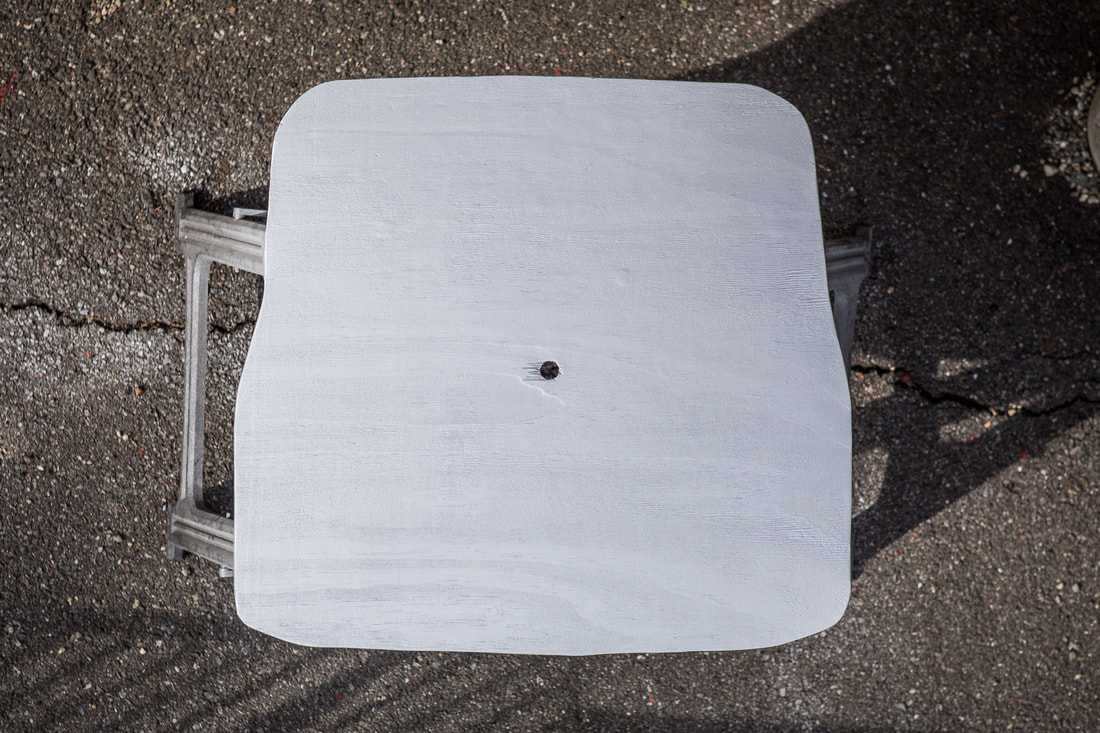
Once the deck was sanded, Dani asked what color I was going to paint it. While my initial thought was just to do it black, she asked for silver… so it’s metallic silver. This actually will work to my benefit, as it will push me even more to keep the wire routing clean, even though it’ll never really be seen. With paint dry, I moved the deck into the house and turned the living room into my mad science laboratory getting the fun part of the project underway.
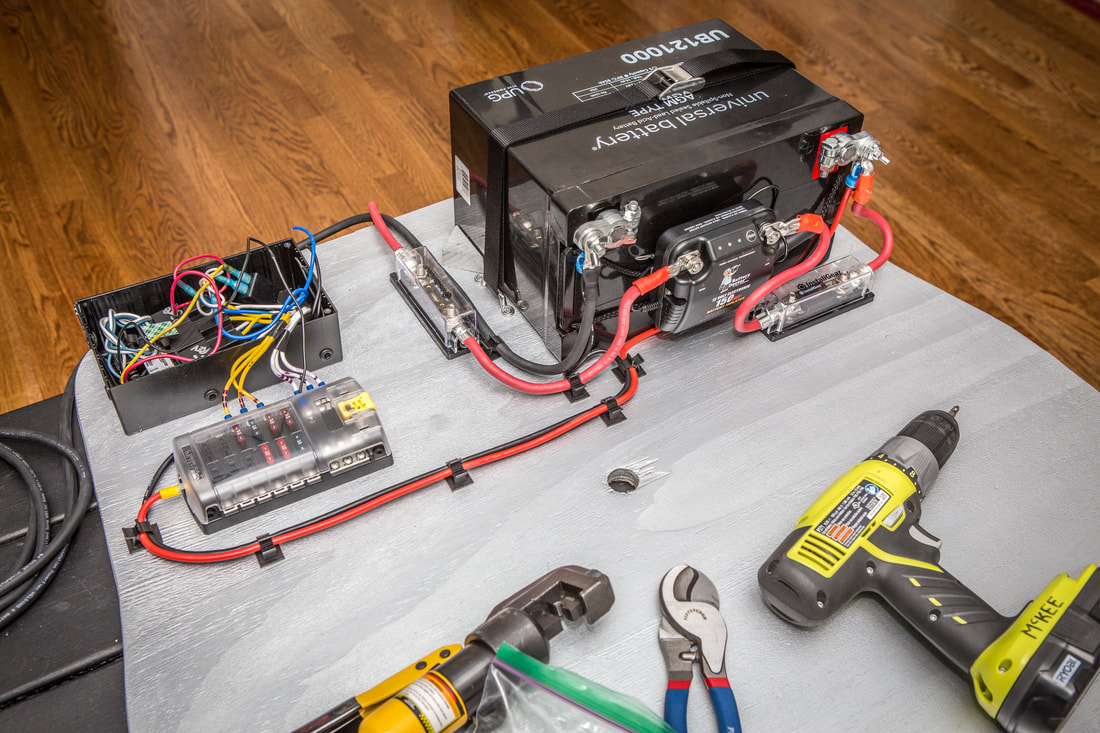
I unfortunately spent an hour or so cutting up the existing wiring system in the Jeep, pulling out the control box and re-routing the existing auxiliary lighting and radio harnesses to the rear trunk area for use in a few days time. The relay control box was pretty tired after months of working with it and moving it to a resting spot, so I went ahead and ordered a new ABS project box to be installed in the new spot in the back. I chose one that’s a bit larger to allow for future expansion, after measuring and ensuring that it will fit on the deck.
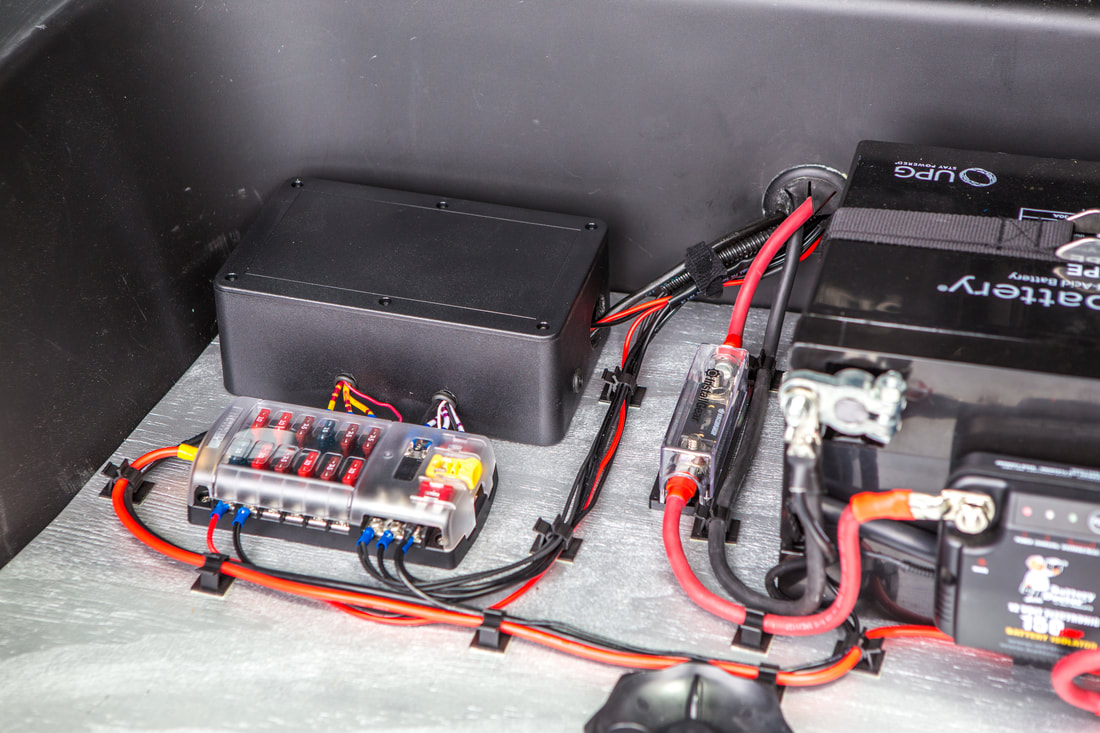
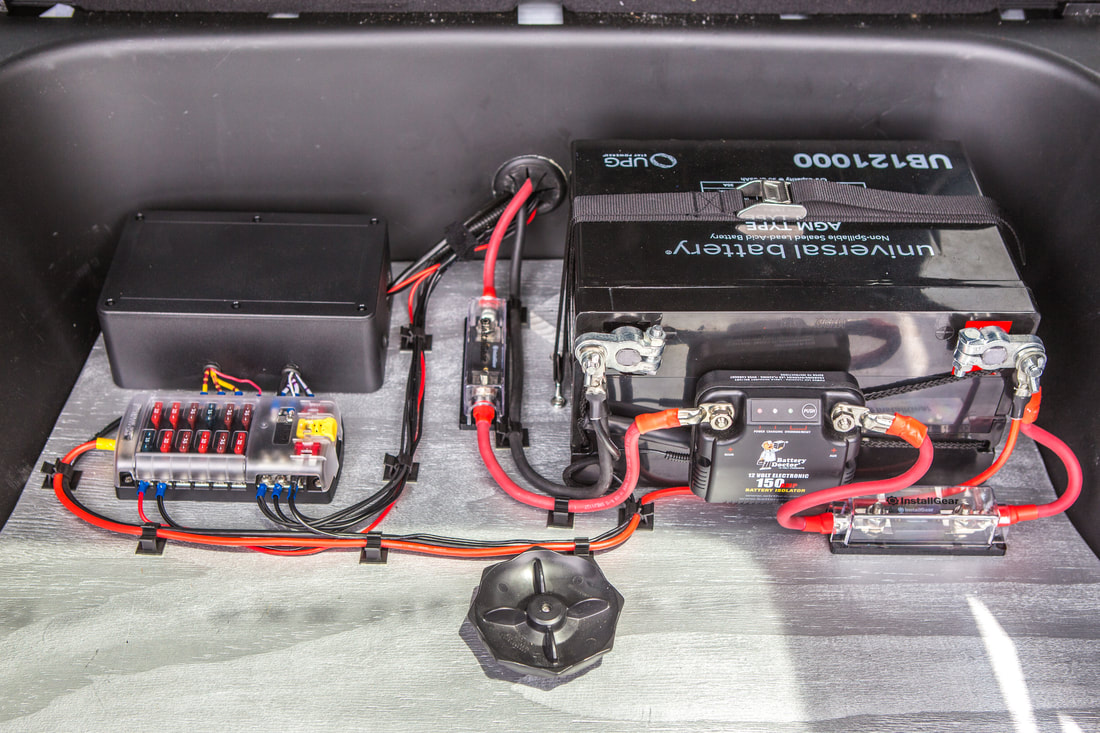
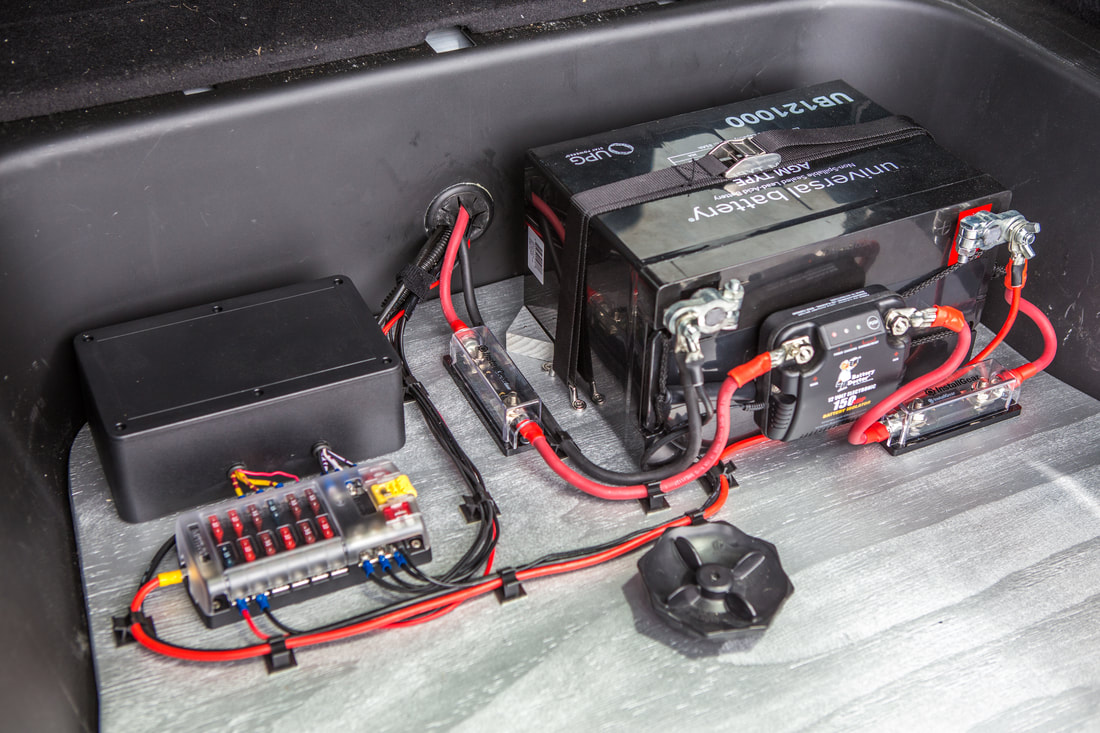
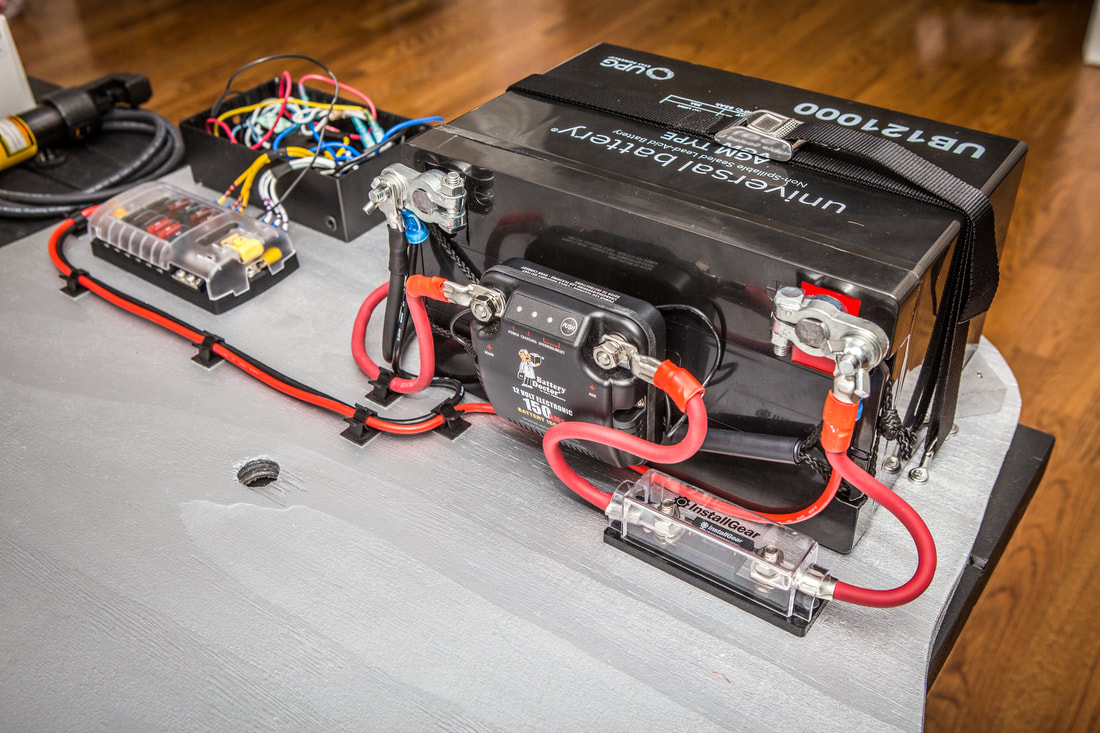
I played around with the parts on the deck once it was in the living room and figured out a clean layout for the equipment. Battery will be on the passenger side, with the Wirthco Intelligent Isolator mounted on a bracket in front of it. In-line fuses to the side and again in front of the (+) post of the House battery. The Blue Sea Systems fuse panel and relay control box will live on the driver’s side of the compartment, and wiring will be routed between the two without needing much distance at all.
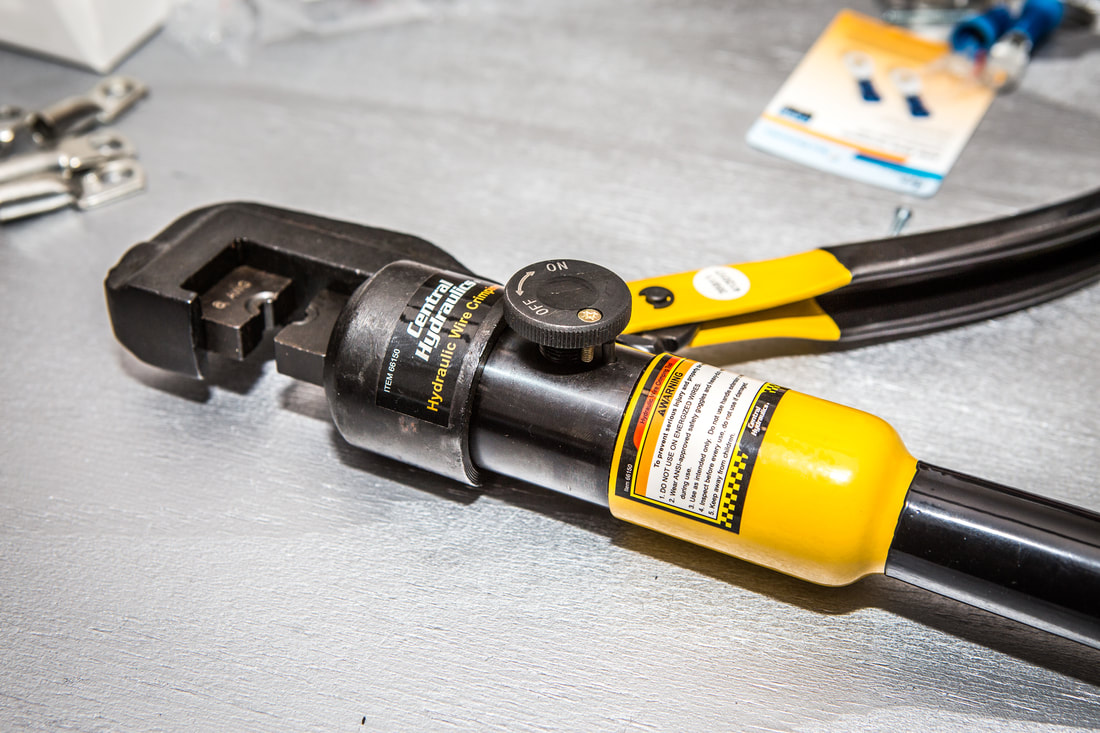
It took a quick trip to Harbor Freight to buy a handheld hydraulic crimper to tackle the 4AWG connections, but it seems like a good tool to have for the future. As of now the basic wiring is set, and I’ve pretty much gotten as far as I can before the last bit of parts arrive and I move this set-up into the back of the Jeep.
Lots of photos, and plenty more to come…
  |   |
After getting the system tested with temporary wiring, I went ahead and got to work making the necessary wiring looms to get all of the electrical components (lighting, radio/comms, fridge) bought back to the Blue Sea Systems fuse panel and connected appropriately. This took quite a bit of time, and was sort of a pain in the butt, but I think the cleanliness of the end result was worth it.
In order to get the wiring into the trunk area I was hoping to use some kind of brush-plate from home A/V installs, but in my searching I found a computer-desk type grommet for wiring, which turned out to be perfect for my use. It measures about 2.25" across, and using a hole saw I cut out the appropriate hole in the trunk/tire surround trim to allow wiring to pass through. It's high enough to clear the rise in the floor of the vehicle and allows wiring to fit in the minimal gap between the suspension air tank and the floor. This took some tricky snaking, but the end result was worth it. I used adhesive silicone to seal the grommet to the plastic trim, and though it's not 100% perfectly adhered, it has done a good job making it look clean.
After pulling all the loose ends of the aux. component wiring into the trunk space I then had the fun (read: tedious) task of cutting them all to the appropriate lengths so they fit cleanly and were able to be loomed up together in the trunk. Testing each fixture one at a time, reappropriating the right fuse size to the connection point, and checking the dash panel switches as I went to make sure everything was functioning appropriately from a control standpoint. Once all was great I used some more of the adhesive tie-downs to secure everything in an organized manner, then took some photos and put the storage deck back on top, calling it a day.
For now the system is fully functioning and seems to be doing so flawlessly. In the next few weeks I'm going to install a 12v meter by the fridge so I can monitor the house battery without lifting the storage deck lid, and also a switch to disable the isolator system. Because it's intelligent and not just passive, it draws a tiny amount of power to see if the starting battery is on or not... where I travel a lot and the vehicle sits in the garage, I'll be able to use the switch to disengage the grounding wire of the isolator to shut it off, essentially disabling the charging capabilities of the second battery until I turn it back on. I've got miscellaneous switches in the basement, so when I've got a meter and time I'll add those to make the entire setup even easier to use.
Final Dual-Battery Install Photos: