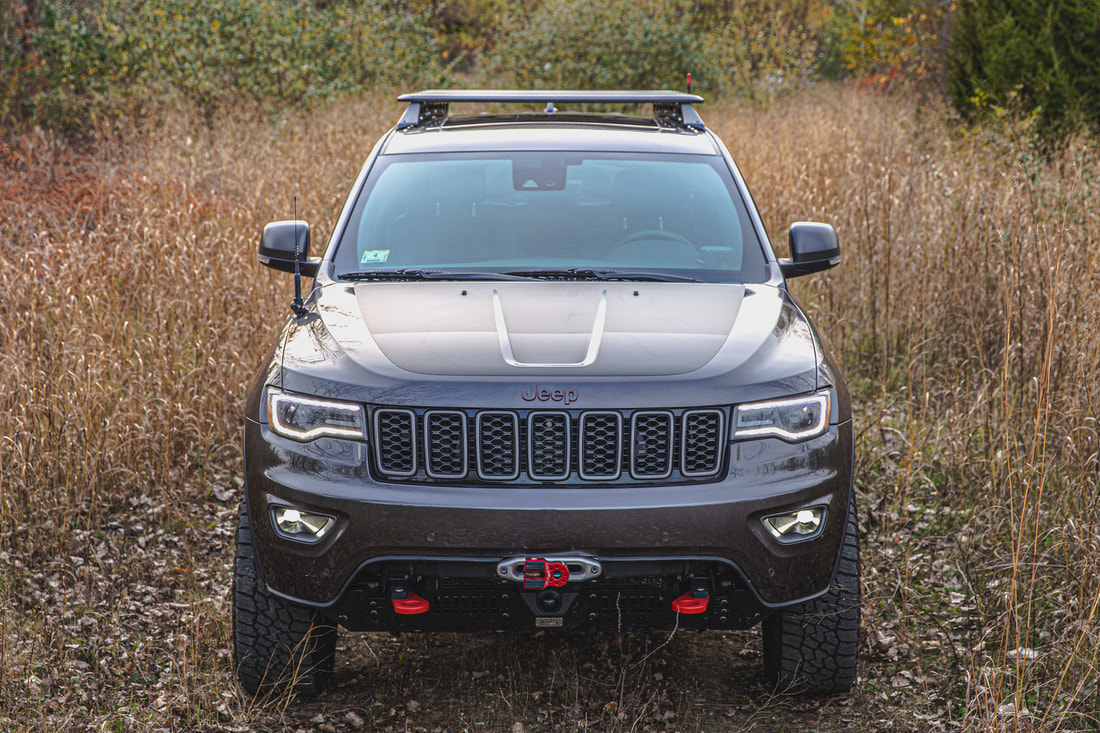

It’s with great enthusiasm that I sit down to document this install write-up about the brand new Chief Products WK2 Roof Rack. A long awaited release from Chief, this rack steps in as one of few contenders in the industry for modern Grand Cherokees looking to move gear to the roof to save space inside. Boasting an unprecedented and engineer certified 330-pound dynamic weight rating and 1,332-pound dynamic rating, this rack is build to securely and safely handle whatever you can throw on it.
Whether you’re looking to store a spare tire, fuel canisters, LED bars, awnings, or a Roof Top Tent of any kind, the WK2 Roof Rack is the solution a great many people have been looking for. A very important thanks to my friend Nick for helping with the initial day of installation of the rack.
Whether you’re looking to store a spare tire, fuel canisters, LED bars, awnings, or a Roof Top Tent of any kind, the WK2 Roof Rack is the solution a great many people have been looking for. A very important thanks to my friend Nick for helping with the initial day of installation of the rack.
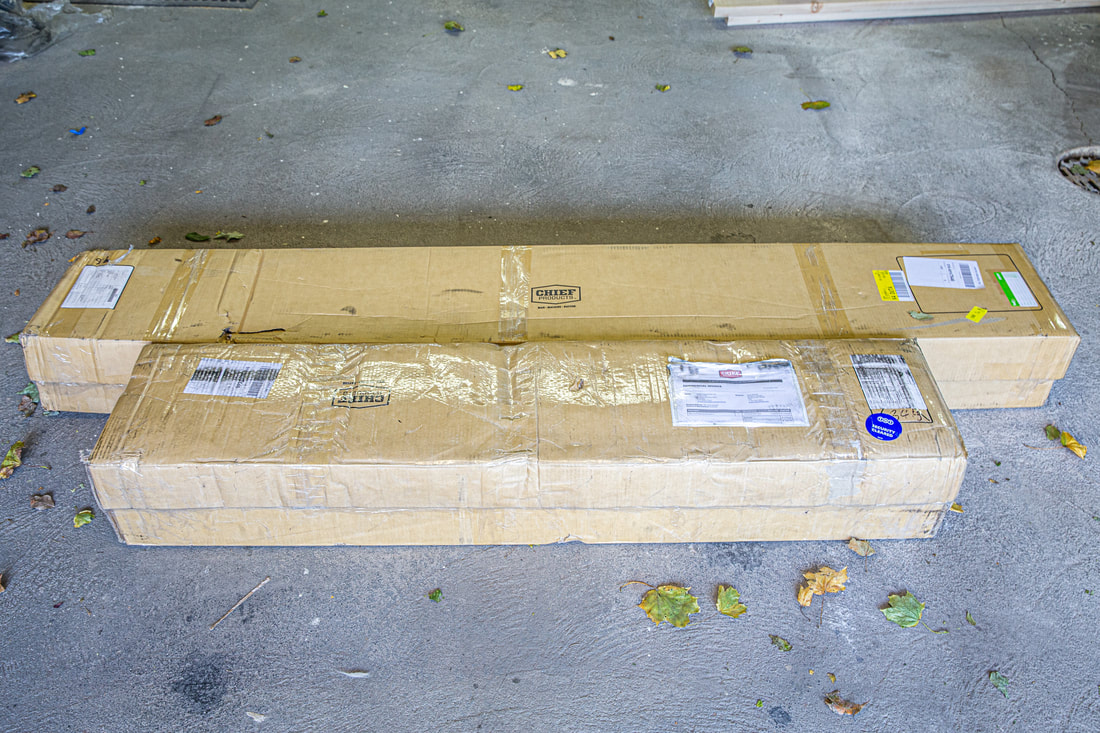 | 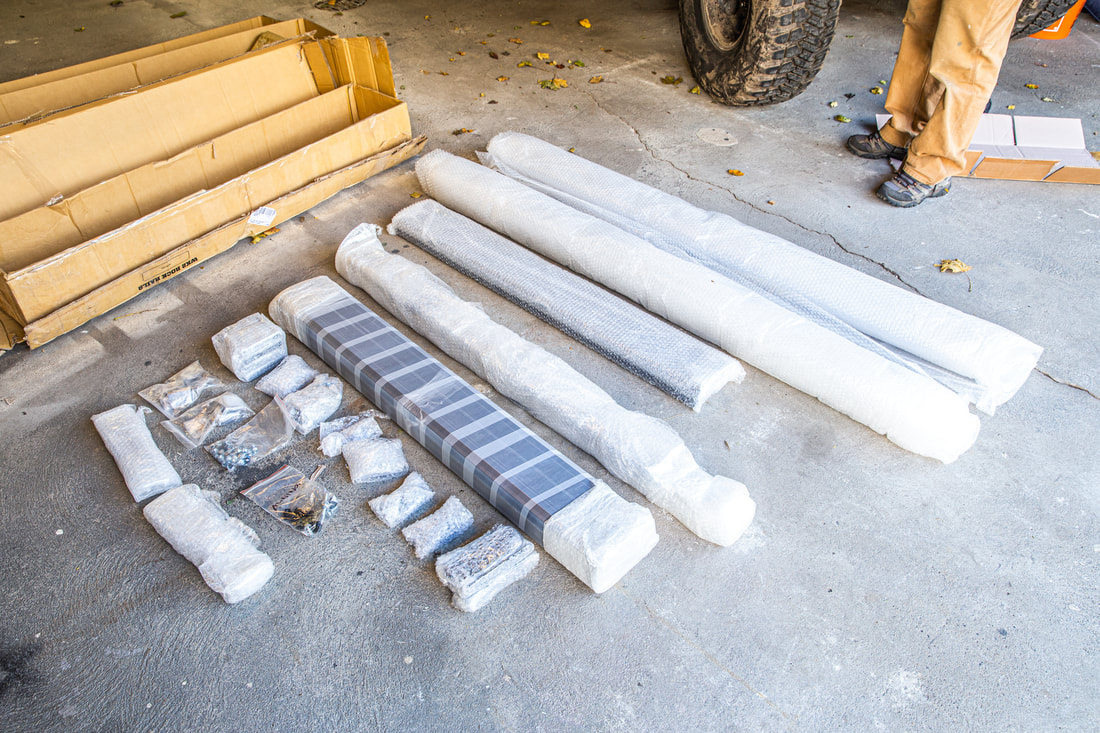 |
Shipped to me directly from Chief’s warehouse in Australia, the entire aluminum rack (listed on their website as the “Full Roof Rack System”) came immaculately packaged and wrapped in more protective bubble wrap than even Amazon sends out. Each piece of the aircraft-grade aluminum alloy was perfectly powder coated, each piece of individual hardware bagged and labeled for assembly. If I’ve learned one thing over the years of working with Chief, it’s that they put thought into each and every aspect of the process, from unboxing to install to customer service, it’s all there.
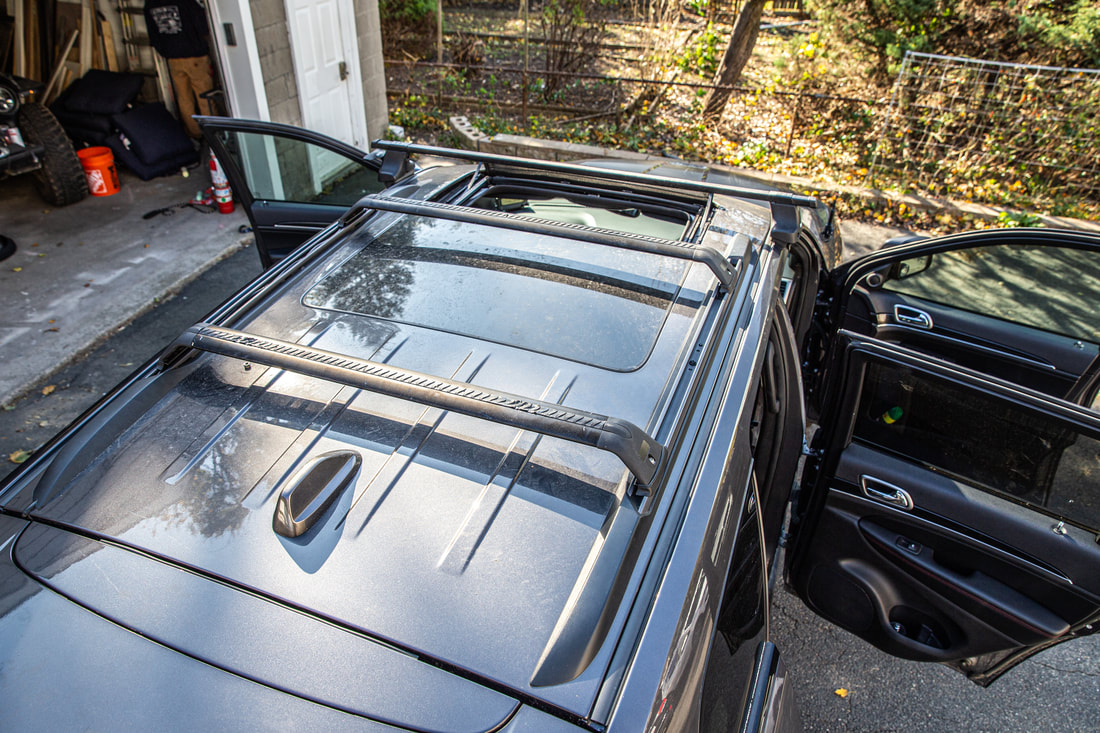
To start the install of the WK2 Roof Rack I needed to remove my roof top tent and existing Rhino Racks and Thule Traverse crossbar, along with the OEM roof rails. Great news - all of this can be done with a simple T-30 torx bit. With all of that put down on the ground behind the Jeep, I washed two years of grime and dirt accumulation off the roof, and we got to work.
To start the install of the WK2 Roof Rack I needed to remove my roof top tent and existing Rhino Racks and Thule Traverse crossbar, along with the OEM roof rails. Great news - all of this can be done with a simple T-30 torx bit. With all of that put down on the ground behind the Jeep, I washed two years of grime and dirt accumulation off the roof, and we got to work.
 Custom 3-Crossbar Set-Up | 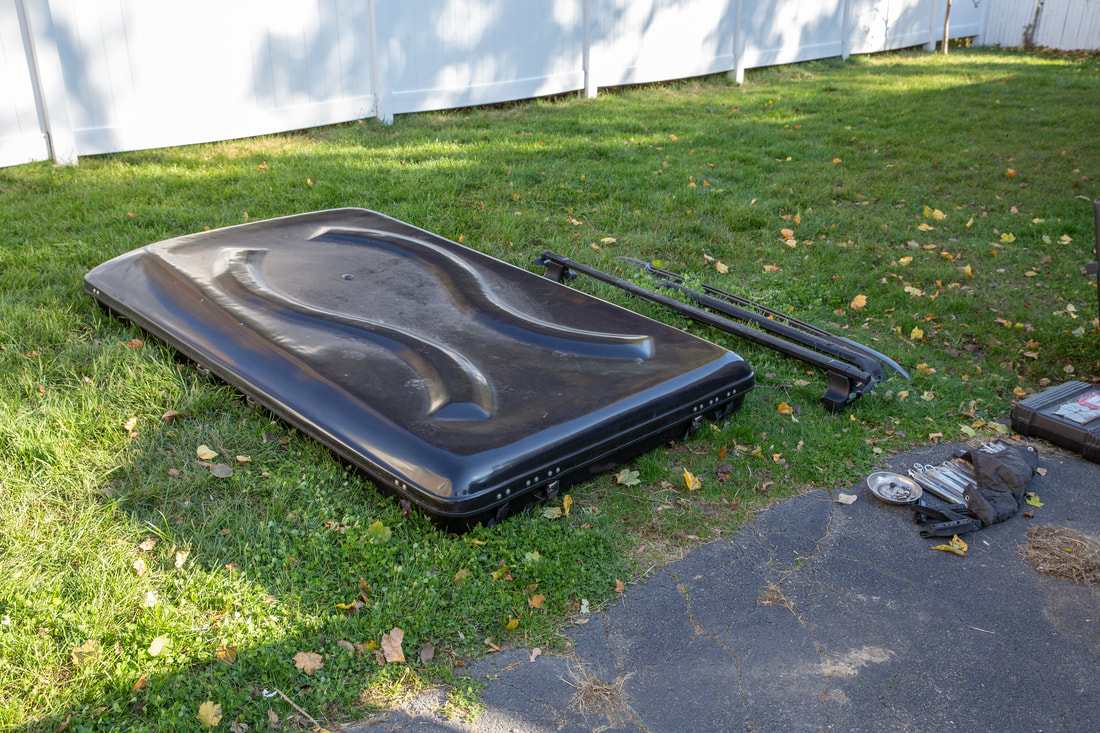 Roof Top Tent Removed |
 OEM Roof Rails Removed |  Washing The Roof |
Mounting Rails Installation
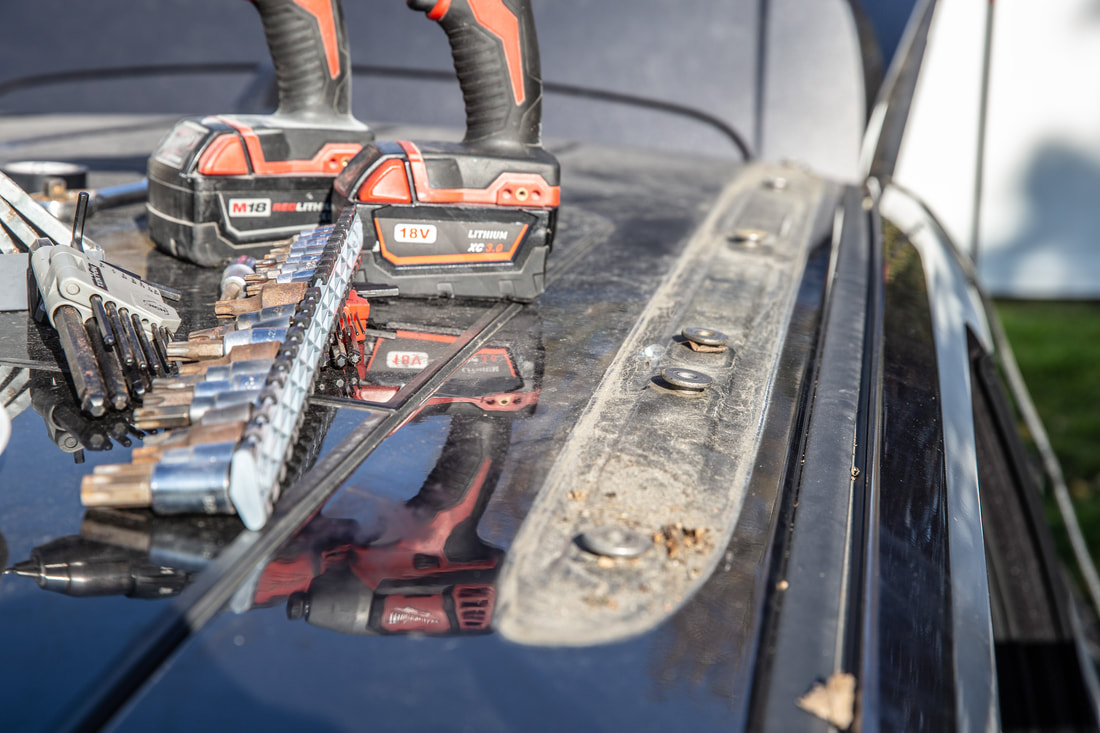
The first step was loosely fastening the small angled brackets to the Mounting Rails in preparation for their installation on the roof. Each bracket mounts with two 10mm bolts and lock washers which, in true Chief Products fashion, sit securely into grooves pressed into the Mounting Rails themselves. Once these 10 brackets were finger tight on the two Rails, we placed the driver’s side up on the roof of the Trailhawk. Utilizing the factory T30 fasteners and an angled bit driver, we installed the bolts into the factory nutserts along the roofline, making sure to leave the whole system semi-loose so that it could wiggle around as the rest of the rack was installed over top of the Mounting Rails. We repeated the process on the passenger side of the vehicle before returning to the pile of parts on the garage floor (placed gently overtop of the shipping bubblewrap!) to continue the installation.
 Chief Products WK2 Roof Rack Parts
 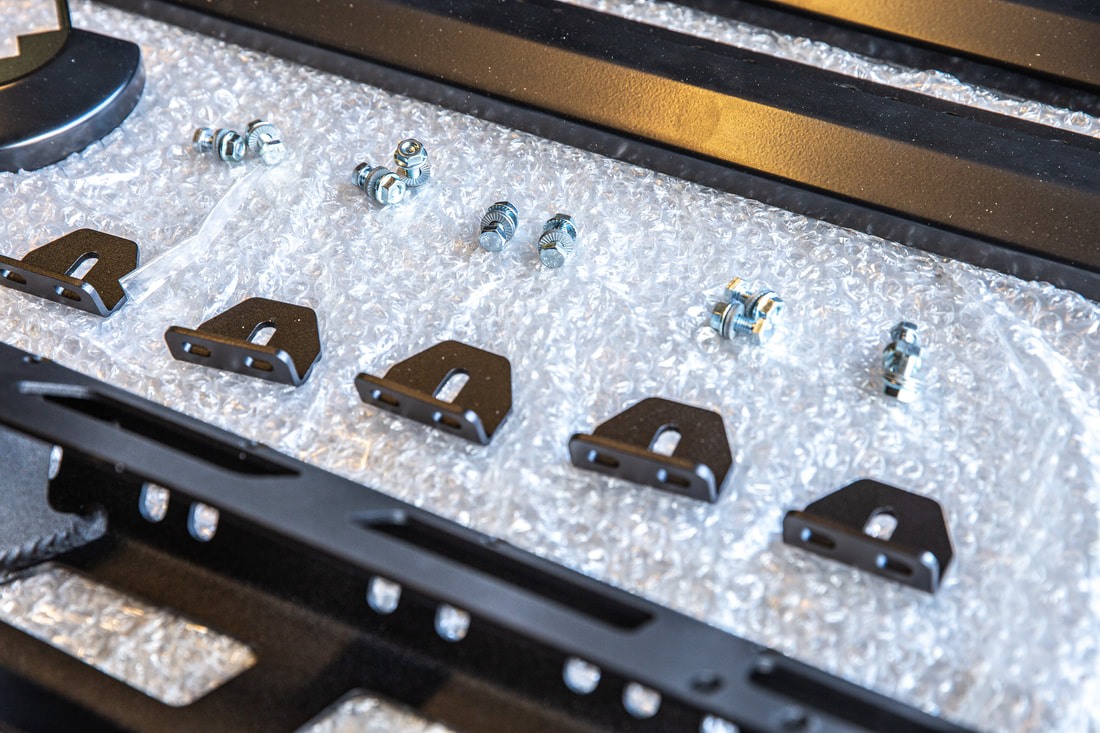 Angle Brackets & Hardware | 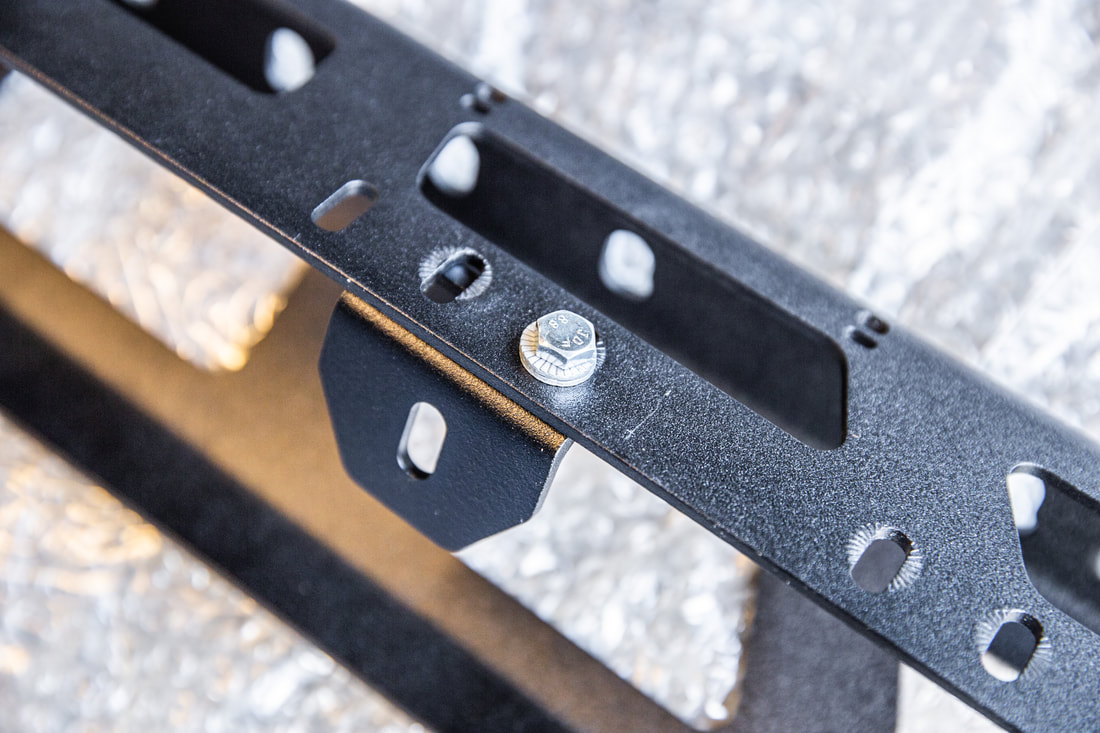 Securing Angle Brackets |
Securing to OEM Roof Nutserts
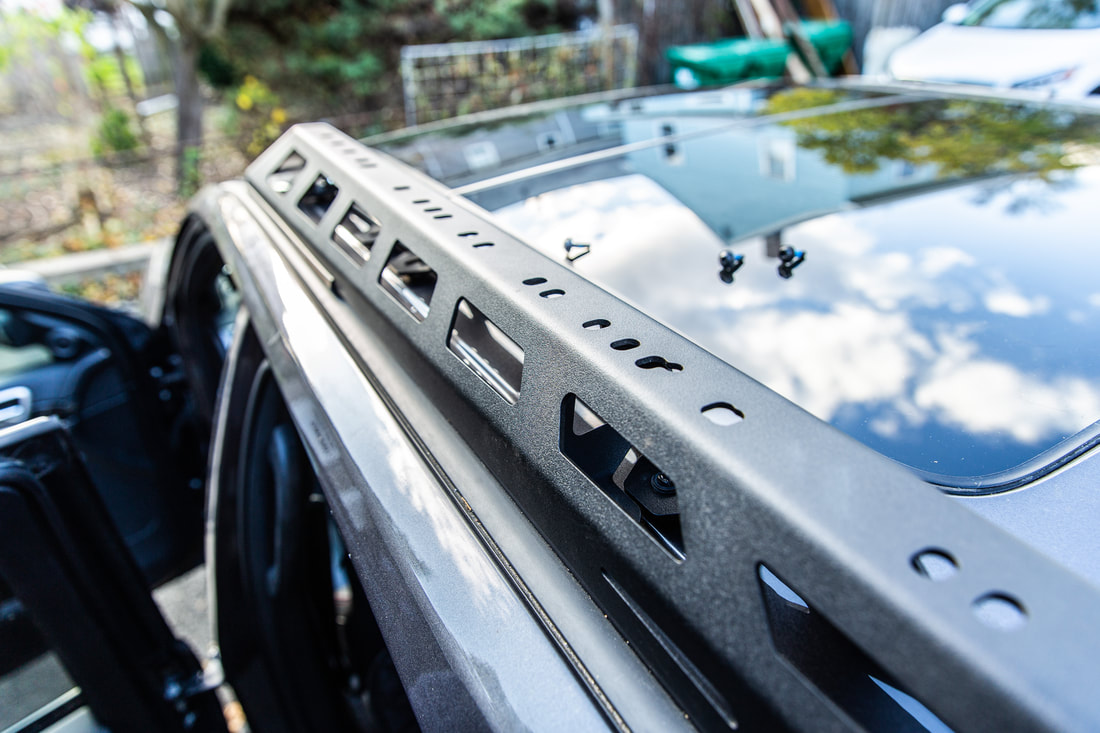
Driver's Side Mounting Rail
Passenger Side Mounting Rail
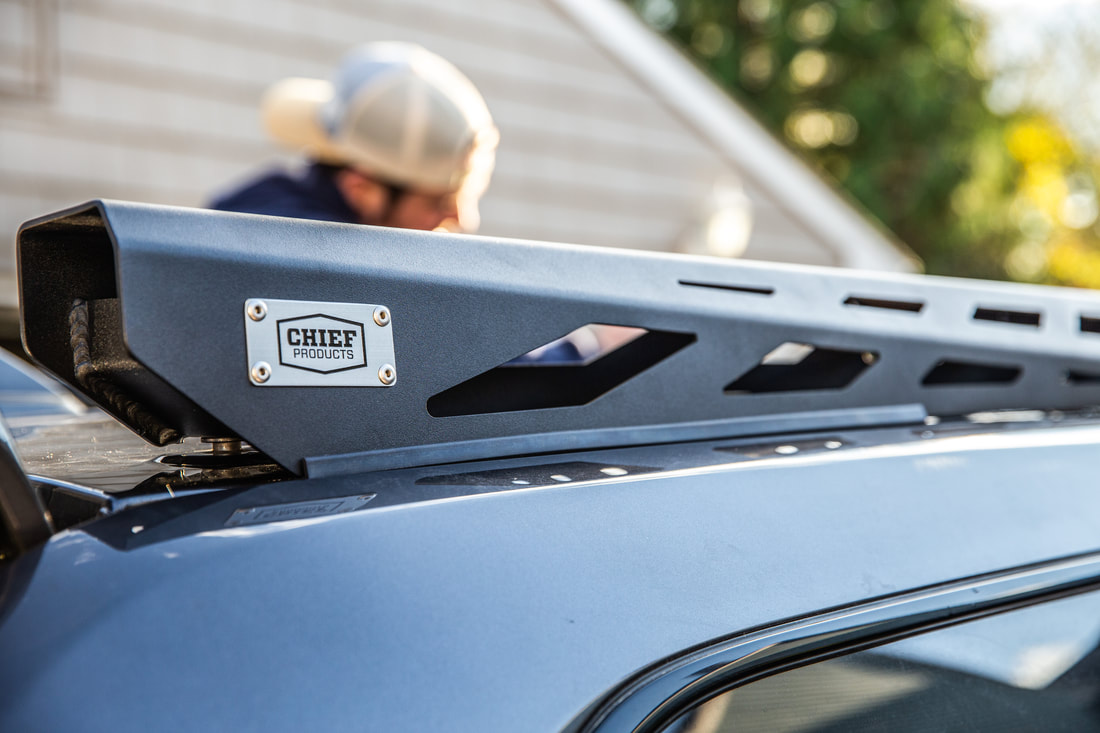
Bare Bones ConfiguratioN
Depending on which multiple Roof Rack configurations you buy from Chief, there are a variety of methods of installation. While I was ultimately working with the Full System configuration, I wanted to ensure that people were able to see the variety of possibilities, so we went forward with installing what Chief refers to as the “Bare Bones” configuration. This consists of the Mounting Rails and two of the Plank crossbars.
The beauty of the Chief rack is the modular nature of the product, allowing these Planks to be placed almost anywhere up and down the length of the Mounting Rails. The full system comes with 6 planks for a complete installation, but is configurable with anywhere from one to all six of them depending on your needs. I figured most people would use a two-plank configuration, so we placed them in positions 2 and 6 to illustrate this set-up. You’ll notice the awesome end caps that flank the crossbar planks, machined out in the famous 7-slots that pay tribute to decades of Jeep history.
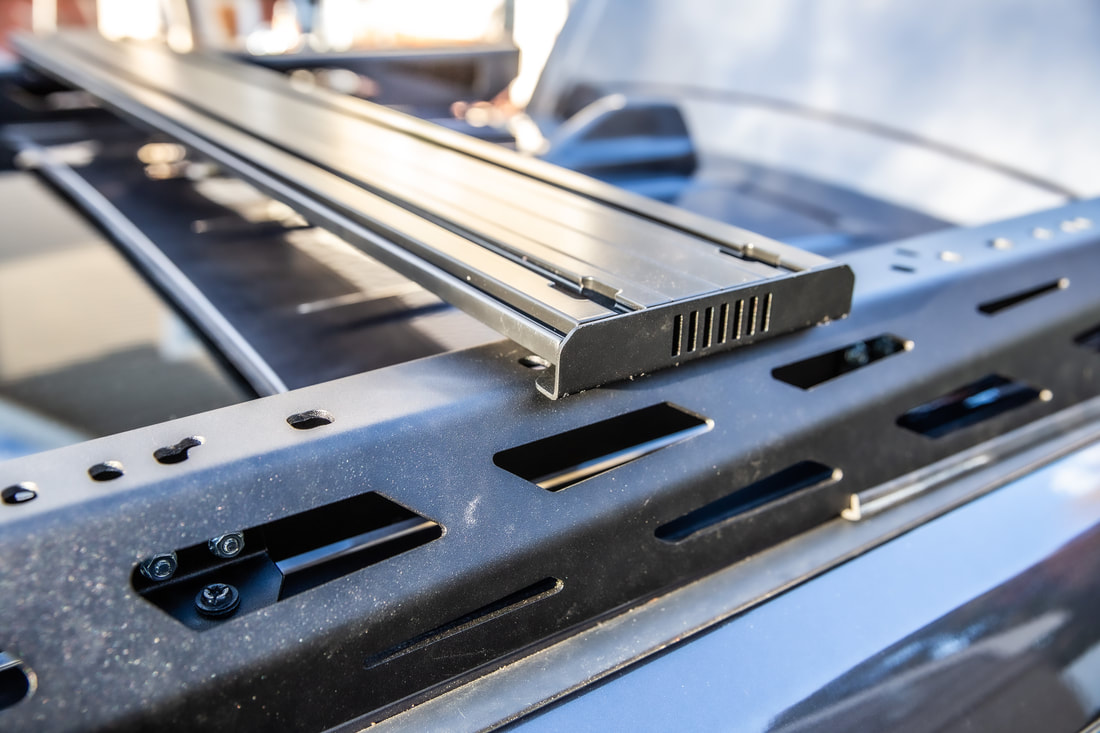
Each aluminum plank is drilled out for bolts to easily fall through them into the Mounting Rails where a bar with pre-welded nuts mates up to the bottom side. For those of us with larger hands it can be a bit of fun to hold the nut plates into place, but I found that getting one side relatively secure and then adding the second bolt made it a lot easier to get everything tight. Once all 4 bolts were tightened on the first plank we moved onto the second one, buttoning it up in just a few minutes after picking it up off the garage floor. At this point we were losing daylight in the Northeast, so I drove the Jeep back from Nick’s house and tested the wind noise with the windows and sunroof both opened and closed. I’m happy to report that the existence of the rack wasimperceivable at all rates of speed regardless of the window situation. Huge accolades to Chief for that accomplishment.
The beauty of the Chief rack is the modular nature of the product, allowing these Planks to be placed almost anywhere up and down the length of the Mounting Rails. The full system comes with 6 planks for a complete installation, but is configurable with anywhere from one to all six of them depending on your needs. I figured most people would use a two-plank configuration, so we placed them in positions 2 and 6 to illustrate this set-up. You’ll notice the awesome end caps that flank the crossbar planks, machined out in the famous 7-slots that pay tribute to decades of Jeep history.
Each aluminum plank is drilled out for bolts to easily fall through them into the Mounting Rails where a bar with pre-welded nuts mates up to the bottom side. For those of us with larger hands it can be a bit of fun to hold the nut plates into place, but I found that getting one side relatively secure and then adding the second bolt made it a lot easier to get everything tight. Once all 4 bolts were tightened on the first plank we moved onto the second one, buttoning it up in just a few minutes after picking it up off the garage floor. At this point we were losing daylight in the Northeast, so I drove the Jeep back from Nick’s house and tested the wind noise with the windows and sunroof both opened and closed. I’m happy to report that the existence of the rack wasimperceivable at all rates of speed regardless of the window situation. Huge accolades to Chief for that accomplishment.
 Plank Crossbar In Place | 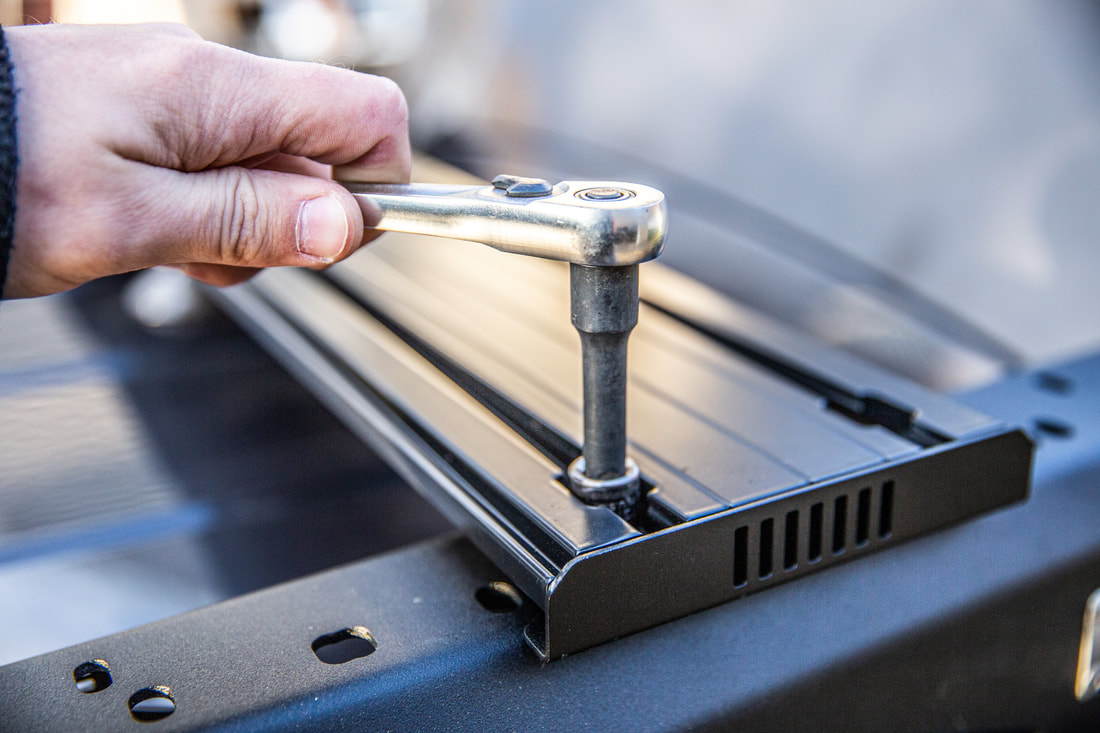 Securing Plank Crossbars |
Bare Bones Configuration
Rear Plank In Place
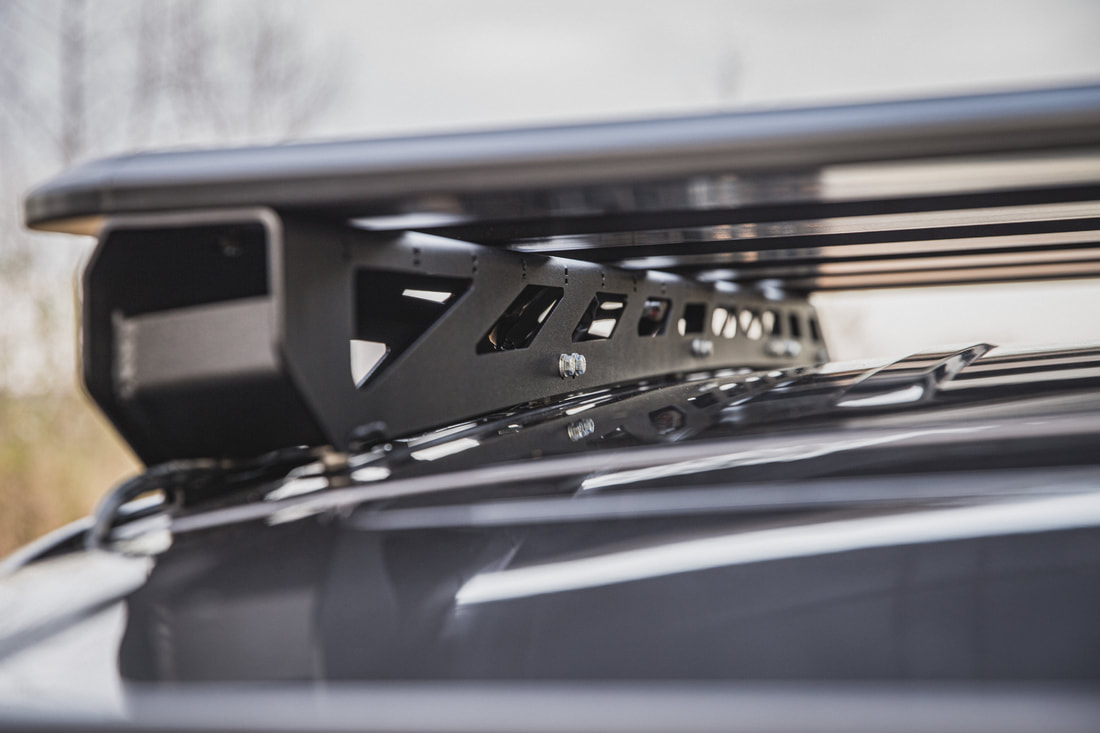
Full System COnfiguration
The next day after checking in with Chief’s lead engineer Ben down in Australia, I moved forward with installing the Full System on the roof. The SINGLE most important thing to note here is that there’s a specific order to do this in to ensure that everything lines up appropriately. For the sake of this, let’s just jump forward to me having removed the two planks and standing in the driveway with just the Mounting Rails on the roof.
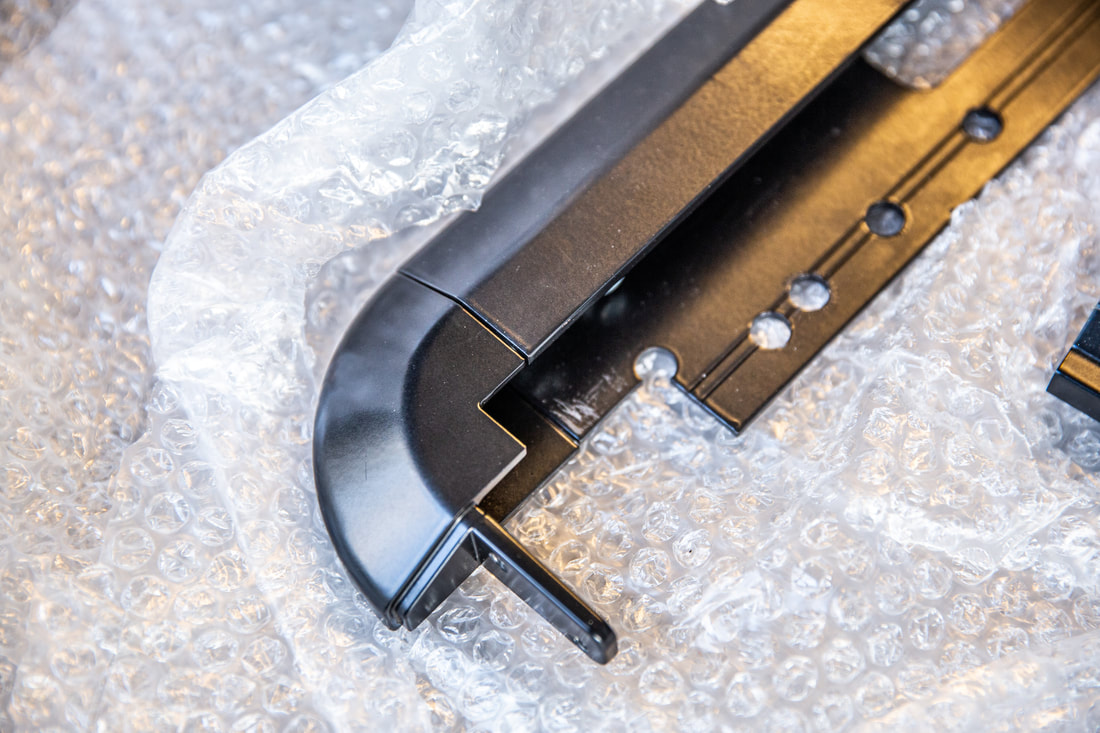 Roof Tray Corner Piece | 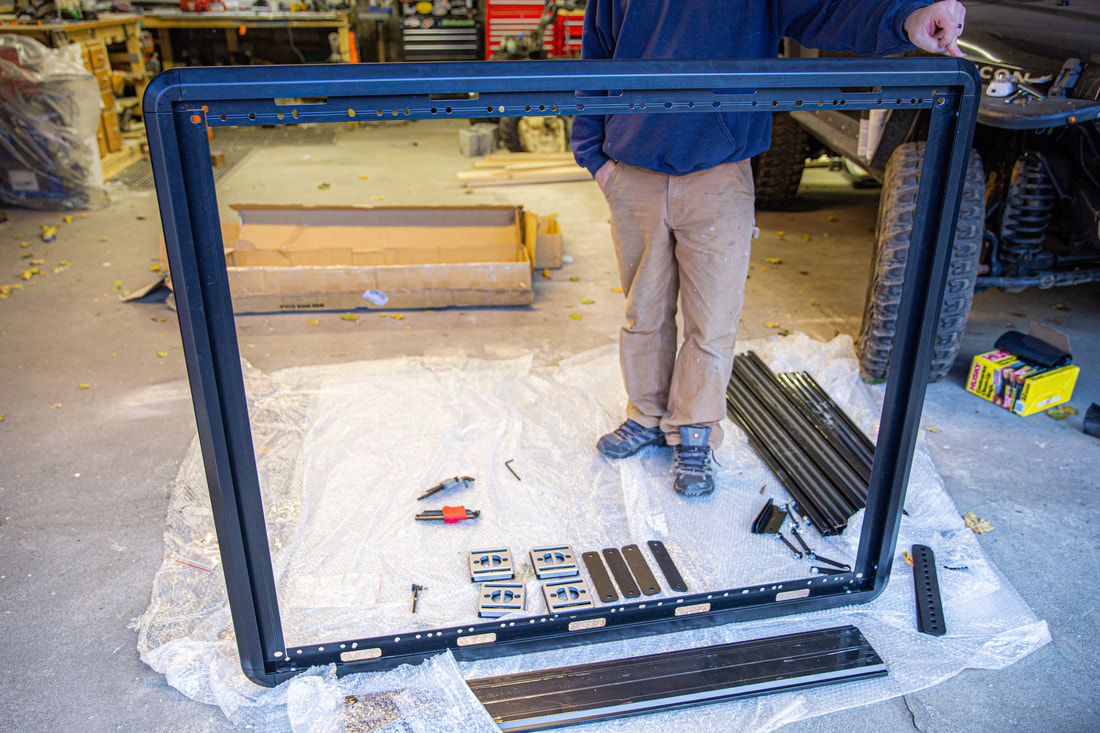 Assembled Frame |
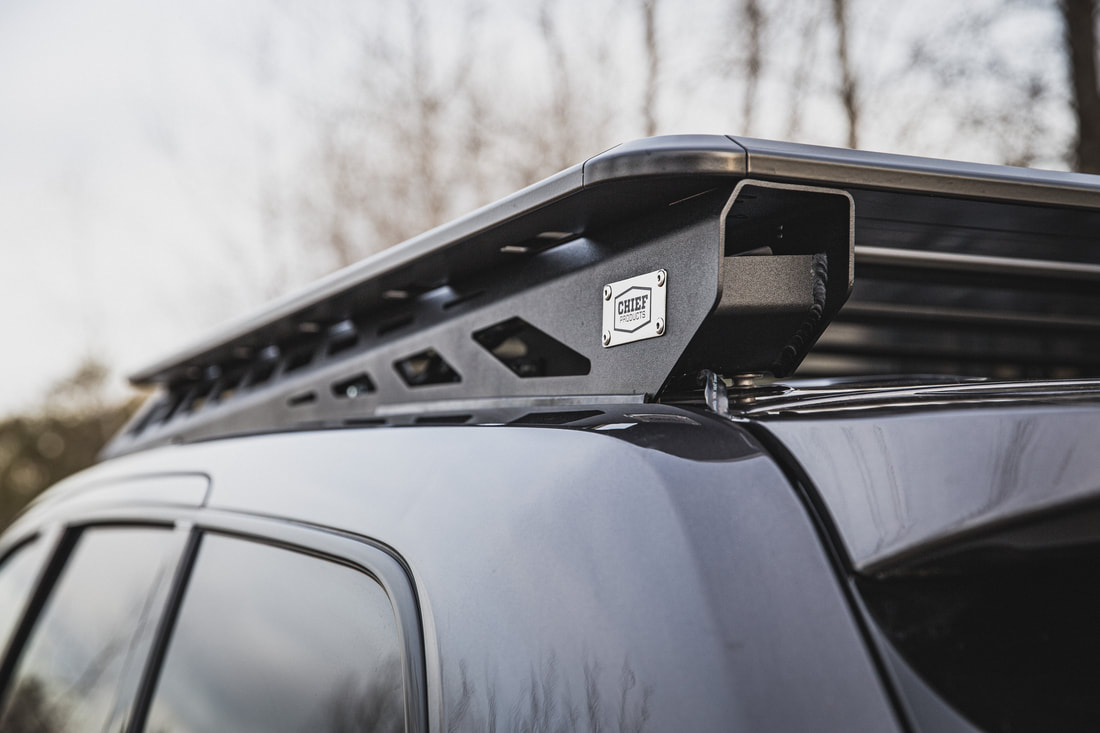
The first part of this process is to loosen all the fasteners holding the Rails down, including both the 10mm bolts attaching the angle brackets and the T-30 nuts into the roof nutserts. These all being loose (but not removed) is going to allow the whole set-up to shimmy around as the roof tray is placed overtop. The tray/surround itself is comprised of four straight pieces of aluminum and four rounded end-caps. The endcaps slide into the longer lengths and fasten with four small bolts per corner. Once the frame it assembled it weighs only a few pounds, adding to the beauty of this product where it’s entirely possible to install by yourself.
With the corner blocks tightened down I lifted it up onto the roof, following up by placing a plank in the first mounting position closest to the front of the Trailhawk. According to Ben the easiest way to get the entire tray lined up is to install the 1st and 4th position planks first, then to move forward with tightening down the mounting rails as the whole system is now in place to line up correctly. Once the rails and both planks were tightened down completely I lifted the rest of the planks into place and tightened them down accordingly. It’s worth noting that I did not re-install the 7-slot end-caps on the planks, as I don’t think they’ll fit in with the tray surround.
 Frame In Place | 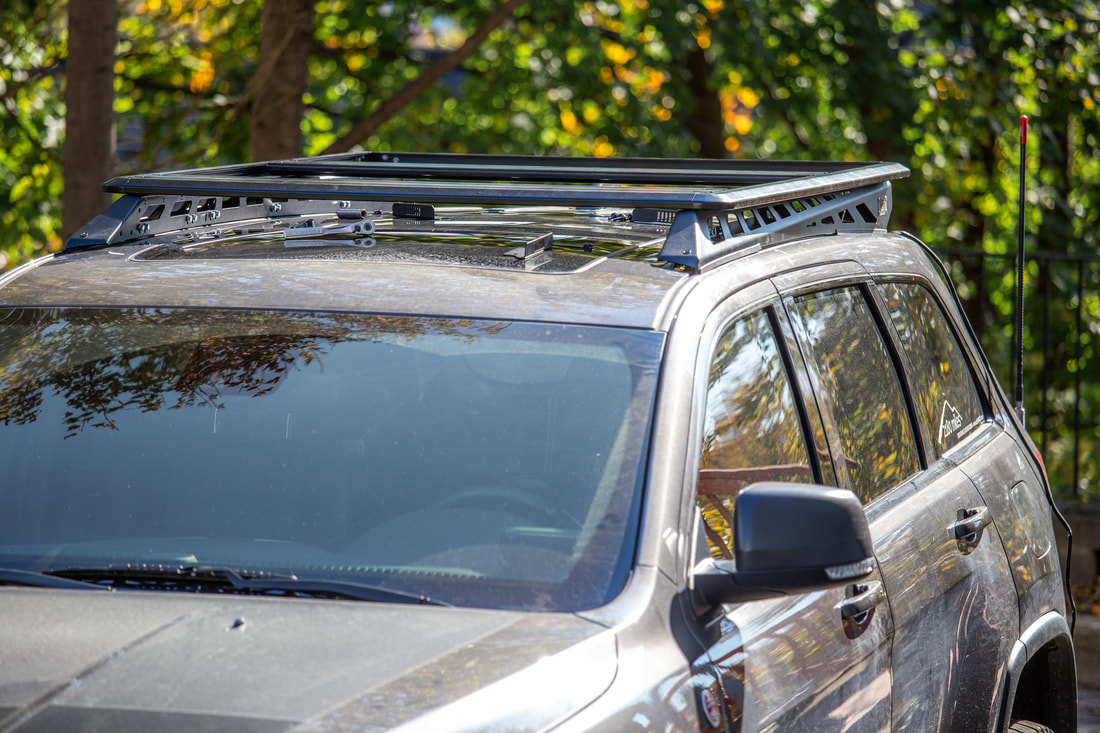 Front Quarter View |
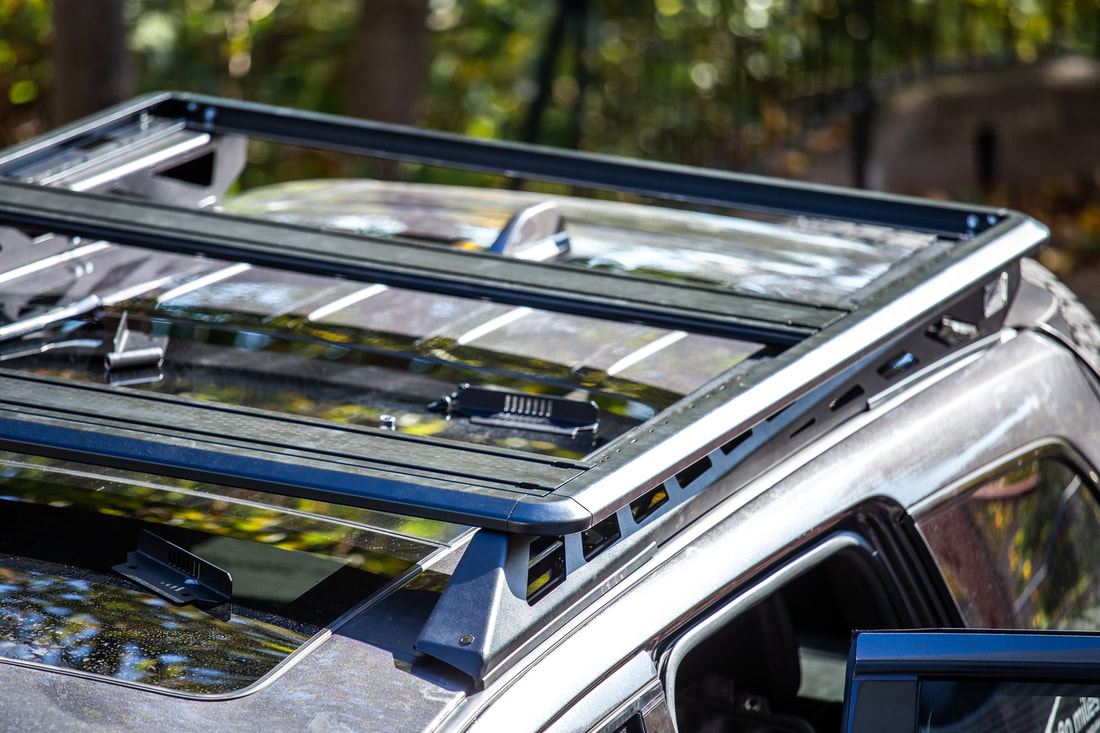
Planks 1 & 4 In Place
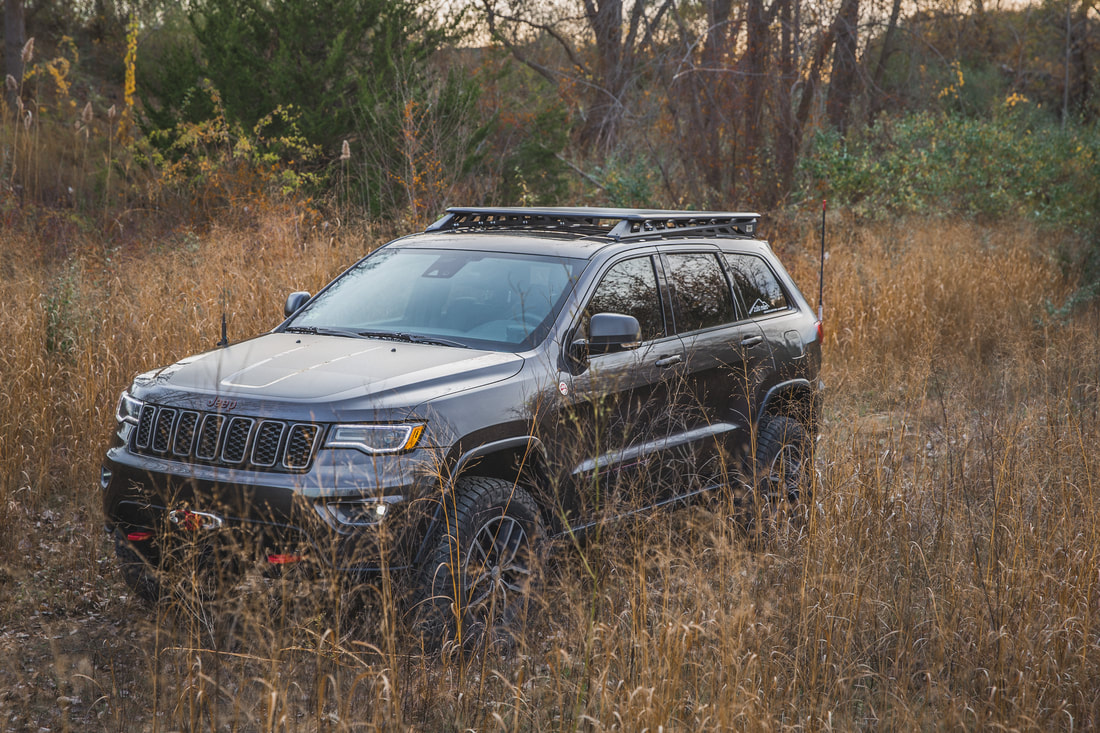
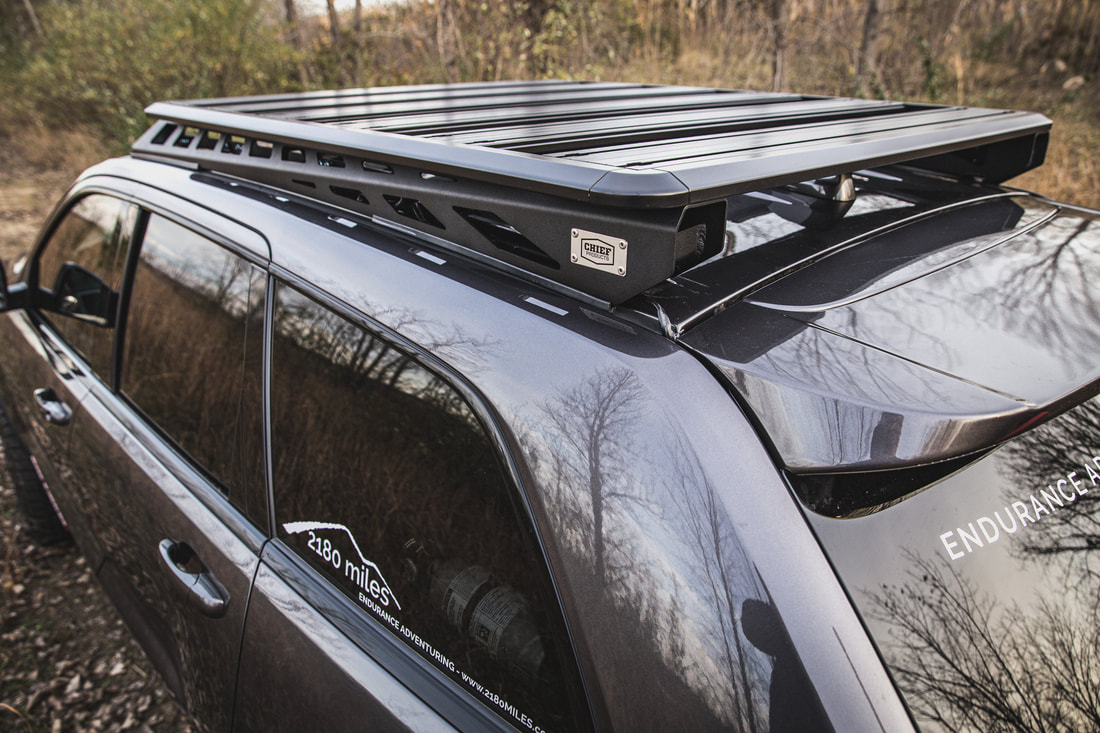
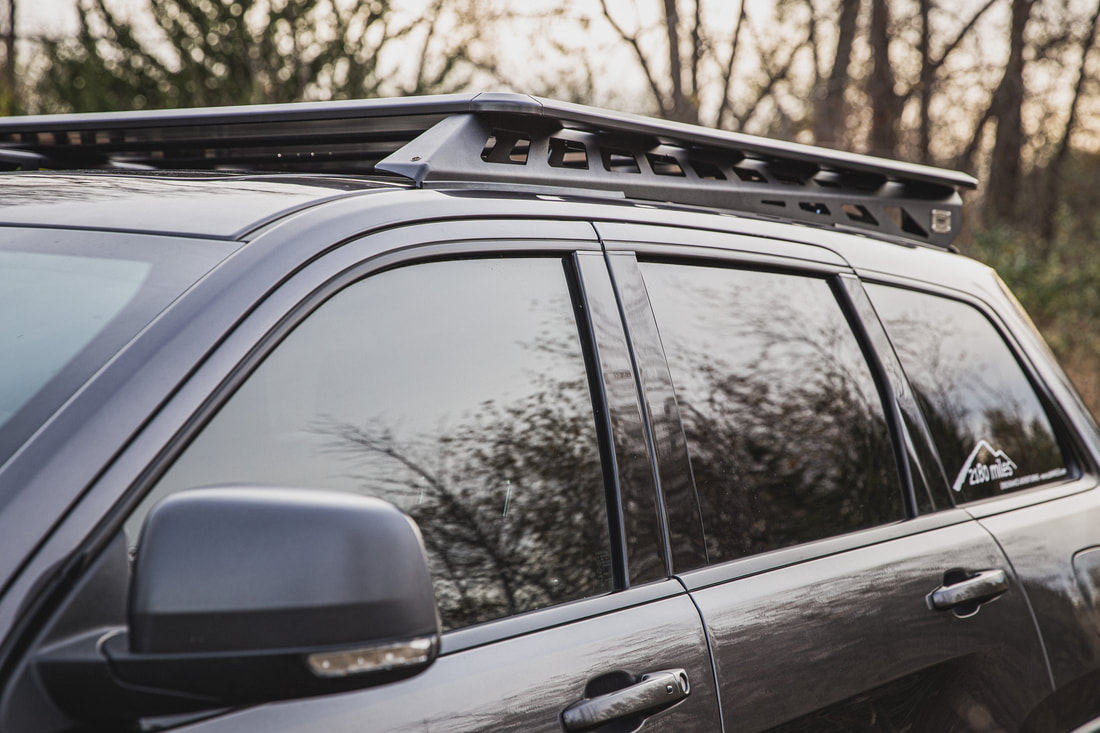
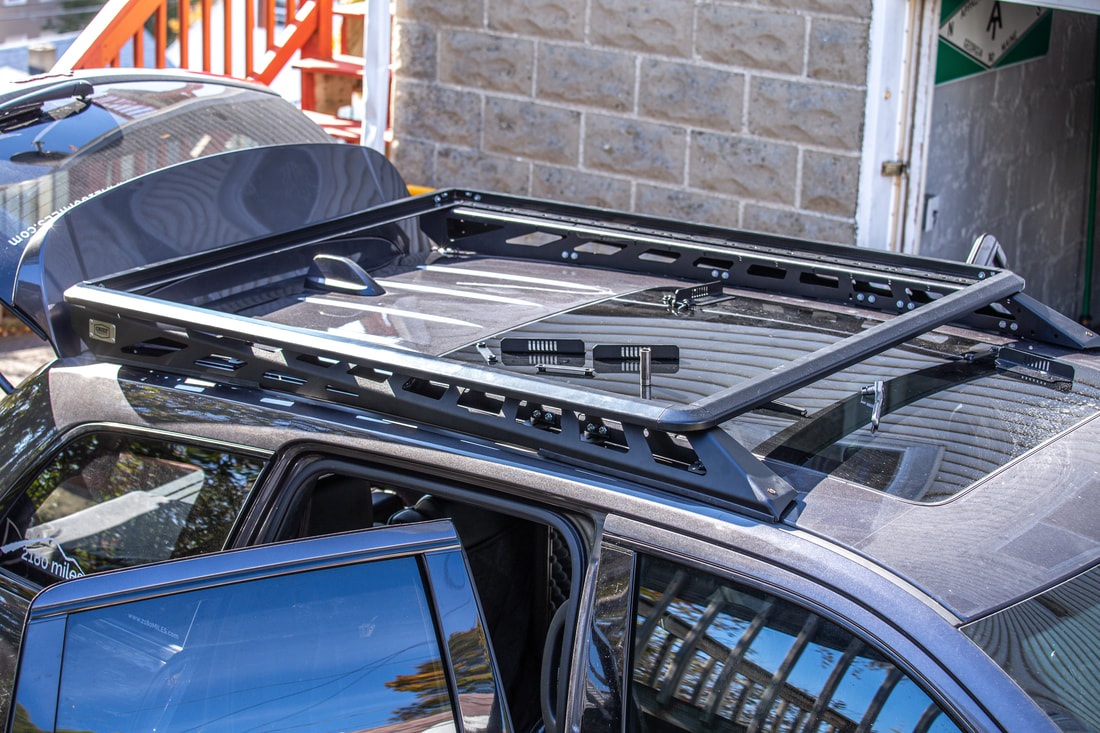
Full System Configuration

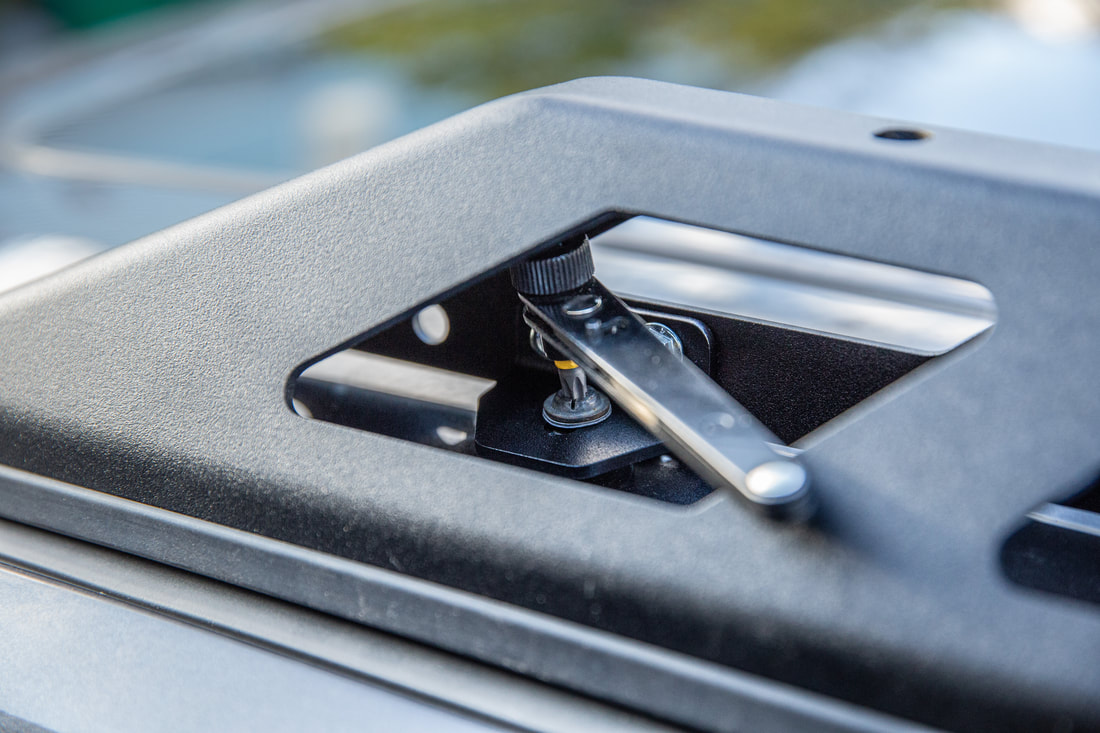
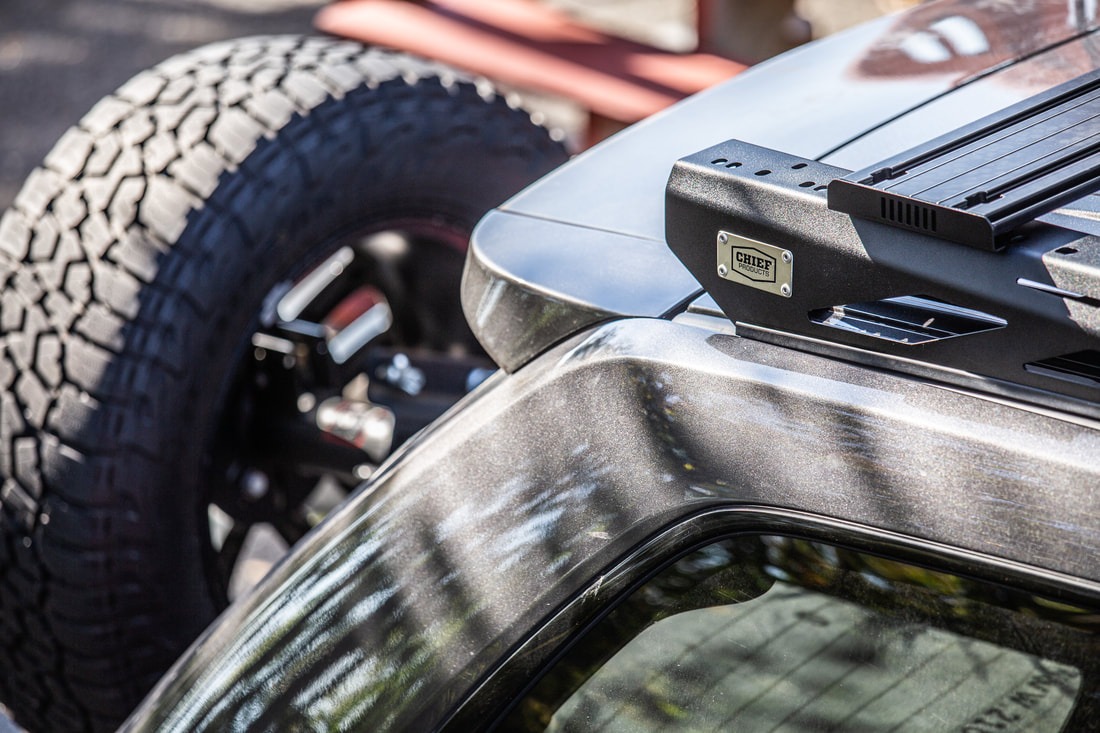
FM/Satellite Antenna Clearance
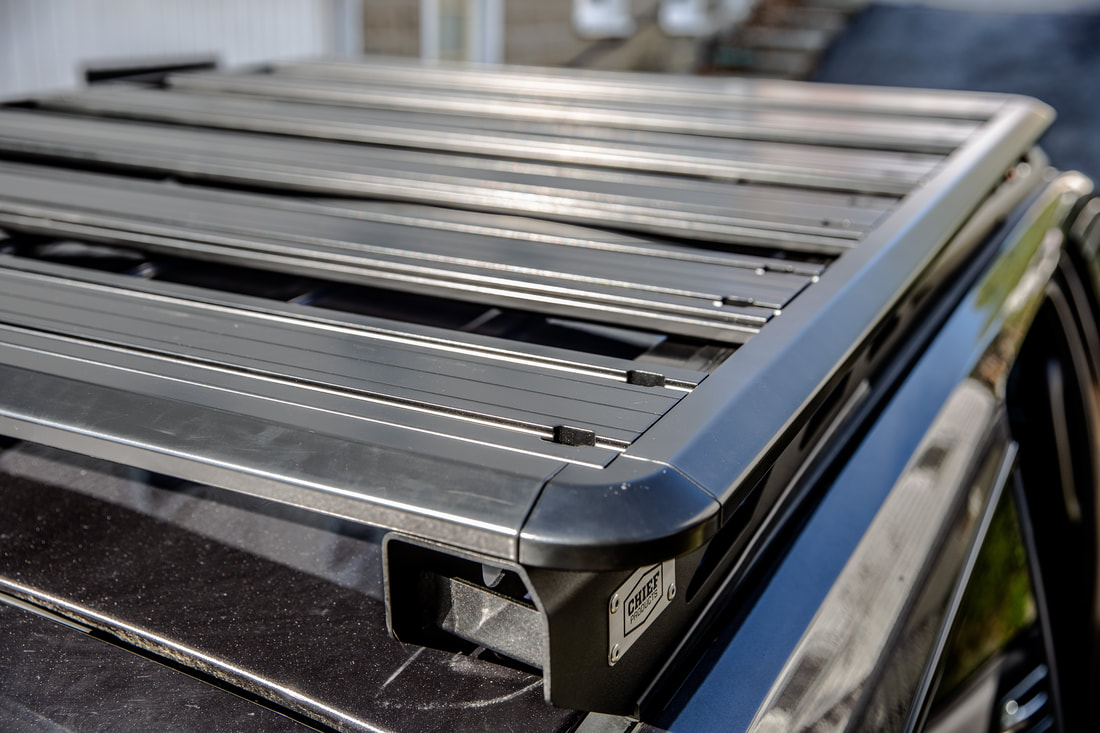
Wrap-Up & Product Photos
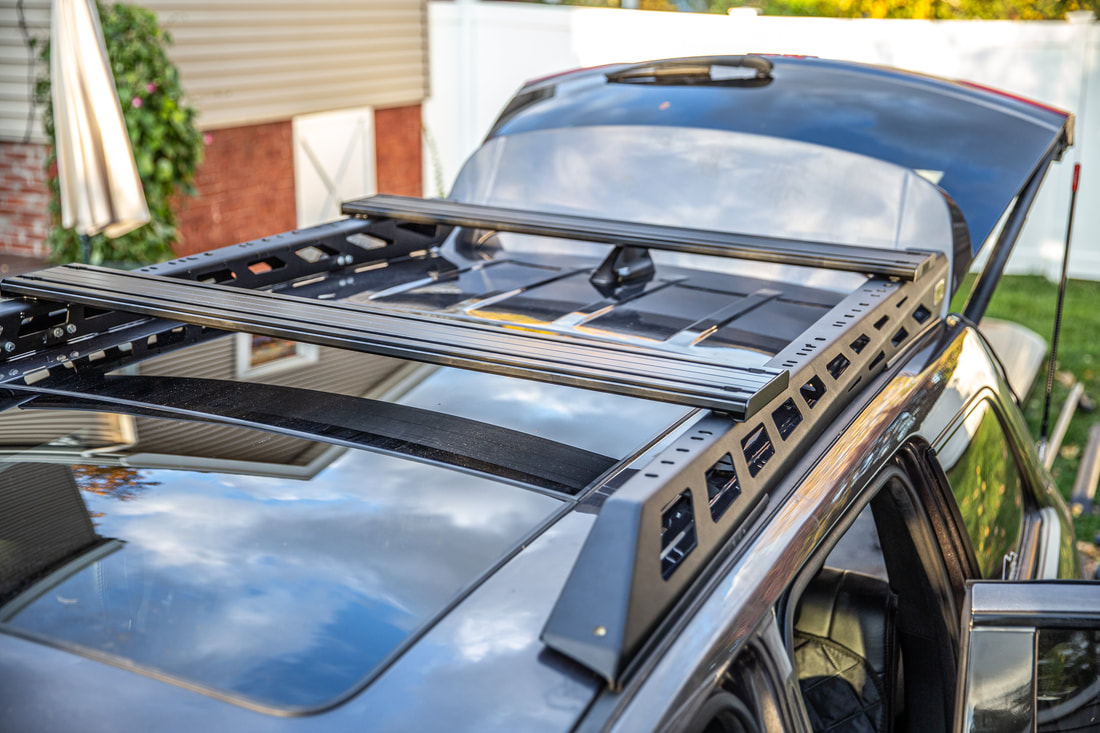
With 6 crossbars into place and tightened down, I’d officially installed the Full System of the Chief Products WK2 Roof Rack. Total time, including figuring out how things went together and photographing as I went was around 2 hours. I can guarantee that in the future it will be much faster… I think I spent more time walking around the Jeep going back and forth between driver and passenger side than I did actually mounting and tightening hardware.
The roof rack in the full configuration set-up did have some noise in the 200-250Hz range at highway speeds, but I’ve spoken to the guys at Chief and they’ve said that they have a fix for it and that it’s largely due to the rack being bare/empty at the moment. I’ll report back with updates.
A week after installing this system, I took off, heading back up to Maine’s Allagash Wilderness for a winter trip, and installed my new Torro Offroad SkyLux RTT to test out before it went to market. I stripped the WK2 Roof Rack down to its RTT configuration and was exceptionally comfortable knowing that the tent, it’s weight, and myself were 100% supported.
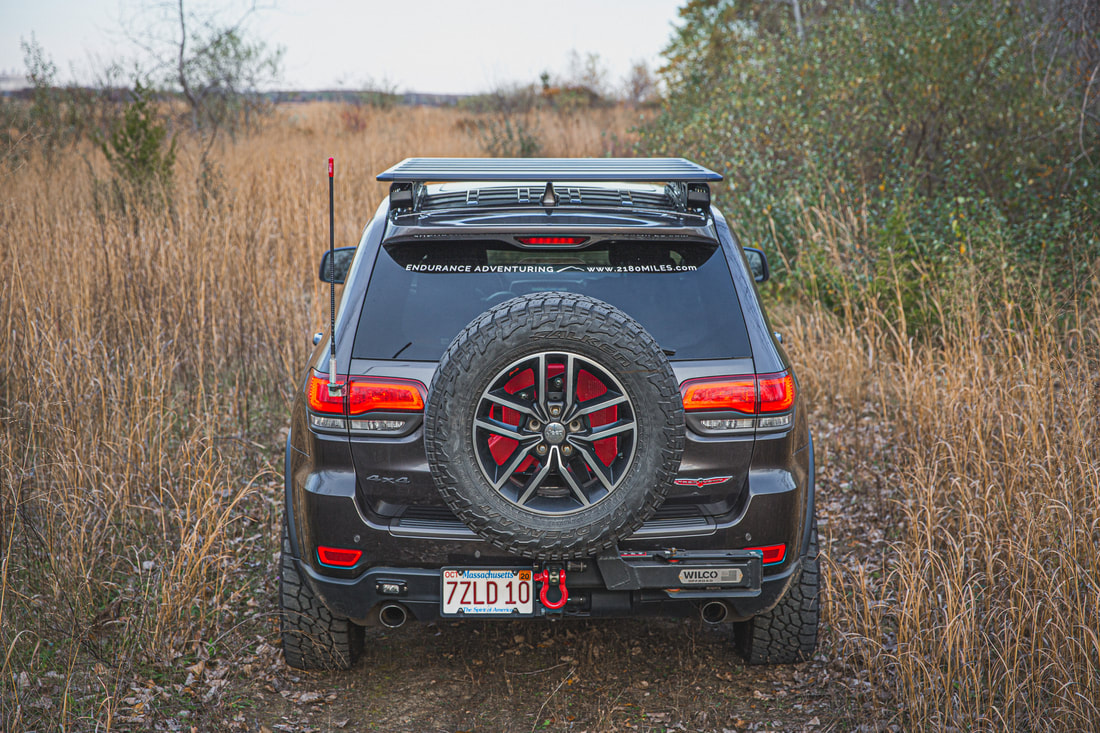
A year later and many hundreds of miles off-pavement and fully loaded with an awning and roof-top tent, I can easily say that this is the best modification we've ever done to the Trailhawk. The rigidity, support, adaptability, and overall awesomeness is not something to overlook if you're in the market for a roof rack for your own build.
The roof rack in the full configuration set-up did have some noise in the 200-250Hz range at highway speeds, but I’ve spoken to the guys at Chief and they’ve said that they have a fix for it and that it’s largely due to the rack being bare/empty at the moment. I’ll report back with updates.
A week after installing this system, I took off, heading back up to Maine’s Allagash Wilderness for a winter trip, and installed my new Torro Offroad SkyLux RTT to test out before it went to market. I stripped the WK2 Roof Rack down to its RTT configuration and was exceptionally comfortable knowing that the tent, it’s weight, and myself were 100% supported.
A year later and many hundreds of miles off-pavement and fully loaded with an awning and roof-top tent, I can easily say that this is the best modification we've ever done to the Trailhawk. The rigidity, support, adaptability, and overall awesomeness is not something to overlook if you're in the market for a roof rack for your own build.